Adobe is on track for the yearly refresh of its Creative Cloud applications. They have been on a roll with their professional video solutions – especially Premiere Pro CC – and this update is no exception. Since this is not a new, across-the-board Creative Cloud version update, the applications keep the CC 2015 moniker, except with a point increase. For example, Premiere Pro CC becomes version 2015.3, not CC 2016. Let me dive into what’s new in Premiere Pro, Audition, Adobe Media Encoder and After Effects.
Premiere Pro CC 2015.3
Adobe has captured the attention of the professional editing community with Premiere Pro and has held it with each new update. CC 2015.3 adds numerous new features in direct response to the needs of editors, including secondary color correction, a proxy workflow, a 360VR viewer and more.
New Lumetri features
 The Lumetri color panel brought over the dominant color correction tools from SpeedGrade CC configured into a Lightroom-style panel. For editors, Lumetri provides nearly everything they need for standard color correction, so there’s rarely any need to step outside of Premiere Pro. Three key features were added to Lumetri in this update.
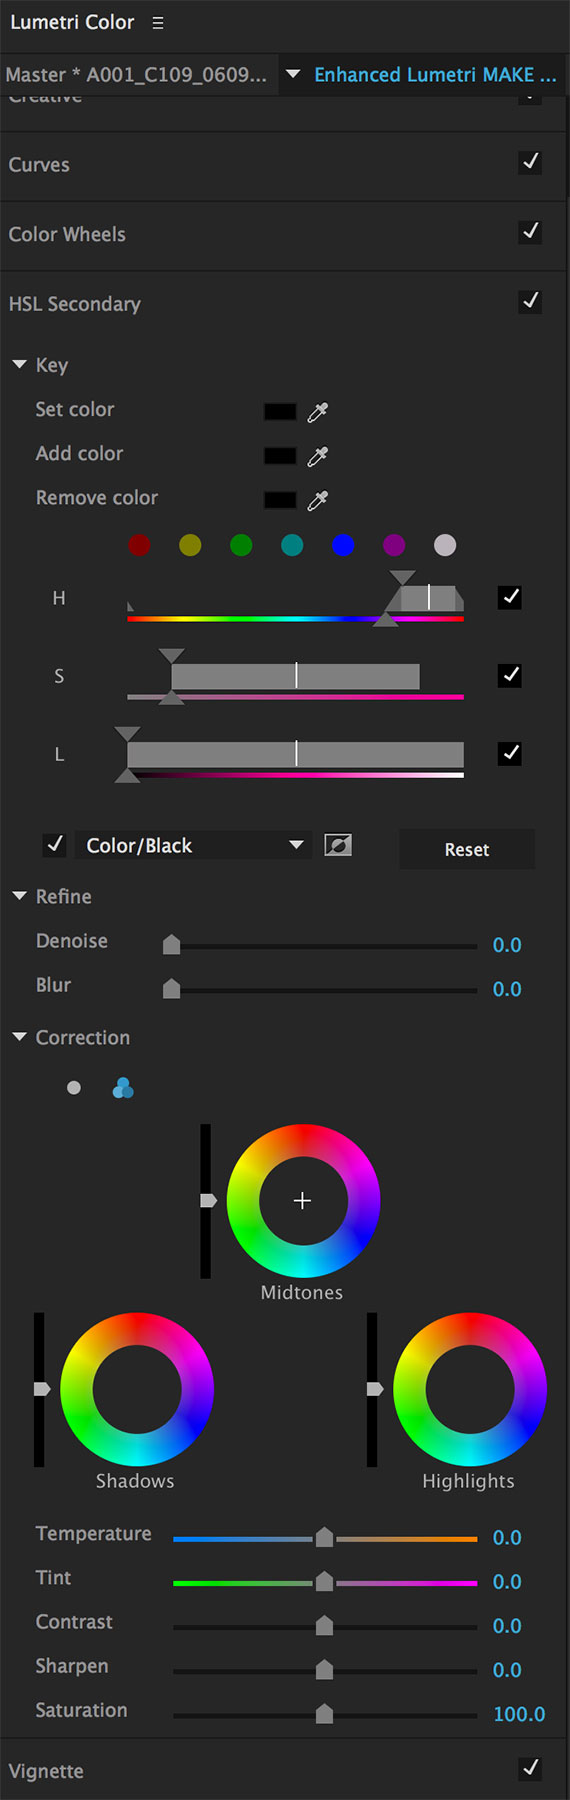
First is a new white balance eyedropper. Lumetri has had temperature and tint sliders, but the eyedropper makes white balance correction a one-click affair. However, the new marquee feature is the addition of SpeedGrade’s HSL Secondary color correction. Use an eyedropper to select the starting color that you want to affect. Then use the “add” or “remove color” eyedroppers to adjust the selection. To further refine the isolated color, which is essentially a key, use the HSL, denoise and blur sliders. The selected color range can be viewed against black, white or gray to check the accuracy of the adjustment. You can then change the color using either the single or three-wheel color control. Finally, the secondary control also includes its own sliders for temperature, tint, contrast, sharpening and saturation.
In the rest of the Lumetri panel, Adobe changed the LUT (color look-up table) options. You can pick a LUT from either the input and/or creative tab. The new arrangement is more straightforward than when first introduced. Now only camera gamma correction LUTs (like ARRI Log-C to Rec 709) appear in the input tab and color style LUTs show up in the creative tab. Adobe LUTs plus SpeedLooks LUTs from LookLabs are included as creative choices. Previously you had to use a SpeedLooks camera LUT in tandem with one of the SpeedLooks creative LUTs to get the right correction . With this update, the SpeedLooks creative LUTs are all designed to be added to Rec 709 gamma, which makes these choices far more functional than before. You can now properly use one of these LUTs by itself without first needing to add a camera LUT.
New Proxy workflow
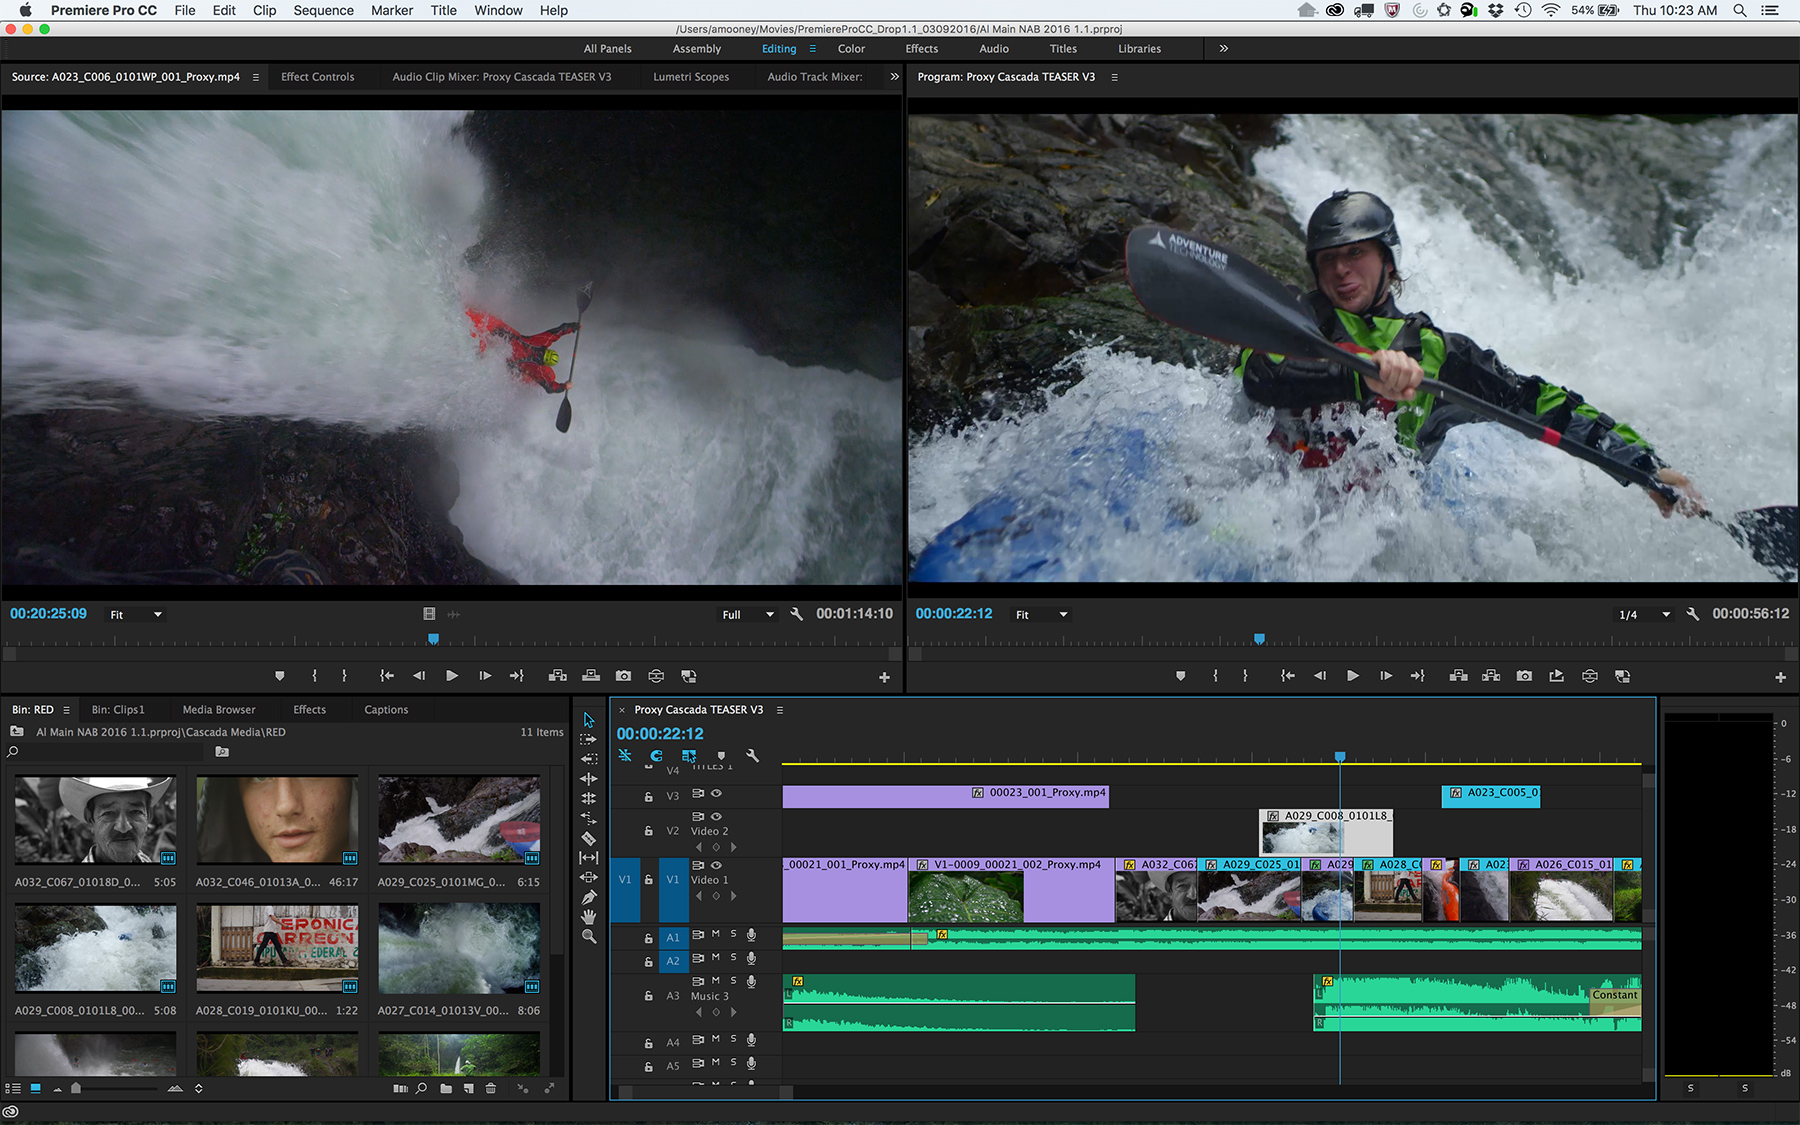
 Apple Final Cut Pro X users have enjoyed a proxy workflow since its launch, whereas Adobe always touted Premiere Pro’s native media prowess. Nevertheless, as media files get larger and more taxing on computing systems, proxy files enable a more fluid editing experience. A new ingest tool has been added to the Media Browser. So now from within Premiere Pro, you can copy media, transcode to high-res file formats and create low-res proxies. You can also select clips in a bin and right-clip to create proxies, attach proxies and/or relink full-resolution files. There is a new toggle button that you can add to the toolbar, which lets you seamlessly flip between proxy and full-resolution media files. According to Adobe, even if you have proxy selected, any export always draws from the full-resolution media for the best quality.
Be careful with the proxy settings. For example, one of the default sizes is 1024×540, which would be the quarter-frame match for 2K media. But, if you use that for HD clips in a 1920×1080 timeline, then your proxies will be incorrectly pillar-boxed. If you create 720p proxies for 1080p clips, you’ll need to use “scale to frame size” in order to get the right size on the timeline. It’s a powerful new workflow, but take a bit of time to figure out the best option for your needs.
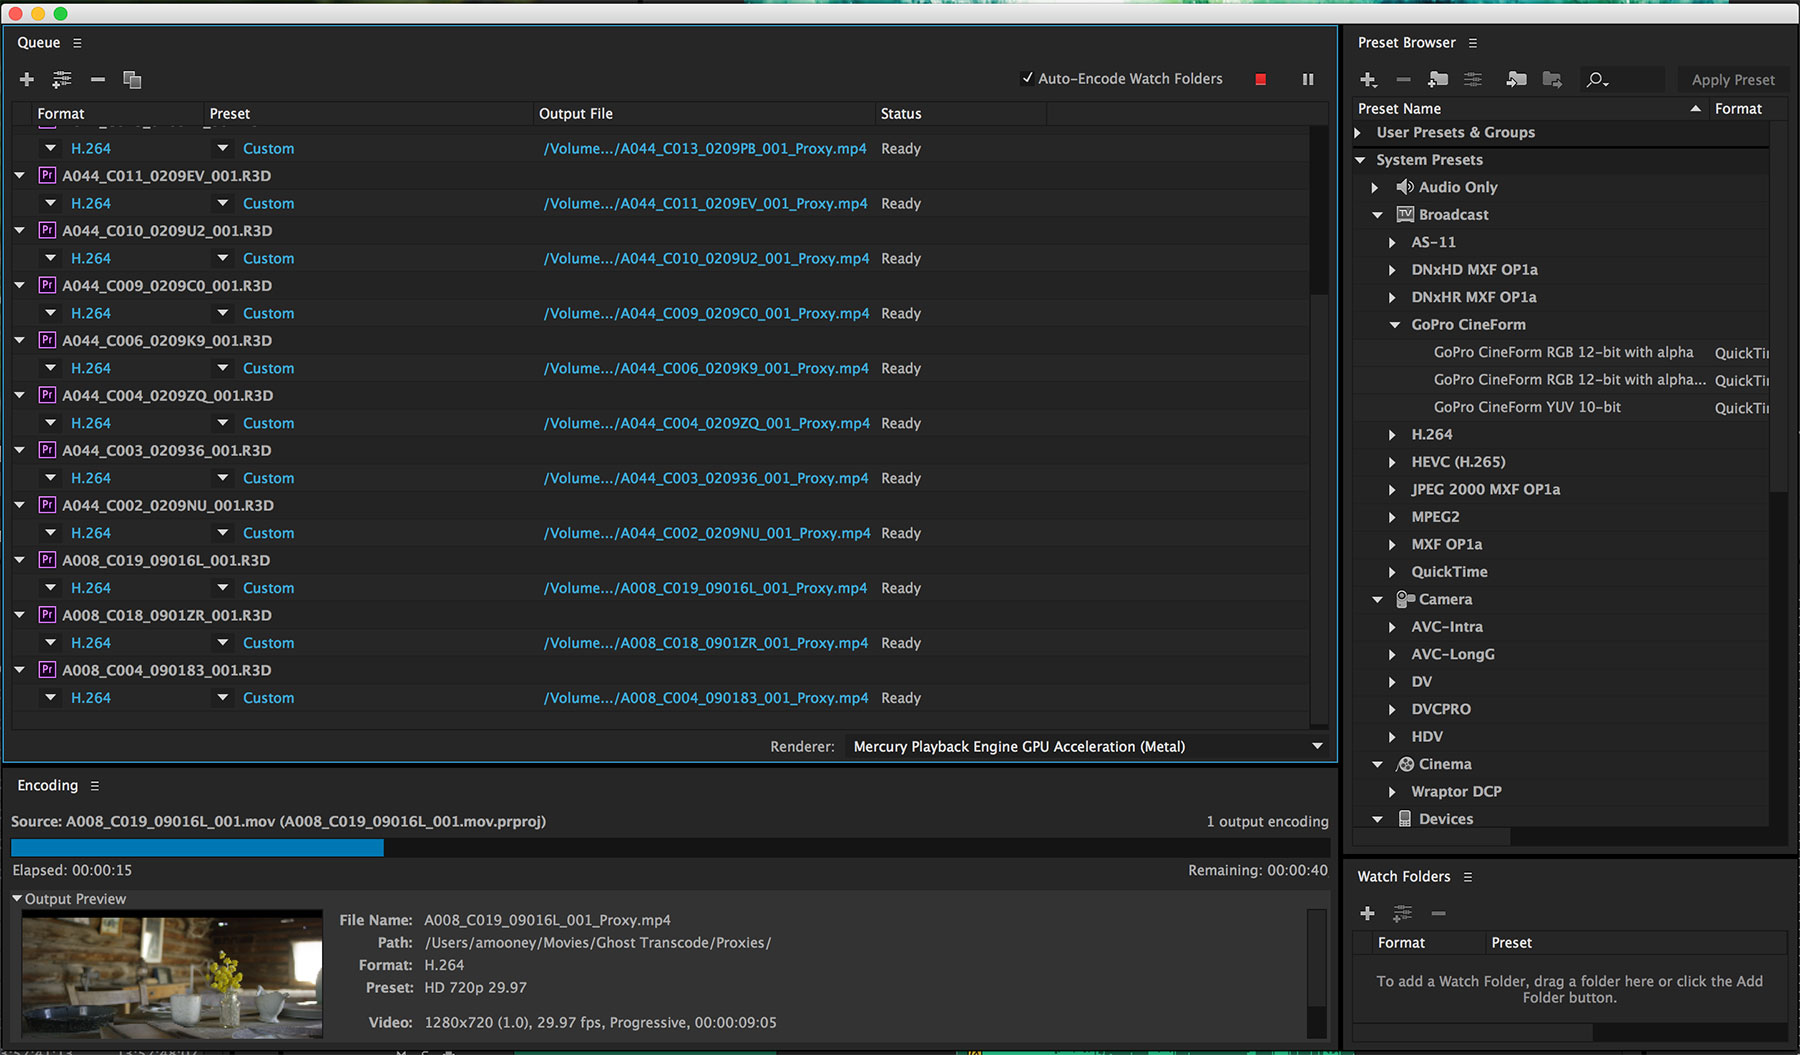
Adobe Media Encoder also gains the Media Browser tool, as well as a new ingest function, which has been brought over from Adobe Prelude. Now you can use Media Encoder to copy camera files and/or transcode them to primary and secondary locations. If you need to copy camera cards, transcode a full-res master file and also transcode a low-res proxy file, then this complete workflow can be handled through Media Encoder.
New 360VR viewer
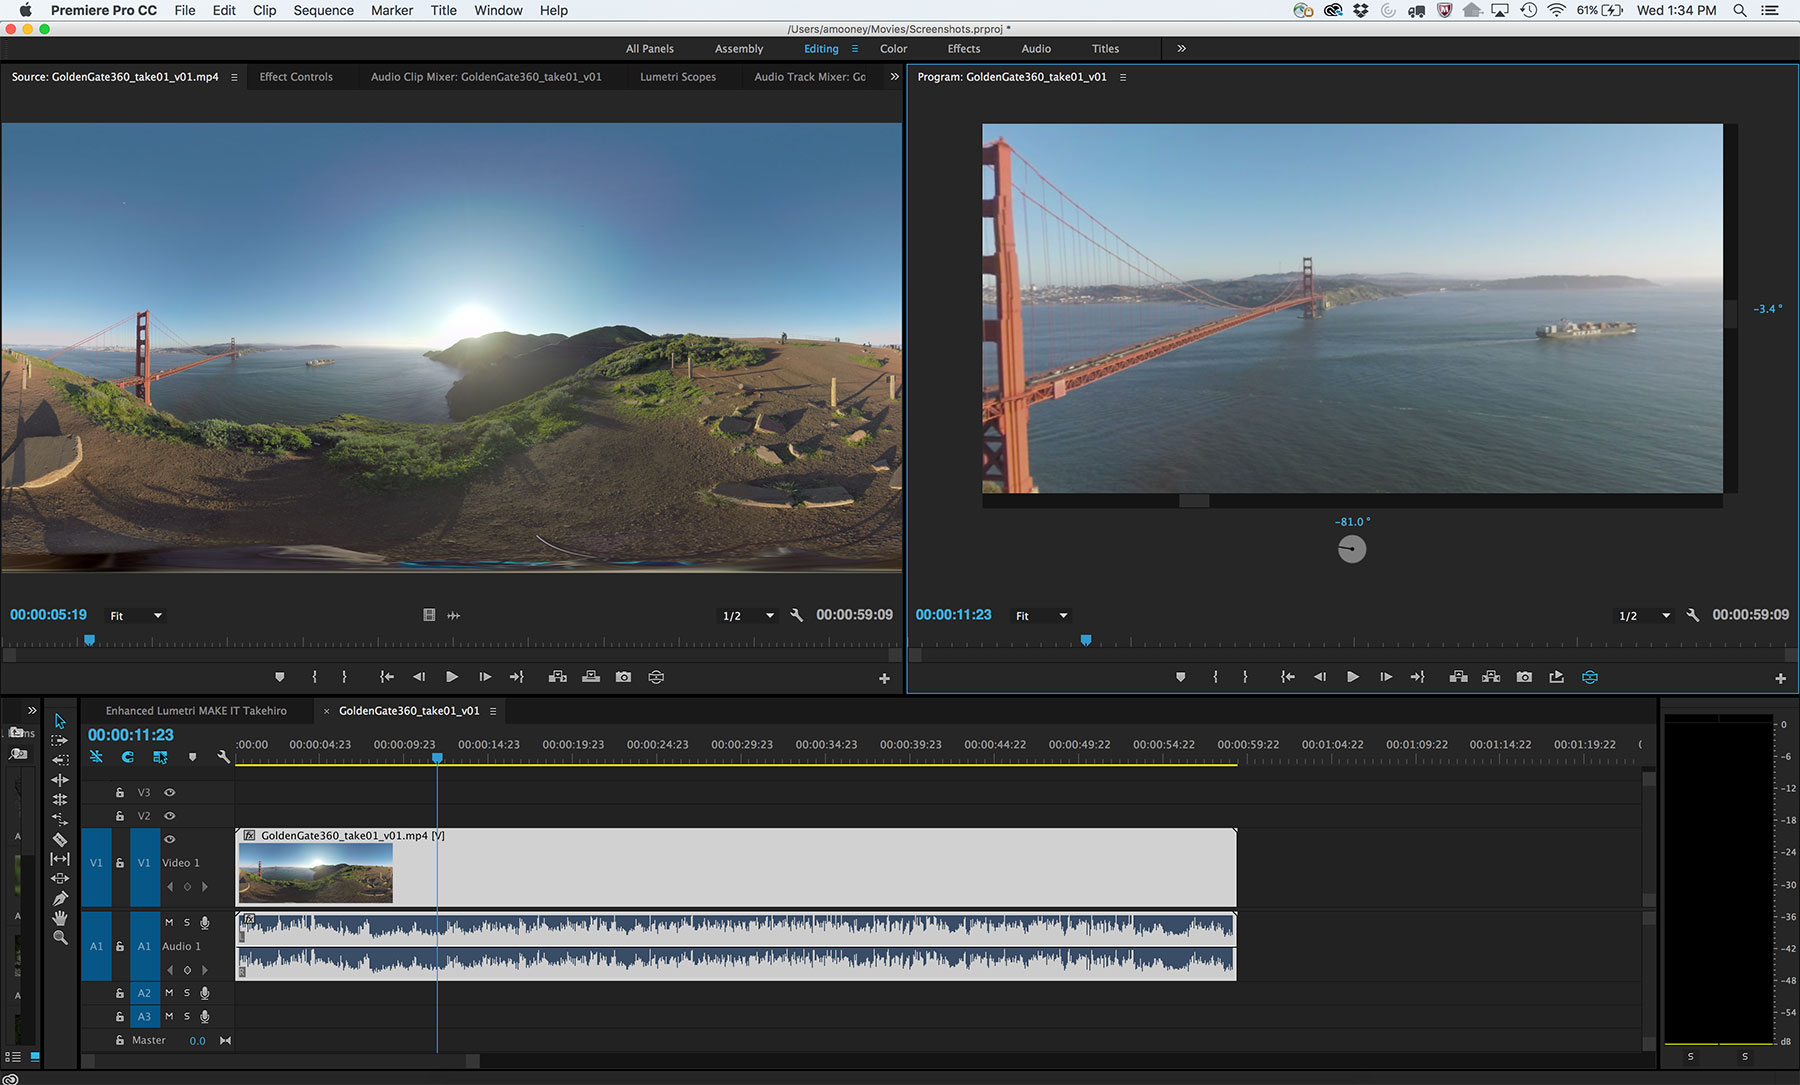 Premiere Pro CC now sports a new VR-capable viewer mode. Start with monoscopic or stereoscopic, stitched 360-degree video clips and edit them as you normally would. The viewer allows you to pan around inside the clip or view the timeline from a point of view. You can see what someone viewing with goggles sees when looking in a given direction. Note that this is not a pan-and-scan plug-in. You cannot drop one of these 360-degree clips into an otherwise 2D 16×9 (“flat”) timeline and use Premiere Pro’s VR function to keyframe a digital move within that clip.
There are other new Premiere Pro CC features that I haven’t yet tested thoroughly. These include new support for Apple Metal (an API that combines the functionality of OpenGL and OpenCL) and for grading control surfaces. Open Caption support has been improved – adding more languages and their native alphabets, including Arabic and Hebrew.
Adobe Audition CC 2015.2
 Want better audio mixing control than what’s available inside of Premiere Pro CC? Then Audition CC is the best tool for the job. Premiere Pro timelines translate perfectly and in the last update a powerful retime feature was added. Audition “automagically” edits the duration of a music cue for you in order to fit a prescribed length.
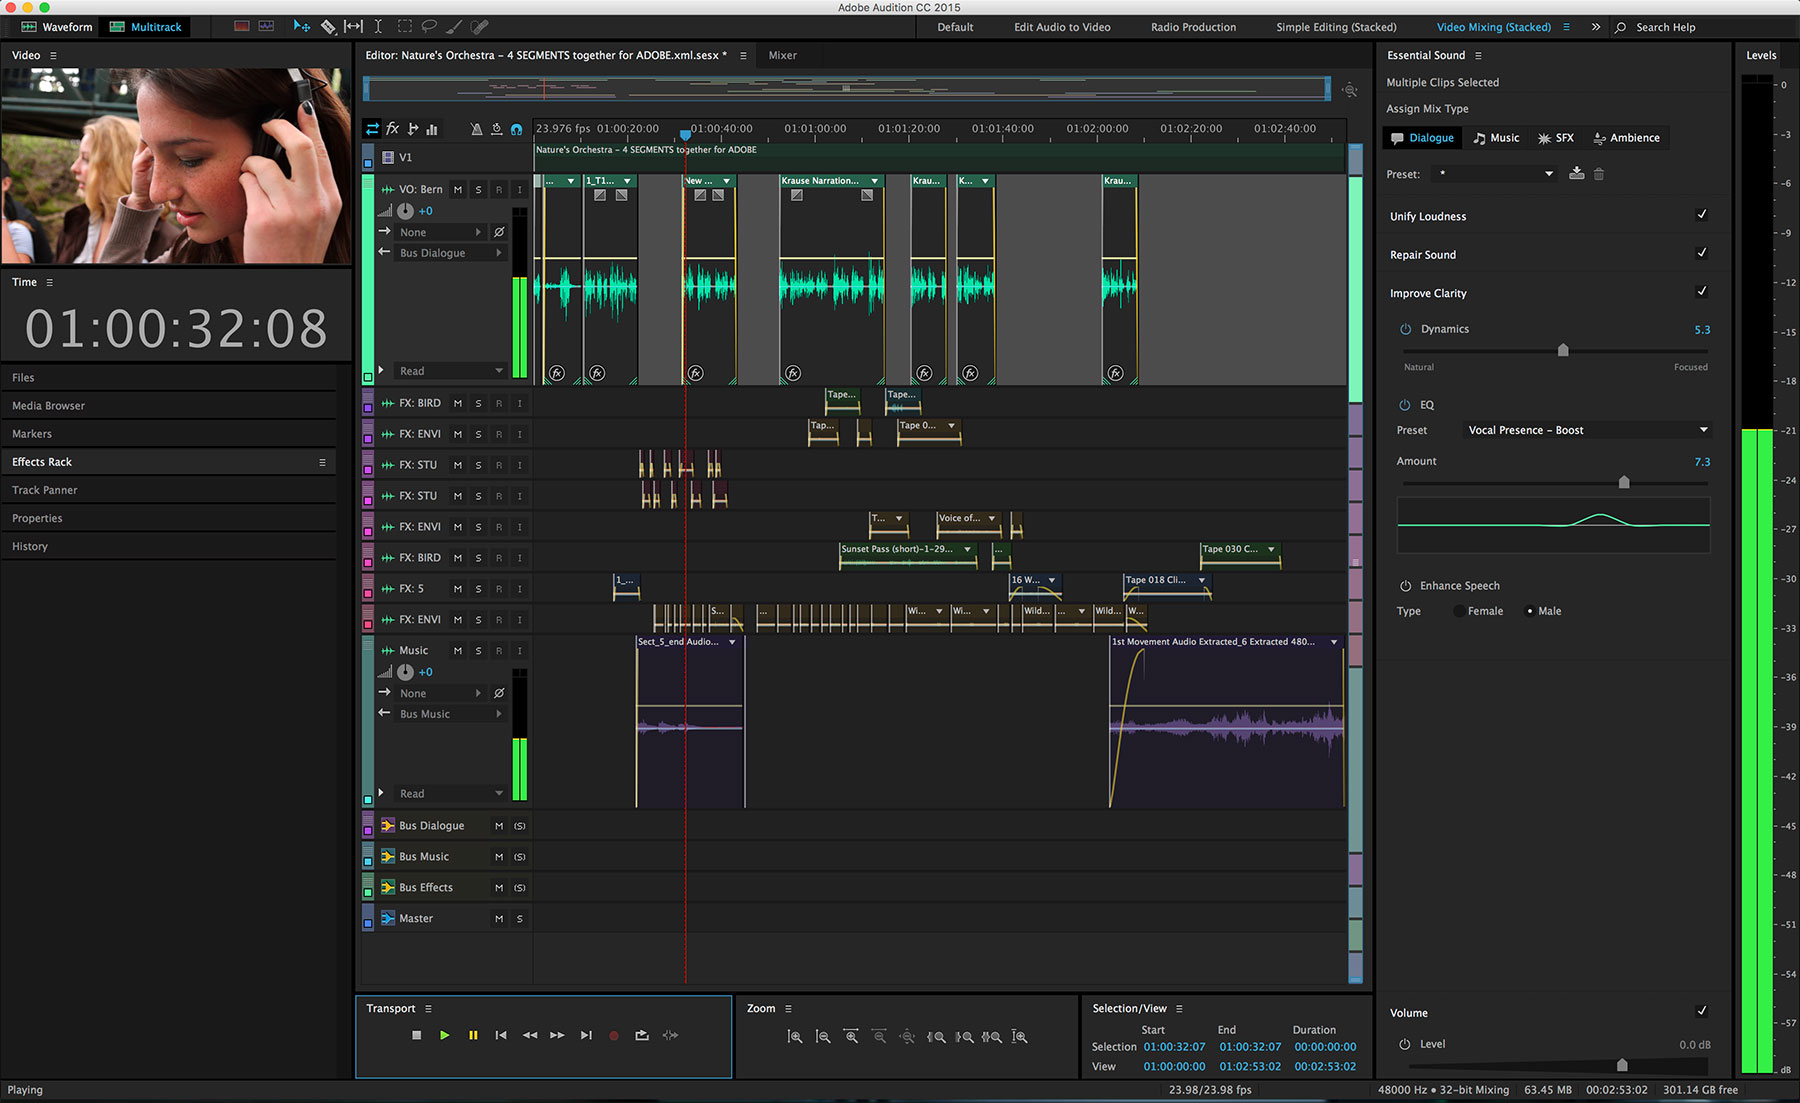
The Essential Sound panel is new in this update. The layout of this panel is the audio equivalent to the Lumetri color panel and also owes its design origins to Lightroom. Select a clip and choose from the Dialogue, Music, SFX or Ambience group. Each group presents you with a different, task-appropriate set of effects presets. For example, when you pick Dialogue, the panel will display tabbed controls for loudness, repair sound, improve clarity and a creative tab. Click on a section of the vertical stack within this panel to reveal the contents and controls for that section.
In the past, the workflow would have been a roundtrip from Premiere Pro to Audition and back. Now you can go directly to Adobe Media Encoder from Audition, which changes the workflow into these steps: cut in Premiere Pro CC, mix in Audition CC, and master/export directly through Adobe Media Encoder. Thus roundtrips are eliminated, because picture is carried through the Audition phase. This export path supports multichannel mix files, especially for mastering containers like MXF. Audition plus Media Encoder now enable you to export a multichannel file that includes a stereo mix plus stereo submix “stems” for dialogue, SFX and music.
After Effects CC 2015.3 and more
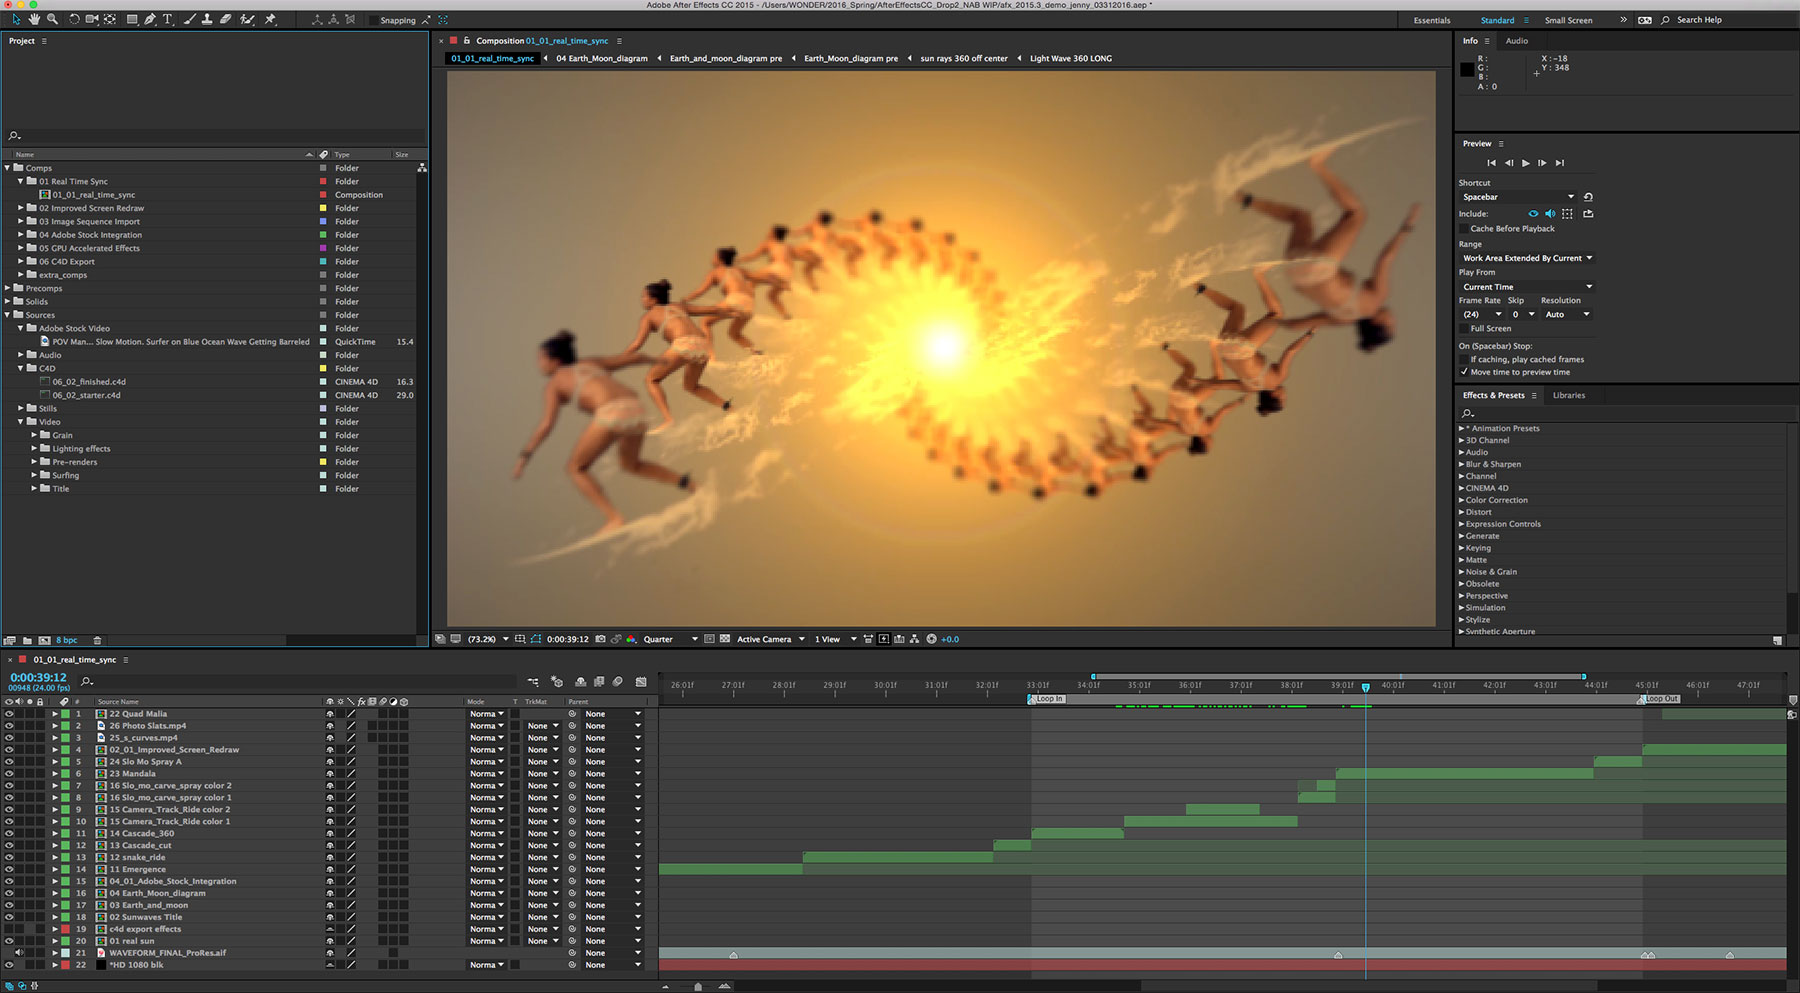 After Effects CC has been undergoing an overhaul through successive versions, including this one. Some users complained that the most recent version was a bit of a step backwards, but this is all in an effort to improve performance, as well as to modernize and streamline the product. From my vantage as an editor who uses After Effects as much as a utility as for occasional motion graphics and visual effects, I really like what Adobe has been doing. Changes in this update include enhanced performance, GPU-accelerated Gaussian blur and Lumetri color correction, better playback of cached frames, and a new a/v preview engine. In the test projects that I ran through it, including the demo projects sent by Adobe, performance was fast and rather impressive. That’s on a 2009 Mac Pro tower.
If you are an animator, then Maxon Cinema 4D is likely a tool that you use in conjunction with After Effects. Animated text and shape layers can now be saved directly into the Cinema 4D file format from After Effects. When you customize your text and shapes in Cinema 4D, the changes are automatically updated in After Effects for a roundtrip 3D motion graphics workflow.
Thanks to the live The Simpsons event, in which Homer was animated live using Character Animator, this tool is gaining visibility. Character Animator moves to version 4, even though the application is still technically in prerelease. Some of the enhancements include improved puppet tagging. You can record multiple takes of a character’s movement and then enable your puppet to respond to motion and trigger animation accordingly.
To wrap up, remember that Adobe is promoting Creative Cloud as more than simply a collection of applications. The subscription includes access to over 50 million royalty-free photos, illustrations, vector graphics and video (including 4K clips). According to Adobe, licensed Adobe Stock assets in your library are now badged for easy identification. Videos in your library are displayed with duration and format information and have links to video previews. You can access your Libraries whenever you need them, both when you are connected to the internet and working offline. I personally have yet to use Adobe Stock, but it’s definitely a resource that you should remember is there if you need it.
Click here for Dave Helmly’s excellent overview of the new features in Premiere Pro CC.
Originally written for Digital Video magazine and Creative Planet Network.
©2016 Oliver Peters
