AJA T-Tap


df0217_ttap_sm

The Thunderbolt protocol has ushered in a new era for easy connectivity of hardware peripherals. It allows users to deploy a single connection type to tie in networking, external storage, monitoring and broadcast audio and video input and output. Along with easy connections, it has also enabled peripheral devices to becomes smaller, lighter and more powerful. This is in part due to advances in the hardware and software, as well. AJA Video Systems is one of the popular video manufacturers that has taken advantage of these benefits.

In many modern editing environments, the actual editing system has become extremely streamlined. All it really takes is a Thunderbolt-enabled laptop, all-in-one (like an iMac) or desktop computer, fast external storage, and professional monitoring – and you are good to go. For many editors, live video output is strictly for monitoring, as deliverables are more often-than-not files and not tape. Professional monitoring is easy to achieve using SDI or HDMI connections. Any concern for analog is gone, unless you need to maintain analog audio monitoring. AJA makes a series of i/o products to address these various needs, ranging from full options down to simple monitoring devices. Blackmagic Design and AJA currently produce the lion’s share of these types of products, including PCIe cards for legacy installations and Thunderbolt devices for newer systems.

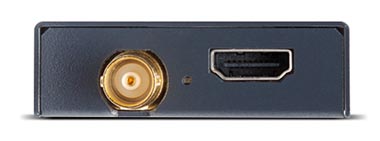
I recently tested the AJA T-Tap, which is a palm-sized video output device that connects to the computer using the Thunderbolt 2 protocol. It is bus-powered – meaning that no external power supply or “wall-wart” is needed to run it. I tested this on both a 2013 Mac Pro and a 2015 MacBook Pro. In each case, my main need was SDI and/or HDMI out of the unit to external monitors. Installation couldn’t be easier. Simply download the current control panel software and drivers from AJA’s website, install, and then connect the T-Tap. Hook up your monitors and you are ready. There’s very little else to do, except set your control panel configuration for the correct video/frame rate standard. Everything else is automatic in both Adobe Premiere Pro CC and Apple Final Cut Pro X. Although you’ll want to check your preference settings to make sure the device is detected and enabled.

One of the main reasons I wanted to test the T-Tap was as a direct comparison with the Blackmagic products on these same computers. For example, the current output device being used on the 2013 Mac Pro that I tested is a Blackmagic DesignUltraStudio Express. This contains a bit more processing and is comparable to AJA’s Io XT . I also tested the BMD MiniMonitor, which is a direct competitor to the T-Tap. The UltraStudio provides both input and output and offers an analog break-out cable harness, whereas the two smaller units are only output using SDI and HDMI. All three are bus-powered. In general, all performed well with Premiere Pro, except that the BMD MiniMonitor couldn’t provide output via HDMI. For unexplained reasons, that screen was blank. No such problem with either the T-Tap or the UltraStudio Express.

The real differences are with Final Cut Pro X on the Mac Pro. That computer has six Thunderbolt ports, which are shared across three buses – i.e. two connectors per bus. On the test machine, one bus feeds the two external displays, the second bus connects to external storage (not shared for maximum throughput), and the remaining bus connects to both the output device and a CalDigit dock. If the BMD UltraStudio Express is plugged into any connection shared with another peripheral, JKL high-speed playback and scrubbing in FCPX is useless. Not only does the video output stutter and freeze, but so does the image in the application’s viewer. So you end up wasting an available Thunderbolt port on the machine, if you want to use that device with FCPX. Therefore, using the UltraStudio with FCPX on this machine isn’t really functional, except for screening with a client. This means I end up disabling the device most of the time I use FCPX. In that respect, both the AJA T-Tap and the BMD MiniMonitor performed well. However, my subjective evaluation is that the T-Tap gave better performance in my critical JKL scrubbing test.

One difference that might not be a factor for most, is that the UltraStudio Express (which costs a bit more) has advanced processing. This yields a smooth image in pause when working with progressive and PsF media. When my sequence was stopped in either FCPX or Premiere, both the T-Tap and the UltraStudio yield a full-resolution, whole-frame image on the HDMI output. (HDMI didn’t appear to function on the MiniMonitor.) On the TV Logic broadcast display that was being fed vis SDI, the T-Tap and MiniMonitor only displayed a field in pause, so you get an image with “jaggies”. The UltraStudio Express generates a whole frame for a smooth image in pause. I didn’t test a unit like AJA’s Io XT, so I’m not sure if the more expensive AJA model offers similar processing. However, it should be noted that the Io XT is triple the cost of the UltraStudio Express.

The elephant in the room, of course, is Blackmagic Design DaVinci Resolve. That application is restricted to only work with Blackmagic’s own hardware devices. If you want to run Resolve – and you want professional monitoring out of it – then you can’t use any AJA product with it. However, these units are so inexpensive to begin with – compared with what they used to cost – it’s realistic to own both. In fact, some FCPX editors use a T-Tap while editing in FCPX and then switch over to a MiniMonitor or UltraStudio for Resolve work. The reason being the better performance between Final Cut and the AJA products.

Ultimately these are all wonderful devices. I like the robustness of AJA’s manufacturing and software tools. I’ve used their products over the years and never been disappointed with performance or service if needed. If you don’t need video output from Resolve, then the AJA T-Tap is a great choice for an inexpensive, simple, Thunderbolt video output solution. Laptop users who need to hook up to monitors while working at home or away will find it a great choice. Toss it into your laptop bag and you are ready to rock.

©2017 Oliver Peters

Producing a Short Mini-Doc with the AJA CION

df0516_CION4
AJA surprised the industry in 2014 when it rolled out its CION digital cinema 4K camera. Although not known as a camera manufacturer, it had been working on this product for over four years. Last year the company offered its Try CION promotion (ended in October), which loaned camera systems to qualified filmmakers. Even though this promotion is over, potential customers with a serious interest can still get extended demos of the camera through their regional AJA sales personnel. It was in this vein that I arranged a two-week loan of a camera unit for this review.

I’m a post guy and don’t typically write camera reviews; however, I’m no stranger to cameras either. I’ve spent a lot of time “shading” cameras (before that position was called a DIT) and have taken my turn as a studio and field camera operator. My interest in doing this review was to test the process. How easy was it to use the camera in actual production and how easy was the post workflow associated with it?

CION details

The AJA CION is a 4K digital camera that employs an APS-C CMOS sensor with a global shutter and both infrared-cut and optical low-pass filters. It can shoot in various frame sizes (from 1920×1080 up to 4096×2160) and frame rates (from 23.98 up 120fps). Sensor scaling rather than windowing/cropping is used, which means the lens size related to the image it produces is the same in 4K as in 2K or HD. In other words, a 50mm lens yields the same optical framing in all digital sizes.

df0516_CION_Chellee5The CION records in Apple ProRes (up to ProRes 4444) using a built-in Pak media recorder. Think of this as essentially an AJA KiPro built right into the camera. Since Pak media cards aren’t FAT32 formatted like CF or SD cards used by other cameras, you don’t run into a 4GB file-size limit that would cause clip-spanning.  You can also record AJA Raw externally (such as to an AJA KiPro Quad) over 3G-SDI or Thunderbolt. Video is linear without any log encoding schemes; but, there are a number of gamma profiles and color correction presets.

df0516_CION_prod_1It is designed as an open camera system, using standard connectors for HDMI, BNC, XLR, batteries, lens mounts, and accessories. CION uses a PL lens mount system, because that’s the most open and the best glass comes for that mounting system. When the AJA rep sent me the camera, it came ready to shoot and included a basic camera configuration, plus accessories, including some rods, an Ikan D5w monitor, a Zeiss Compact Prime 28mm lens, 512GB and 256GB solid-state Pak media cards, and a Pak media dock/reader. The only items not included – other than tripod, quick-release base plate, and head, of course – were camera batteries. The camera comes with a standard battery plate, as well as an AC power supply.

Learning the CION

The subject of this mini-doc was a friend of mine, Peter Taylor. He’s a talented luthier who builds and repairs electric and acoustic guitars and basses under his Chellee brand. He also designs and produces a custom line of electric guitar pedals. To pull this off, I partnered with the Valencia College Film Production Technology Program, with whom I’m edited a number of professional feature films and where I teach an annual editing workshop. I worked with Ray Bracero, a budding DP and former graduate of that program who helps there as an instructional assistant. This gave me the rest of the package I needed for the production, including more lenses, a B-camera for the interview, lighting, and sound gear.

Our production schedule was limited with only one day for the interview and B-roll shots in the shop. To augment this material, I added a second day of production with my son, Chris Peters, playing an original track that he composed as an underscore for the interview. Chris is an accomplished session musician and instructor who plays Chellee guitars.

df0516_CION_prod_2With the stage set, this provided about half a day for Ray and me to get familiar with the CION, plus two days of actual production, all within the same week. If AJA was correct in designing an easy-to-use cinematic camera, then this would be a pretty good test of that concept. Ray had never run a CION before, but was familiar with REDs, Canons, and other camera brands. Picking up the basic CION operation was simple. The menu is easier than other cameras. It uses the same structure as a KiPro, but there’s also an optional remote set-up, if you want a wireless connection to the CION from a laptop.

4K wasn’t warranted for this project, so everything was recorded in 2K (2048×1080) to be used in an HD 2.35:1 sequence (1920×817). This would give me some room to reframe in post. All sync sound shots would be 23.98fps and all B-roll would be in slow motion. The camera permits “overcranking”, meaning we shot at 59.94fps for playback at 23.98fps. The camera can go up to 120fps, but only when recording externally in AJA Raw. To keep it simple on this job, all recording was internal to the Pak media card – ProResHQ for the sync footage and ProRes 422 for the slow motion shots.

Production day(s)

The CION is largely a “what you see is what you get” camera. Don’t plan on extensive correction in post. What you see on the monitor is typically what you’ll get, so light and control your production set-up accordingly. It doesn’t have as wide of a dynamic range as an ARRI ALEXA for example. The bottom EI (exposure index) is 320 and that’s pretty much where you want to operate as a sweet spot. This is similar to the original RED One. This means that in bright exteriors, you’ll need filtering to knocking down the light. There’s also not much benefit in running with a high EI. The ALEXA, for instance, looks great at 800, but that setting didn’t seem to help the CION.

df0516_CION_Chellee13_smGamma profiles and color temperature settings didn’t really behave like I would have expected from other cameras. With our lighting, I would have expected a white balance of 3200 degrees Kelvin, however 4500 looked right to the eye and was, in fact, correct in post. The various gamma profiles didn’t help with clipping in the same way as Log-C does, so we ultimately stayed with Normal/Expanded. This shifts the midrange down to give you some protection for highlights. Unfortunately with CION, when highlights are clipped or blacks are crushed, that is actually how the signal is being recorded and these areas of the signal are not recoverable. The camera’s low end is very clean and there’s a meaty midrange. We discovered that you cannot monitor the video over SDI while recording 59.94-over-23.98 (slow motion). Fortunately HDMI does maintain a signal. All was good again, once we switched to the HDMI connection.

CION features a number of color correction presets. For Day 1 in the luthier shop, I used the Skin Tones preset. This is a normal color balance, which slightly desaturates the red-orange range, thus yielding more natural flesh tones. On Day 2 for the guitar performance, I switched to the Normal color correction preset. The guitar being played has a red sunburst paint finish and the Skin Tones preset pulled too much of the vibrance out of the guitar. Normal more closely represented what it actually looked like.

df0516_CION_Chellee4During the actual production, Ray used three Zeiss Super Speed Primes (35mm, 50mm, and 85mm) on the CION, plus a zoom on the Canon 5D B-camera. Since the locations were tight, he used an ARRI 650w light with diffusion for a key and bounced a second ARRI 150w light as the back light. The CION permits two channels of high-quality audio input (selectable line, mic, or +48v). I opted to wire straight into the camera, instead of using an external sound recorder. Lav and shotgun mics were directly connected to each channel for the interview. For the guitar performance, the amp was live-mic’ed into an Apogee audio interface (part of Chris’ recording system) and the output of that was patched into the CION at line level.df0516_CION_Chellee8

The real-time interview and performance material was recorded with the CION mounted on a tripod, but all slow motion B-roll shots were handheld. Since the camera had been rigged with a baseplate and rods, Ray opted to use the camera in that configuration instead of taking advantage of the nice shoulder pad on the CION. This gave him an easy grasp of the camera for “Dutch angles” and close working proximity to the subject. Although a bit cumbersome, the light weight of the CION made such quick changes possible.

Post production

df0516_CION_FCPX_2As an editor, I want a camera to make life easy in post, which brought me to Apple Final Cut Pro X for the finished video. Native ProRes, easy syncing of two-camera interviews, and simple-yet-powerful color correction makes FCPX a no-brainer. We recorded a little over three hours of material – 146 minutes on the CION, 37 minutes on the 5D and 11 minutes on a C500 (for two pick-up shots). All of the CION footage only consumed about 50% of the single 512GB Pak media card. Using the Pak media dock, transfer times were fast. While Pak media isn’t cheap, the cards are very robust and unless you are chewing through tons of 4K, you actually get a decent amount of recording time on them.

I only applied a minor amount of color correction on the CION footage. This was primarily to bring up the midrange due to the Normal/Expanded gamma profile, which naturally makes the recorded shot darker. The footage is very malleable without introducing the type of grain-like sensor noise artifacts that I see with other cameras using a similar amount of correction. Blacks stay true black and clean. Although my intention was not to match the 5D to the CION – I had planned on some stylized correction instead – in the end I matched it anyway, since I only used two shots. Surprisingly, I was able to get a successful match.

Final thoughts

df0516_CION_Chellee6The CION achieved the design goals AJA set for it. It is easy to use, ergonomic, and gets you a good image with the least amount of fuss. As with any camera, there are a few items I’d change. For example, the front monitoring connectors are too close to the handle. Occasionally you have to press record twice to make sure you are really recording. There’s venting on the top, which would seem to be an issue if you suddenly got caught in the rain. Overall, I was very happy with the results, but I think AJA still needs to tweak the color science a bit more.

In conjunction with FCPX for post, this camera/NLE combo rivals ARRI’s ALEXA and AMIRA for post production ease and efficiency. No transcoding. No performance hits due to taxing, native, long-GOP media. Proper file names and timecode. A truly professional set-up. At a starting point of $4,995, the AJA CION is a dynamite camera for the serious producer or filmmaker. The image is good and the workflow outstanding.

Click this link to see the final video on Vimeo.

Originally written for Digital Video magazine / Creative Planet Network

©2016 Oliver Peters

AJA Video Systems T-Tap

df_ttap_01Thunderbolt is the latest protocol for peripherals used by Apple on its computers to carry audio, video, data and power over a single cable. The protocol combines Apple’s DisplayPort technology and PCIe into a single connectivity path. The technology can be used to daisy-chain numerous devices, including storage, monitors and broadcast I/O hardware. Thunderbolt ports are currently available on Apple MacBook Air, MacBook Pro, Mac mini and iMac computers. Manufacturers, such as AJA Video Systems, Blackmagic Design and Matrox, have embraced Thunderbolt technology and produced a number of specific capture and output devices designed to be used with it.

The newest Thunderbolt unit to hit the market and start shipping is the T-Tap from AJA. The T-Tap follows AJA’s previously released Io XT, which places much of the power of AJA’s popular KONA cards into a Thunderbolt-enabled external unit. In spite of the fact that Io XT packs a lot of punch into a small, lightweight unit, there was a need for an even smaller product. Thus came the T-Tap, a small, robust, external adapter designed only for broadcast output and monitoring. Without input electronics, the size of the unit could be reduced to a palm-sized, metal-enclosed adapter. It is ideal for the editor who just needs to connect his laptop or iMac to an external monitor or recording deck.

The AJA T-Tap is a bus-powered, end-of-chain Thunderbolt product. This means it has to be last in a series of Thunderbolt devices. For example, if you used a Thunderbolt-enabled Promise Pegasus storage array, the T-Tap could be connected to the Pegasus’ looped Thunderbolt output port. Both storage and T-Tap would be connected in a serial path from the single port on a MacBook Pro. In the case of an iMac with dual Thunderbolt ports or the use of FireWire, USB3 or internal storage, the T-Tap would be directly connected to the Mac. Neither type of connection significantly impacts the performance of getting video out through the T-Tap due to Thunderbolt’s bidirectional 10Gbps throughput. Full bandwidth, uncompressed audio and video are sent over the single Thunderbolt cable to the T-Tap. In turn, it can be connected to any gear with SDI or HDMI connections (or both simultaneously). The T-Tap is capable of passing 10-bit, uncompressed SD, HD and even 2K (2048 x 1080) video with up to eight channels of embedded 24-bit digital audio.

Setting up the T-Tap configuration

I did my testing connecting the AJA T-Tap to an Apple 17” 2.2GHz Core i7 MacBook Pro running OS 10.8.2. The unit was directly connected to the laptop’s Thunderbolt port with Apple ProRes LT media playing from an external G-DRIVE mini. This was connected to the laptop and bus-powered using the FireWire 800 port. The T-Tap’s SDI output was connected to a TV Logic monitor, while the HDMI was simultaneously connected to a Panasonic plasma display.

df_ttap_02Currently the T-Tap works with a variety of editing hosts, including Avid Media Composer/Symphony/NewsCutter (6.5/10.5), Apple Final Cut Pro 7/X and Adobe Premiere Pro CS6. AJA does not employ a unified installer, so the basic driver software package that you download enables the unit to work with Apple products. Use with Adobe or Avid systems requires the download of additional plug-ins. The package also includes a number of AJA utilities, such as software to output QuickTime media files through the T-Tap without launching any other NLE application. T-Tap does not work with Autodesk Smoke 2013, yet, nor does it work with DaVinci Resolve, since Blackmagic Design restricts output to their own products.

Set-up of the T-Tap is controlled through the AJA Control Panel. If you’ve used AJA’s other products, like KONA cards, then you’ll be familiar with its use. I did my testing with FCP 7 and FCP X. Under the “legacy” version of Final Cut Pro, you have quite a lot of direct control over video output using FCP’s pulldown menu for playback and viewing. With FCP X, you have to set the desired format that matches your editing timeline in the AJA Control Panel, before launching FCP X. The T-Tap is intended for monitoring and synchronous output only, so there is no VTR control port on the unit. You can certainly “roll and record” a deck on-the-fly, but there is no software control for frame-accurate output from any of the NLEs to a recorder.

The T-Tap supports all of the popular video frame rates, as well as true 24, 30 and 60fps. Video can be interlaced, progressive or progressive segmented frame (PsF) and the HDMI output supports both YUV and RGB video (host software-dependent). Generally the video is simultaneously played through both the SDI and HDMI ports, but some frame rate/scanning combos, such as 23.98 PsF, will not be compatible with HDMI and will display only on the SDI output.

Working with projects

df_ttap_03I found that some settings in the AJA Control Panel would sort of override the host NLE’s setting. This is especially true of FCP X. For example, I was playing a 23.98 timeline, but had the T-Tap set to 29.97i output. It did display as a 1080i signal, but with a 2:2:2:4 rather than the proper 2:3:2:3 pulldown cadence added. However, when I played the same media in FCP 7 using a 1080p/23.98 sequence, but with the playback set to 29.97i in the FCP menu, the output and display used the correct pulldown cadence. This has less to do with the capabilities of the T-Tap and more to do with what the host software allows or takes advantage of. Although there is no secondary format (upconverted or downconverted) output, as with the KONA cards, you can set the primary playback to be downconverted from within the NLE software. Testing the same 1080p/23.98 sequence in FCP 7, I was able to change the playback settings to 720p/59.94 (downsampled and cadence inserted) and the T-Tap performed beautifully, just like a standard PCIe card.

A few other niceties are worth noting. You can add timecode overlays from the sequence’s timecode (“burn-in” windows) to the output. HDMI protocol can be set for HDMI or DVI, when using an adapter for a DVI display. The RGB range can be set to full (0-1023) or SMPTE (64-940) levels. Settings can be saved or recalled from a Presets window.

Scrubbing, skimming and playback performance was very responsive with either of the Final Cut applications. Running this hardware combo and Apple ProRes LT media felt no less agile than running on a MacPro with fast storage and a PCIe card, like a KONA.

Overall, I found the T-Tap to be  great little unit, but there are a couple of things to make note of. First of all, the T-Tap doesn’t include its own Thunderbolt cable. This is typical of most manufacturers, but you’ll need to factor in another $49 (Apple) for a cable. The T-Tap is also very warm to the touch. There’s a lot of processing going on, of course, but it was considerably warmer than the G-DRIVE sitting right next to it. The AJA Io XT that I tested a few months ago felt cooler, but it is larger and uses a hard plastic case. A Thunderbolt device carries up to 10 watts of power, so metal was used in the smaller T-Tap to dissipate heat.

Sizing up the competition

I would be remiss if I didn’t address the competition. Both AJA Video Systems and Blackmagic Design often compete head-to-head by offering similar products. Usually the AJA products are a little more expensive and that’s just as true here. The T-Tap lists for $295, which is pretty low to start with, but of course, the Blackmagic Design UltraStudio Mini Monitor is less. The relative difference may sound like a lot, but it really isn’t, as both cost so little to start with. Both companies make great products, but if either of these products are on your radar, then make sure you compare them as apples-to-apples with the features that are most important to you. The AJA T-Tap does include some notable features that you may need. There’s 2K output, RGB support to an HP DreamColor display and a 3-year warranty. As someone who has dealt with AJA over the years on a few minor support issues, I can certainly attest to the fact that their customer response is one of the best in the business. That alone may be worth paying a few bucks more for.

As productions move into a file-based world and smaller, more capable computers can handle the load, we become less dependent on cards that you have to install into a workstation just to monitor your video. Yet, the need to provide broadcast quality monitoring and real-time output to recorders, routers, servers and switchers has not been diminished. AJA has been a key part of this migration with the right products to serve video professionals. The T-Tap continues as part of the legacy. It’s small and robust, yet packs a punch where it counts.

Originally written for DV magazine / Creative Planet Network

©2013 Oliver Peters

AJA Ki Pro

blg_kipro

If you thought that there were more than enough tapeless recording devices already on the market by Focus Enhancements, Edirol and Convergent Designs, you would only be partially right. The AJA Ki Pro sparked a lot of enthusiasm at NAB 2009. While it clearly offers cameramen many benefits, it also provides some opportunities for the world of post production.

The Ki Pro was developed by AJA, but like the Io and the IoHD before it, the internal software was co-developed with Apple. Ki Pro approaches tapeless field production from an NLE-friendly, rather than camera-native, design. It records QuickTime movies using embedded versions of Apple’s ProRes 422 and ProRes 422HQ codecs. As a result, you can open these files directly from the hard drive using any QuickTime compliant application, as long as the ProRes codecs are installed on your computer.

As an aside, the name Ki Pro stems from the Asian concept of ki or chi. This is a term for the life force or inner power of all living beings and plays a large part in the philosophies of many types of martial arts.

Configuration

The AJA Ki Pro uses a small, lightweight form factor. It’s about the size of a very large paperback book and can be attached in the field to various camera rigs. The standard package (MSRP $3,995) includes the Ki Pro device, a 250GB removable hard drive and AC power adapters for the Ki Pro and the drive, for when it is detached. Optional accessories include larger capacity drives, solid state storage and a cage and rail system called the Exoskeleton. The latter is a bracket and mount to install the Ki Pro onto a camera rig or tripod and then to attach a small camera to that Exoskeleton system.

Think of the Ki Pro as a recording device that’s built around a version of the AJA FS1 format converter. This means that you not only record in native 525i, 625i, 720p, 1080i or 1080psf, but you can also up/down/cross-convert a signal to one of these formats on input or output. The front panel gives you access to transport controls, menu functions and mix levels for the analog inputs. The back panel holds a series of input and output connectors for HDMI, SDI, component analog and composite video. There are also unbalanced RCA and balanced analog audio XLR connectors with a mic, line and phantom power switch. Finally, there are other interface connections, including timecode in/out, a 9-pin serial port, 1394a, 1394b and Ethernet.

The Ki Pro includes a removable, Mac-formatted 250GB hard drive, which docks to the Ki Pro and connects over a custom multi-pin connector. It can also be connected externally to any computer with a FireWire 800 port (1394b). The Ki Pro front panel sports two ExpressCard|34 memory slots, for optional future recording to a card-based medium.

In the field

I found the Ki Pro to be extremely well thought out. You can run it in the field off of battery or the AC adapter if you have shore power. The system can be controlled from the front panel, a LAN or wirelessly through an access point like an Airport base station. This means you can control it remotely from a laptop or even an iPhone or iPod Touch via a web browser. The latter might come in handy if you have a Ki Pro mounted at the end of a camera crane.

The record settings, like format, clip name, conversion, timecode values, etc. are set by an operator using the front panel controls or one of the remote methods. The menu is easy to navigate once you get the hang of it, but it’s easier to do from the web interface. I tested it through my home router without any issues. Plug in the IP address as the URL and you have access to all the Ki Pro settings (and operational control) using Firefox, Safari or another standard browser.

As an editor, I appreciate the thought put into naming conventions. Unlike the cryptic methods used by camera manufacturers, the Ki Pro lets you assign reel IDs and clip or scene numbers in an EDL and script-compatible manner. Typically all recordings on one drive would have the same reel number, from 001 to 999. Recordings can be designated as clips or scenes with appended alphabetical values and take numbers. Once you assign the initial values, subsequent recordings automatically increment the take number until the operator makes a change. Your first recorded file might be labeled as SC12ATK1, the next would be SC12ATK2 and so on. When you mount the drive on your computer, it shows up with the name of 001 (or another assigned reel number) on the desktop.

Actual use

At the time of this review, shipping units like my evaluation Ki Pro have 1.0 software. Not all functions are yet enabled. For example, I couldn’t start/stop recordings from a camera. AJA is planning an October firmware update that will enable such automatic recording. You will be able to roll the camera and if it provides SDI embedded timecode or has LTC timecode output, then the Ki Pro starts recording when it sees the timecode value change and stops when the value stops changing.

Another function I like is auto-format-sensing. Whatever is coming into Ki Pro will automatically be the native format recorded, unless up/down/cross-conversion is assigned. The exception is 23.98PsF media. To properly record these files, the operator must change the Record Type from Normal to PsF. I was able to test this with SDI from a Sony EX-3 and it worked as advertised. In a future update, AJA plans to provide VFR support as in its KONA and IoHD products. This means you would be able to record the output of a Panasonic VariCam and the Ki Pro would record and recognize the variable speed flags.

AJA started development of Ki Pro long before Apple released its new Final Cut Studio, which included additional ProRes codecs. It is likely that AJA will eventually expand the recording options to include other ProRes codecs; however, the Ki Pro is a single-stream 4:2:2 SDI device. This makes it unlikely that the current Ki Pro model will support the new high-end ProRes 4444 codec. Personally, I have no problem with this, because Ki Pro is intended to be a mastering device on par with high-quality videotape. ProRes 422 equates to the data rate of HDCAM at 147Mbps, while ProRes 422HQ is close to HD-D5 at 220Mbps. In its present form, Ki Pro delivers outstanding visual quality already matching or surpassing all other HD camcorder recordings.

One of the big benefits of Ki Pro is that it extends the life of cameras that have good image technology, but weak recording systems. Many Panasonic VariCam owners aren’t keen to change to newer P2 cameras, since their tape-based VariCams still create very compelling images. Adding a Ki Pro and recording the full-raster, uncompressed HD-SDI output from the camera as native 720p or converted 1080i, means that there’s a lot of life left in those VariCams. Another example is Canon’s XL H1, which is a great camera burdened with a 25Mbps HDV recording mechanism. Ki Pro adds a superior recording system to that camera.

Post production

All of the above makes Ki Pro a great recording product, but the real beauty is for Final Cut editors. Simply eject the 250GB drive, connect it to your computer via FW800 and it mounts on the desktop. All files are contained within a single AJA folder. You can copy those files to your local drive or edit directly from the Ki Pro drive. If you want to edit directly, simply import the AJA folder into the FCP browser and the clips are immediately available. I received a “media not optimized” prompt on my MacBook Pro, but, I didn’t see that same message with a Mac Pro tower. This is a result of how FCP’s Dynamic RT technology indexes performance on these two different computers. Nevertheless, various HD clips in both ProRes 422 and ProRes 422HQ played fine from the Ki Pro’s removable drive on both the laptop and the workstation.

The AJA Ki Pro offers other advantages away from the field. Since up/down/cross-conversion is built-in, simply cable the Ki Pro to nearly any monitor and you can play out audio and video. I was even able to connect HDMI to my living room flat panel and see the high-def video from the Ki Pro. Since the drive uses standard Mac formatting, you can also copy compatible QuickTime ProRes files from the computer back into the AJA folder on the drive. Once the drive is docked back into the Ki Pro, these files can be played out through the video spigots as if they were recorded by the Ki Pro. In addition, the front panel will display the file name, even if it doesn’t conform to the clip/scene naming convention used by the Ki Pro.

(Note: According to AJA this is not yet officially supported, due to some remaining audio work. This will be fully implemented in a future update. Also in the future will be support for the i/o of up to 8 channels of audio over embedded SDI and HDMI.)

This last situation brings up some interesting possibilities. Many small shops are resisting the need to purchase HD VTRs, which can potentially cost more than their entire edit system. If you need to deliver a high definition videotape master (HDCAM, HDCAM-SR, HD-D5, etc.), Ki Pro could be used as an intermediate source. Copy the show to the Ki Pro drive and then take the complete unit to a facility that owns the necessary deck. Connect the Ki Pro to the VTR using SDI and dub from the Ki Pro to the videotape. Granted it’s two steps, but the cost of the Ki Pro, the service and tape stock is a lot less than owning a high-end VTR for only infrequent use. Several days’ rental alone of an HDCAM-SR deck would pay for the Ki Pro.

In closing, it’s important to note that although the ProRes codecs are optimized for Final Cut, this doesn’t mean Ki Pro recordings are limited to only Final Cut Pro. If you run Adobe’s CS4 products on a Mac, then ProRes and ProRes HQ files open and can be used in both Premiere Pro and After Effects. (Final Cut Studio or a ProRes QT component must also be installed to enable this.) Same for Media 100. These files can also be imported into Avid Media Composer, but will be transcoded into DNxHD media upon import. (That might change down the road, if Avid includes drivers for QuickTime files within its Avid Media Architecture API.) Finally, Apple offers a free Windows playback-only QuickTime component for ProRes files. This enables you to open and play ProRes-encoded movies on PCs with QuickTime installed.

On the whole, AJA’s Ki Pro is a versatile product that has quite a few useful applications in the field, the studio and in post. AJA has earned a stellar support reputation, which goes a long way towards pushing the Ki Pro ahead of the competition. If you’ve been looking for a tapeless acquisition device that was designed with post in mind, then look no further. The AJA Ki Pro is it.

© 2009 Oliver Peters

Written for NewBay Media LLC and DV magazine