Apple iPad Pro

df1216_ipadpro_main_sm

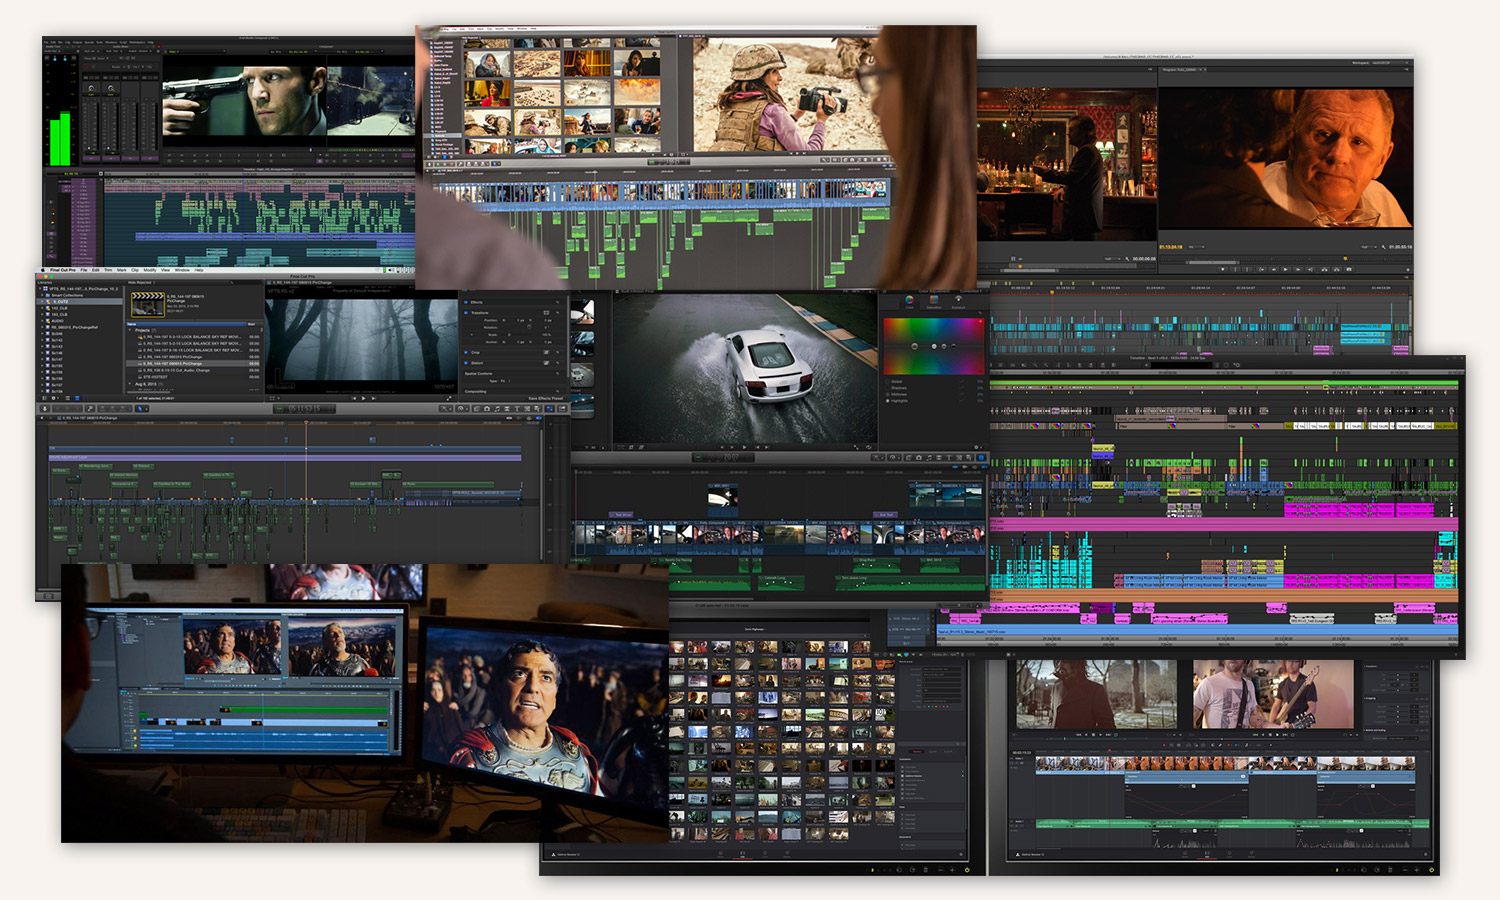
Mark me down as a happy Apple iPad user. It’s my go-to computer away from home, unless I need to bring my laptop for on-site editing. I’ve even written some of my magazine stories, like NAB reports, on it. First the original iPad and now a new Air 2. While I don’t consider myself a post-PC computer user, I could imagine that if I didn’t need to run tools like Resolve, FCPX, and Premiere Pro, an iPad Pro could function as my only computer.

For this review, Apple loaned me the 12.9″ 128GB WiFi+Cellular iPad Pro, complete with all the bells-and-whistles, including the Apple Pencil, Lightning-to-SD Card Camera Reader, Case, Smart Cover, and Smart Keyboard. The Pro’s A9X processor is beefy for a tablet. Other reviewers have noted its performance rivals Apple’s smallest MacBook with the Intel Core M CPU. Since the iPad Air 2 processor is only one step down, you won’t see that much difference between it and the iPad Pro on most iOS applications. However, the A9X delivers twice the CPU and graphics performance of the Air 2’s A8X, so there is a difference in driving the larger 12.9” Pro screen, as well as with multitasking and animation-heavy applications.

df1216_ipadpro_split

Many specs are the same between these two models, with the exception that the iPad Pro includes a total of four speakers and adds a Smart Connector to be used with the Smart Keyboard. In addition, the Pro’s touch screen has been re-engineered to scan at 240 times/second (twice as fast as scanning for your finger) in support of the Apple Pencil. On March 21st Apple launched a second iPad Pro model using the same 9.7” form factor as the iPad Air 2. Other than screen size, the two Pro models sport nearly identical specs, including A9X processor, four speakers, and Smart Connector. Now there’s also a Smart Keyboard specifically designed for each model. Since I tested the larger version, the rest of this review is in the context of using the 12.9” model.

The big hallmark in iOS9 is multitasking, which lets you leave two applications open and on-screen, side-by-side at one time. You can go between them and slide the divider bar to change app size or move them completely on or off of the screen. This feature is superb on the iPad Pro, aided by the bigger screen real estate. It’s not quite as functional on the other iPads. However, many applications and web pages don’t feel quite optimized for the larger screen of the iPad Pro. It often feels like pages are slightly blown up or that there’s a lot of wasted space.

Accessories

df1216_ipadpro_pencilThe iPad Pro starts to stand out once you accessorize it. You can get an Apple case, Smart Cover and/or Smart keyboard. The covers magnetically attach to the iPad, so be careful. If you hold or lift the heavier iPad Pro by the cover, it can detach, resulting in the Pro potentially dropping to the floor. Both the Smart Cover and the Smart Keyboard can fold into a stand to prop up the iPad Pro on a desk. When you fold the Smart Keyboard back into a cover, it’s a very slim lid that fits over the screen. The feel of the keyboard is OK, but I prefer the action of the small, standalone Apple Bluetooth keyboard, which I use with my own iPad. Other reviewers have also expressed a preference for the Logitech keyboard available for the Pro. These new keyboards are enabled by the Smart Connector with its two-way power and data transfer, so no battery is required for the keyboard.

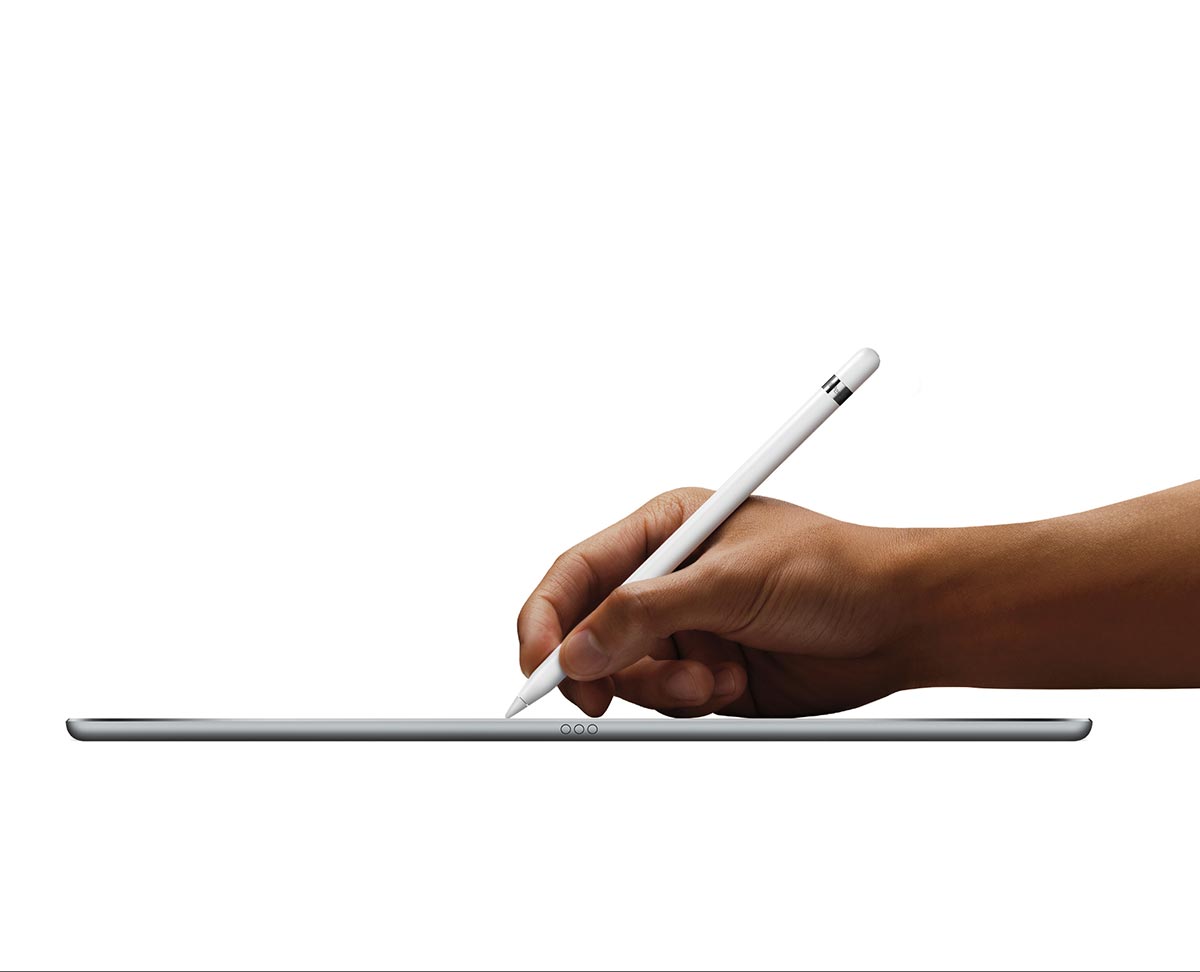
The new Apple Pencil is getting the most press. Unlike other pointing devices, the Pencil requires charging and can only be paired with the iPad Pro. The Pencil is clearly a blast to use with Pixelmator or FiftyThree’s Paper. It’s nicely weighted and feels as close to drawing with a real pen or pencil as you can get with an electronic stylus. It responds with pressure-sensitivity and you can even shade with the side of the tip. For drawing in apps like this, or Photoshop Express, Autodesk Graphic, Art Studio, etc., the Pencil is clearly superior to low-cost third-party styli or your finger. FiftyThree also offers its own drawing styli that are optimized for use with the Paper application.

df1216_ipadpro_53paperAs a pointing device, the Apple Pencil isn’t quite as good, since it was designed for fine detail. According to Apple, their design criteria was pixel-level precision. The Pencil does require charging, which you can do by plugging it into the iPad’s lightning port, or directly charging it by using the regular lightning cable and charger via a small adapter ring. When the Pencil gets low on juice a warning pops up on the iPad Pro’s screen. Plug it into the lightning port for a quick boost. Apple claims that fifteen seconds will give you thirty minutes of use and my experience bore this out.

The final accessory to mention is the Lightning-to-SD Card Camera Reader. The lightning port supports USB 3.0 speeds on the iPad Pro to make transfers fast. Plug the reader into the lightning port and pop your SD card into the reader. The Photos application will open to the contents of the card and you can import a selection of clips. Unfortunately, there is no generic way to transfer files into the iPad using SD cards. I’ve been able to cheat it a little by putting some renamed H.264 files into the DCIM folder structure from a Canon 5D camera. This made everything look like valid camera media. Then I could move files into Photos, which is Apple’s management tool for both camera stills and videos on the iPad. However, it doesn’t work for all files, such as graphics or audio tracks that you might use for a voice-over.

Using the iPad Pro as a professional video tool

Is the iPad Pro better for the video professional when compared with other tablets and iPads? Obviously the bigger screen is nice if you are editing in iMovie, but can one go beyond that?

df1216_ipadpro_filmicproI worked with a number of applications, such as FiLMiC Pro. This application adds real camera controls to the built-in camera. These include ISO, white balance, focus, frame rates, and stabilization controls. It was used in the production of the Sundance hit, Tangerine, and is a must-have tool if you intend to do serious captures with any iOS device. The footage looks good and H.264 compression (starting at 32Mbps) artifacts are not very visible. Unfortunately, there’s not shutter angle control to induce motion blur, which would smooth out the footage.

To make real production viable, you would need camera rigging and accessories. The weight of the 12.9″ iPad Pro makes it tough to shoot steady hand-held footage. Outside in bright daylight, the screen is too dim even at its brightest setting. Having some sort of display hood is a must. In fact, the same criticism is true if you are using it to draw outside. Nevertheless, if you mounted an iPad or iPad Pro in some sort of fixed manner, it would be very useful for recording interviews and similar, controllable productions. iOgrapher produces some of these items, but the larger iPad Pro model isn’t supported yet.

df1216_ipadpro_imovieFor editors, the built in option is iMovie. It is possible to edit external material, if you brought it in via the card reader, DropBox, iCloud Drive, or by syncing with your regular computer. (Apple’s suggested transfer path is via AirDrop.) Once you’ve edited your piece, you can move the project file from iOS iMovie to iMovie on your computer using iCloud Drive and then import that project into Final Cut Pro X. In my tests, the media was embedded into the project and none of the original timecode or file names were maintained. Frame rates were also changed from 29.97fps to 30.0fps. Clearly if you intend to use this path, it’s best for video originated on the iPad itself.

df1216_ipadpro_touchedit_1If you want a professional nonlinear editing tool for the iPad, nothing even comes close to TouchEdit, an app developed by feature film editor Dan Lebental (Ant-Man, Iron Man, Cowboys & Aliens) and his team. This app includes many of the tools an editor would expect, such as trimming, titles and audio mixing, plus it tracks all of the important clip metadata. There is a viable workflow to get clips into – and an edit list and/or movie out of – the iPad. Lebental started with a skeuomorphic interface design that borrows from the look of a flatbed editor. The newest version of the software includes the option for a flattened interface skin, plus a portrait and landscape layout, each of which enables somewhat different capabilities. TouchEdit is attractive as an offline editing tool that definitely benefits from the larger size and improved performance of the iPad Pro.

Final thoughts

df1216_ipadpro_touchedit_2

I used the 12.9” iPad Pro for three months. It’s a wonderful tool, but also a mixed bag. The more ample screen real estate makes it easier to use than the 9.7” iPad models. However, the smaller device is tweaked so that many pages are displayed a bit differently. Thus the size advantage of the larger Pro model is less pronounced. Like all iPads, the Pro uses the same iOS operating system. This holds back the potential of the Pro, which begs for some sort of hybrid “iOS Pro” operating system that would make the iPad Pro work more like a laptop. Naturally, Apple’s position is that iPads are “touch-first” devices and iOS a “touch-first” operating system. The weakest spot is the lack of true file i/o and a visible file structure. You have to go through Dropbox, iCloud, Photos, AirDrop, e-mail, or be connected to iTunes on your home machine.

The cost of the iPad Pro would seem to force a decision between buying the 12” MacBook and the 12.9″ iPad Pro. Both are of similar size, weight, and performance. In John Gruber’s Daring Fireball review he opined that in the case of the iPad Pro, “professional” should really be thought of in the context of “deluxe”. According to him, the iPad Pro relates to the regular iPad line in the same way a MacBook Pro relates to the other MacBooks. In other words, if an iPad serves your needs and you can afford the top-end version, then the Pro is for you. Its target market is thus self-defining. The iPad Pro is a terrific step up in all the things that make tablets the computing choice for many. Depending on your needs, it’s a great portable computer. For the few that are moving into the post-PC world, it could even be their only computer.

Originally written for Digital Video magazine / CreativePlanetNetwork.

©2016 Oliver Peters

Voice from the Stone

df0316_vfts_1_smAs someone who’s worked on a number of independent films, I find it exciting when an ambitious feature film project with tremendous potential comes from parts other than the mainstream Hollywood studio environment. One of these is Voice from the Stone, which features Emilia Clarke and Marton Csokas. Clarke has been a fan favorite in her roles as Daenerys Targaryen in Game of Thrones and the younger Sarah Connor in Terminator Genisys. Csokas has appeared in numerous films and TV series, including Sons of Liberty and Into the Badlands.

In Voice from the Stone, Clarke plays a nurse in 1950s Tuscany who is helping a young boy, Jakob (played by Edward Ding), recover from the death of his mother. He hasn’t spoken since the mother, a renowned pianist, died. According to Eric Howell, the film’s director, “Voice from the Stone was a script that screamed to be read under a blanket with a flashlight. It plays as a Hitchcock fairy tale set in 1950s Tuscany with mysterious characters and a ghostly antagonist.” While not a horror film or thriller, it is about the emotional relationship between Clarke and the boy, but with a supernatural level to it.

df0316_vfts_15Voice from the Stone is Howell’s feature directorial debut. He has worked on numerous films as a director, assistant director, stuntman, stunt coordinator, and in special effects. Dean Zanuck (Road to Perdition, Get Low, The Zero Theorem) produced the film through his Zanuck Independent company. From there, the production takes an interesting turn towards the American heartland, as primary post-production was handled by Splice in Minneapolis. This is a market known for its high-end commercial work, but Splice has landed a solid position as the primary online facility for numerous film and TV series, such as History Channel’s America Unearthed and ABC-TV’s In An Instant.

Tuscany, Minneapolis, and more

Clayton Condit, who co-owns and co-manages Splice with his wife Barb, edited Voice from the Stone. We chatted about how this connection came about. He says, “I had edited two short films with Eric. One of these, Anna’s Playground, made the short list for the 2011 Oscars in the short films category. Eric met with Dean about getting involved with this film and while we were waiting for the financing to be secured, we finished another short, called Strangers. Eric sent the script to Emilia and she loved it. After that everything sort of fell into place. It’s a beautiful script that, along with Eric’s style of directing, fueled amazing performances from the entire cast.”

df0316_vfts_2The actual production covered about 35 days in the Tuscany region of Italy. The exterior location was filmed at one castle, while the interiors at another. This was a two-camera shoot, using ARRI Alexas recording to ARRIRAW. Anamorphic lenses were used to record in ARRI’s 3.5K 4:3 format, but the final product is desqueezed for a 2.39:1 “scope” final 2K master. The DIT on set created editorial and viewing dailies in the ProRes LT file format, complete with synced production audio and timecode burn-in. The assistant editor back at Splice was also loading and organizing the same dailies, so that everything was available there, as well.

df0316_vfts_8Condit explains the timeline of the project, “The production was filmed on location in Italy during November and December of 2014. I was there for the first half of it, cutting on my MacBook Pro on set and in my hotel room. Once I travelled back to Minneapolis, I continued to build a first cut. The director arrived back in the states by the end of January to see early rough assemblies, but it was around mid-February when I really started working a full cut with Eric on the film. By April of 2015 we had a cut ready to present to the producers. Then it took a few more weeks working with them to refine the cut. Splice is a full service post facility, so we kicked off visual effects in May and color starting mid-June. The composer, Michael Wandmacher, created an absolutely gorgeous score that we were able to record during the first week of July at Air Studios in London. We partnered with Skywalker Sound for audio post-production and mix, which took us through the middle of August.”

As with any film, getting to the final result takes time and experimentation. He continues, “We screened for various small groups listening to feedback and debated and tweaked. The film has a lot of beautiful subtleties to it. We did not want to cheapen it with cliché tricks that would diminish the relationships between characters. It really is first a love story between a mother and her child. The director and producers and I worked very closely together taking scenes out, working pacing, putting scenes back in, and really making sure we had an effective story.”

df0316_vfts_12Splice handled visual effects ranging from sky replacements to entire green screen composited sequences. Condit explains, “Our team uses a variety of tools including Nuke, Houdini, Maya, and Cinema 4D. Since this film takes place in the 1950s, there were a lot of modern elements that needed to be removed, like TV antennas and distant power lines, for example. There’s a rock quarry scene with a pool of water. When it came time to shoot there, the water was really murky, so that had to be replaced. In addition, Splice also handled a number of straight effects shots. In a couple scenes the boy is on the edge of the roof of the castle, which was a green screen composite, of course. We also shot a day in a pool for underwater shots.”

Pioneering the cut with Final Cut Pro X

df0316_vfts_5Clayton Condit is a definite convert to Apple’s Final Cut Pro X and Voice from the Stone was no exception. Condit says, “Splice originated as an Avid-based shop and then moved over to Final Cut Pro as our market shifted. We also do a lot of online finishing, so we have to be compatible with whatever the offline editor cuts in. As FCP 7 fades away we are seeing more jobs being done in [Adobe] Premiere Pro and we also are finishing with [Blackmagic Design] DaVinci Resolve. Today we are sort of an ‘all of the above’ shop; but for my offline projects I really think FCP X is the best tool. Eric also appreciated his experience with FCP X as the technology never got in the way. As storytellers, we are creatively free to try things very quickly [with Final Cut Pro X].”

df0316_vfts_7“Of course, like every FCP X editor, I have my list of features that I’d like to see; but as a creative editorial tool, hands down it’s the real deal. I really love audio roles, for example. This made it very easy to manage my temp mixes and to hand over scenes to the composer so that he could control what audio he worked with. It also streamlined turnovers. My assistant, Cody Brown, used X2Pro Audio Convert to prepare AAFs for Skywalker. Sound work in your offline is so critical when trying to ‘sell’ your edit and to make sure a scene is really working. FCP X makes that pretty easy and fun. We have an extensive sound library here at Splice. Along with early music cues from Wandmacher, I was able to do fairly decent temp mixes in surround for early screenings inside Final Cut.”

On location, Condit kept his media on a small G-RAID Thunderbolt drive for portability; but back in Minneapolis, Splice has a 600TB Xsan shared storage system for collaboration among departments. Condit’s FCP X library and cache files were kept on small dual-SSD Thunderbolt drives for performance and with mirrored media he could easily transition between working at home or at Splice.

df0316_vfts_9Condit explains his FCP X workflow, “We broke the film into separate libraries for each of the five reels. Each scene was its own event. Shots were renamed by scene and take numbers using different keyword assignments to help sort and search. The film was shot with two cameras, which Cody grouped as multicam clips in FCP X. He used Sync-N-Link X to bring in the production sound metadata. This enabled me to easily identify channel names. I tend to edit in timelines rather than a traditional source and record approach. I start with ‘stringouts’ of all the footage by scene and will use various techniques to sort and track best takes. A couple of the items I’d love to see return to FCP X are tabs for open timelines and dupe detection.”

df0316_vfts_11Final Cut Pro X also has other features to help truly refine the edit. Condit says, “I used FCP X’s retiming function extensively for pace and emotion of shots. With the optical flow technology, it delivers great results. For example, in the opening shot you see two hands – the boy and his mother – playing piano. The on-set piano rehearsal was recorded and used for playback for all takes. Unfortunately it was half the speed of the final cue used in the film. I had to retime that performance to match the final cue, which required putting a keyframe in for every finger push. Optical flow looks so good in FCP X that many of the final online retimes were actually done in FCP X.”

df0316_vfts_6Singer Amy Lee of the band Evanescence recorded the closing title song for the film during the sound sessions at Skywalker. Condit says, “Amy completely ‘got’ the film and articulated it back in this beautiful song. She and Wandmacher collaborated to create something pretty special to close the film with. Our team is fortunate enough now to be creating a music video for the song that was shot at the same castle.”

Zanuck Independent is currently arranging a domestic distribution schedule for Voice from the Stone, so look for it in theaters later this year.

If you want more details, click here for Steve Hullfish’s excellent Art of the Cut interview with Clayton Condit.

Originally written for Digital Video magazine / CreativePlanetNetwork.

©2016 Oliver Peters

Film Editor Techniques

df2416_filmedit_sm

Editing is a craft that each editor approaches with similarities and differences in style and technique. If you follow my editor interviews or those at Steve Hullfish’s Art of the Cut series, then you know that most of the top editors are more than willing to share how they do things. This post will go through a “baker’s dozen” set of tips and techniques that hopefully will help your next, large project go just a bit more smoothly.

Transcoding media. While editing with native media straight from the camera is all the rage in the NLE world, it’s the worst way to work on long-term projects. Camera formats vary in how files are named, what the playback load is on the computer, and so on. It’s best to create a common master format for all the media in your project. If you have really large files, like 4K camera media, you might also transcode editing proxies. Cut with these and then flip to the master quality files when it comes time to finish.

Transcode audio. In addition to working with common media formats, it’s a good practice to get all of your audio into a proper format. Most NLEs can deal with a mix of audio formats, bit depths and sample rates, but that doesn’t mean you should. It’s quite common to get VO and temp music as MP3 files with 44.1kHz sampling. Even though your NLE may work with this just fine, it can cause problems with sync and during audio post later. Before you start working with audio in your project, transcode it to .wav of .aif formats with 48kHz sampling and 16-bit or 24-bit bit-depth. Higher sampling rates and bit-depths are OK if your NLE can handle them, but they should be multiples of these values.

Break up your project files by reel. Most films are broken down into 20 minute “reels”. Typically a feature will have five or six reels that make up the entire film. This is an old-school approach that goes back to the film day, yet, it’s still a good way to work in the modern digital era. How this is done differs by NLE brand.

With Media Composer, the root data file is the bin. Therefore, each film reel would be a separate timeline, quite possibly placed into a separate bin. This facilitates collaboration among editors and assistants using different systems, but still accessing the same project file. Final Cut Pro X and Premiere Pro CC don’t work this way. You cannot share the exact same FCPX library or Premiere Pro project file between two editors at one time.

In Final Cut Pro X, the library file is the basic data file/container, so each reel would be in its own library with a separate master library that contains only the final edited sequence for each of the reels. Since FCPX editors can open multiple libraries, it’s possible to work across reels this way or to have different editors open and work on different libraries independent of each other.

With Premiere you can only have a single project file open at one time. When a film is broken into one reel per project, it becomes easy for editors and assistants to work collaboratively. Then a master project can be created to import the final version of each reel’s timeline to create the combined film timeline. Media Browser within Premiere Pro should be used to access sequences from within other project files and import them into a new project.

Show/hide, sifting and sorting. Each NLE has its own way of displaying or hiding clips and subclips. Learning how to use these controls will help you speed up the organization of the media. Final Cut Pro X has a sophisticated method of assigning “favorites” and “rejects” to clips and ranges within clips. You can also assign keywords. By selecting what to see and to hide, it’s easy to cull a mass of footage into the few, best options. Likewise with Media Composer and Premiere Pro, you can show and hide clips and also sort by custom column criteria. Media Composer includes a custom sift feature, which is a filtering solution within the bin. It is easy to sift a bin by specific data in certain columns. Doing so hides everything else and reveals only the matching set of media on a per-bin basis.

Stringouts. A stringout is a sequence of selected footage. Many editors use stringouts as the starting point and then whittle down the scene from there. For example, Kirk Baxter likes his assistants to create a stringout for a dialogue scene that is broken down by line and camera. For each line of dialogue, you would see every take and camera angle covering that line of dialogue from wide to tight. Then the next line of dialogue and so on. The result is a very long sequence for the scene, but he can quickly assess the performance and best angle for each portion of the scene. Then he goes through and picks his favorites by pushing the video clip up one track for quick identification. The assistant then cleans up the stringout by creating a second version containing only these selected clips. Now the real cutting can begin.

Julian Clarke has his assistants create a similar stringout for action scenes. All takes and angles are organized back-to-back matching the choreography of the action. So – every angle/take for each crash or blast or punch within the scene. From these he has a clear idea of coverage and how to proceed cutting the scene, which otherwise might have an overwhelming amount of footage at first glance.

I use stringouts a lot for interview-driven documentaries. One sequence per person with everything. The second and third stringouts are successive cutdowns from that initial all-inclusive stringout. At this stage I start combining portions of sequences based on topics for a second round of stringouts. These will get duplicated and then culled, trimmed and rearranged as I refine the story.

Pancakes and using sequences as sources. When you use stringouts, it’s common to have one sequence become the source for another sequence. There are ways to handle this depending on your NLE. Many will nest the source sequence as a single clip on the new timeline. I contend that nesting should be avoided. Media Composer only allows one sequence in the “record” window to be active at any one time (no tabbed timeline). However, you can also drag a sequence to the source window and its tracks and clips can be viewed by toggling the timeline display between source and record. At least this way you can mark ins and outs for sections. Both Final Cut Pro “legacy” and Premiere Pro enable several sequences to be loaded into the timeline window where they are accessible through tabs. Final Cut Pro X dropped this feature, replacing it with a timeline history button to step forward or backward through several loaded sequences. To go between these sequences in all three apps, using copy-and-paste functions are typically the best way to bring clips from one sequence into another.

One innovative approach is the so-called “pancake” timeline, popularized by editor/blogger Vashi Nedomansky. Premiere Pro permits you to stack two or more timelines into separate panels. The selected sequence becomes active in the viewer at any given time. By dragging between timeline panels, it is possible to edit from one sequence to another. This is a very quick and efficient way to edit from a longer stringout of selects to a shorting one with culled choices.

Scene wall. Walter Murch has become synonymous with the scene wall, but in fact, many editors use this technique. In a scene wall, a series of index cards for each scene is placed in story order on a wall or bulletin board. This provides a quick schematic of the story at any given time during the edit. As you remove or rearrange scenes, it’s easy to see what impact that will have. Simply move the cards first and review the wall before you ever commit to doing the actual edit. In addition, with the eliminated cards (representing scenes) moved off to the side, you never lose sight of what material has been cut out of the film. This is helpful to know, in case you want to go back and revisit those.

Skinning, i.e. self-contained files. Another technique Murch likes to use is what he calls adding a skin to the topmost track. The concept is simple. When you have a lot of mixed media and temp effects, system performance can be poor until rendered. Instead of rendering, the timeline is exported as a self-contained file. In turn, that is re-imported into the project and placed onto the topmost track, hiding everything below it. Now playback is smooth, because the system only has to play this self-contained file. It’s like a “skin” covering the “viscera” of the timeline clips below it.

As changes are made to add, remove, trim or replace shots and scenes, an edit is made in this self-contained clip and the ends are trimmed back to expose the area in which changes are being made. Only the part where “edit surgery” happens isn’t covered by the “skin”, i.e. self-contained file. Next a new export is done and the process is repeated. By seeing the several tracks where successive revisions have been made to the timeline, it’s possible to track the history of the changes that have been made to the story. Effectively this functions as a type of visual change list.

Visual organization of the bin. Most NLEs feature list and frame views of a bin’s contents. FCPX also features a filmstrip view in the event (bin), as well as a full strip for the selected clip at the top of the screen when in the list view. Unfortunately, the standard approach is for these to be arranged based on sorting criteria or computer defaults, not by manual methods. Typically the view is a tiled view for nice visual organization. But, of course, the decision-making process can be messy.

Premiere Pro at least lets you manually rearrange the order of the tiles, but none of the NLEs is as freeform as Media Composer. The bin’s frame view can be a completely messy affair, which editors use to their advantage. A common practice is to move all of the selected takes up to the top row of the bin and then have everything else pulled lower in the bin display, often with some empty space in between.

Multi-camera. It is common practice, even on smaller films, to shoot with two or more cameras for every scene. Assuming these are used for two angles of the same subject, like a tight and a wide shot on the person speaking, then it’s best to group these as multi-camera clips. This gives you the best way to pick among several options. Every NLE has good multi-camera workflow routines. However, there are times when you might not want to do that, such as in this blog post of mine.

Multi-channel source audio. Generally sound on a film shoot is recorded externally with several microphones being tracked separately. A multi-channel .wav file is recorded with eight or more tracks of materials. The location sound mixer will often mix a composite track of the microphones for reference onto channel one and/or two of the file. When bringing this into the edit, how you handle it will vary with each NLE.

Both Media Composer and Premiere Pro will enable you to merge audio and picture into synchronized clips and select which channels to include in the combined file. Since it’s cumbersome to drag along eight or more source channels for every edit in these track-based timelines, most editors will opt to only merge the clips using channel one (the mixed track) of the multi-channel .wav file. There will be times when you need to go to one of the isolated mics, in which case a match-frame will get you back to the source .wav, from which you can pull the clean channel containing the isolated microphone. If your project goes to a post-production mixer using Pro Tools, then the mixer normally imports and replaces all of the source audio with the multi-channel .wav files. This is common practice when the audio work done by the picture editor is only intended to be used as a temp mix.

With Final Cut Pro X, source clips always show up as combined a/v clips, with multi-channel audio hidden within this “container”. This is just as true with synchronized clips. To see all of the channels, expand the clip or select it and view the details in the inspector. This way the complexity doesn’t clog the timeline and you can still selectively turn on or off any given mic channel, as well as edit within each audio channel. No need to sync only one track or to match-frame back to the audio source for more involved audio clean-up.

Multi-channel mixing. Most films are completed as 5.1 surround mixes – left, center, right, left rear surround, right rear surround, and low-frequency emitter (subwoofer). Films are mixed so that the primary dialogue is mono and largely in the center channel. Music and effects are spread to the left and right channels with a little bit also in the surrounds. Only loud, low frequencies activate the subwoofer channel. Usually this means explosions or some loud music score with a lot of bottom. In order to better approximate the final mix, many editors advocate setting up their mixing rooms for 5.1 surround or at least an LCR speaker arrangement. If you’ve done that, then you need to mix the timeline accordingly. Typically this would mean mono dialogue into the center channel and effects and music to the left and right speakers. Each of these NLEs support sequence presets for 5.1, which would accommodate this edit configuration, assuming that your hardware is set up accordingly.

Audio – organizing temp sound. It’s key that you organize the sounds you use in the edit in such a way that it is logical for other editors with whom you may be collaborating. It should also make sense to the post-production mixer who might do the final mix. If you are using a track-based NLE, then structure your track organization on the timeline. For example, tracks 1-8 for dialogue, tracks 9-16 for sound effects, and tracks 17-24 for music.

If you are using Final Cut Pro X, then it’s important to spend time with the roles feature. If you correctly assign roles to all of your source audio, it doesn’t matter what your timeline looks like. Once properly assigned, the selection of roles on output – including when using X2Pro to send to Pro Tools – determines where these elements show up on an exported file or inside of a Pro Tools track sheet. The most basic roles assignment would be dialogue, effects and music. With multi-channel location recordings, you could even assign a role or subrole for each channel, mic or actor. Spending a little of this time on the front end will greatly improve efficiency at the back end.

For more ideas, click on the “tips and tricks” category or start at 12 Tips for Better Film Editing and follow the bread crumbs forward.

©2016 Oliver Peters

NLE as Post Production Hub

df2316_main_sm

As 2009 closed, I wrote a post about Final Cut Studio as the center of a boutique post production workflow. A lot has changed since then, but that approach is still valid and a number of companies can fill those shoes. In each case, rather than be the complete, self-contained tool, the editing application becomes the hub of the operation. Other applications surround it and the workflow tends to go from NLE to support tool and back for delivery. Here are a few solutions.

Adobe Premiere Pro CC

df2316_prproNo current editing package comes as close to the role of the old Final Cut Studio as does Adobe’s Creative Cloud. You get nearly all of the creative tools under a single subscription and facilities with a team account can equip every room with the full complement of applications. When designed correctly, workflows in any room can shift from edit to effects to sound to color correction – according to the load. In a shared storage operation, projects can stay in a single bay for everything or shift from bay to bay based on operator speciality and talent.

While there are many tools in the Creative Cloud kit, the primary editor-specific applications are Premiere Pro CC, After Effects CC and Audition CC. It goes without saying that for most, Photoshop CC and Adobe Media Encoder are also givens. On the other hand, I don’t know too many folks using Prelude CC, so I can’t say what the future for this tool will be. Especially since the next version of Premiere Pro includes built-in proxy transcoding. Also, as more of SpeedGrade CC’s color correction tools make it into Premiere Pro, it’s clear to see that SpeedGrade itself is getting very little love. The low-cost market for outboard color correction software has largely been lost to DaVinci Resolve (free). For now, SpeedGrade is really “dead man walking”. I’d be surprised if it’s still around by mid-2017. That might also be the case for Prelude.

Many editors I know that are heavy into graphics and visual effects do most of that work in After Effects. With CC and Dynamic Link, there’s a natural connection between the Premiere Pro timeline and After Effects. A similar tie can exist between Premiere Pro and Audition. I find the latter to be a superb audio post application and, from my experience, provides the best transfer of a Premiere Pro timeline into any audio application. This connection is being further enhanced by the updates coming from Adobe this year.

Rounding out the package is Photoshop CC, of course. While most editors are not big Photoshop artists, it’s worth noting that this application also enables animated motion graphics. For example, if you want to create an animated lower third banner, it can be done completely inside of Photoshop without ever needing to step into After Effects. Drop the file onto a Premiere Pro timeline and it’s complete with animation and proper transparency values. Update the text in Photoshop and hit “save” – voila the graphic is instantly updated within Premiere Pro.

Given the breadth and quality of tools in the Creative Cloud kit, it’s possible to stay entirely within these options for all of a facility’s post needs. Of course, roundtrips to Resolve, Baselight, ProTools, etc. are still possible, but not required. Nevertheless, in this scenario I typically see everything starting and ending in Premiere Pro (with exports via AME), making the Adobe solution my first vote for the modern hub concept.

Apple Final Cut Pro X

df2316_fcpxApple walked away from the market for an all-inclusive studio package. Instead, it opted to offer more self-contained solutions that don’t have the same interoperability as before, nor that of the comparable Adobe solutions. To build up a similar toolkit, you would need Final Cut Pro X, Motion, Compressor and Logic Pro X. An individual editor/owner would purchase these once and install these on as many machines as he or she owned. A business would have to buy each application for each separate machine. So a boutique facility would need a full set for each room or they would have to build rooms by specialty – edit, audio, graphics, etc.

Even with this combination, there are missing links when going from one application to another. These gaps have to be plugged by the various third-party productivity solutions, such as Clip Exporter, XtoCC, 7toX, Xsend Motion, X2Pro, EDL-X and others. These provide better conduits between Apple applications than Apple itself provides. For example, only through Automatic Duck Xsend Motion can you get an FCPX project (timeline) into Motion. Marquis Broadcast’s X2Pro Audio Convert provides a better path into Logic than the native route.

If you want the sort of color correction power available in Premiere Pro’s Lumetri Color panel, you’ll need more advanced color correction plug-ins, like Hawaiki Color or Color Finale. Since Apple doesn’t produce an equivalent to Photoshop, look to Pixelmator or Affinity Photo for a viable substitute. Although powerful, you still won’t get quite the same level of interoperability as between Photoshop and Premiere Pro.

Naturally, if your desire is to use non-Apple solutions for graphics and color correction, then similar rules apply as with Premiere Pro. For instance, roundtripping to Resolve for color correction is pretty solid using the FCPXML import/export function within Resolve. Prefer to use After Effects for your motion graphics instead of Motion? Then Automatic Duck Ximport AE on the After Effects side has your back.

Most of the tools are there for those users wishing to stay in an Apple-centric world, provided you add a lot of glue to patch over the missing elements. Since many of the plug-ins for FCPX (Motion templates) are superior to a lot of what’s out there, I do think that an FCPX-centric shop will likely choose to start and end in X (possibly with a Compressor export). Even when Resolve is used for color correction, I suspect the final touches will happen inside of Final Cut. It’s more of the Lego approach to the toolkit than the Adobe solution, yet I still see it functioning in much the same way.

Blackmagic Design DaVinci Resolve

df2316_resolveIt’s hard to say what Blackmagic’s end goal is with Resolve. Clearly the world of color correction is changing. Every NLE developer is integrating quality color correction modules right inside of their editing application. So it seems only natural that Blackmagic is making Resolve into an all-in-one tool for no other reason than self-preservation. And by golly, they are doing a darn good job of it! Each version is better than the last. If you want a highly functional editor with world-class color correction tools for free, look no further than Resolve. Ingest, transcoded and/or native media editing, color correction, mastering and delivery – all there in Resolve.

There are two weak links – graphics and audio. On the latter front, the internal audio tools are good enough for many editors. However, Blackmagic realizes that specialty audio post is still the domain of the sound engineering world, which is made up predominantly of Avid Pro Tools shops. To make this easy, Resolve has built-in audio export functions to send the timeline to Pro Tools via AAF. There’s no roundtrip back, but you’d typically get composite mixed tracks back from the engineer to lay into the timeline.

To build on the momentum it started, Blackmagic Design acquired the assets of EyeOn’s Fusion software, which gives then a node-based compositor, suitable for visual effects and some motion graphics. This requires a different mindset than After Effects with Premiere Pro or Motion with Final Cut Pro X (when using Xsend Motion). You aren’t going to send a full sequence from Resolve to Fusion. Instead, the Connect plug-in links a single shot to Fusion, where it can be effected through series of nodes. The Connect plug-in provides a similar “conduit” function to that of Adobe’s Dynamic Link between Premiere Pro and After Effects, except that the return is a rendered clip instead of a live project file. To take advantage of this interoperability between Resolve and Fusion, you need the paid versions.

Just as in Apple’s case, there really is no Blackmagic-owned substitute for Photoshop or an equivalent application. You’ll just have to buy what matches your need. While it’s quite possible to build a shop around Resolve and Fusion (plus maybe Pro Tools and Photoshop), it’s more likely that Resolve’s integrated approach will appeal mainly to those folks looking for free tools. I don’t see too many advanced pros doing their creative cutting on Resolve (at least not yet). However, that being said, it’s pretty close, so I don’t want to slight the capabilities.

Where I see it shine is as a finishing or “online” NLE. Let’s say you perform the creative or “offline” edit in Premiere Pro, FCPX or Media Composer. This could even be three editors working on separate segments of a larger show – each on a different NLE. Each’s sequence goes to Resolve, where the timelines are imported, combined and relinked to the high-res media. The audio has gone via a parallel path to a Pro Tools mixer and graphics come in as individual clips, shots or files. Then all is combined inside Resolve, color corrected and delivered straight from Resolve. For many shops, that scenario is starting to look like the best of all worlds.

I tend to see Resolve as less of a hub than either Premiere Pro or Final Cut Pro X. Instead, I think it may take several possible positions: a) color correction and transcoding at the front end, b) color correction in the middle – i.e. the standard roundtrip, and/or c) the new “online editor” for final assembly, color correction, mastering and delivery.

Avid Media Composer

df2316_avidmcThis brings me to Avid Media Composer, the least integrated of the bunch. You can certainly build an operation based on Media Composer as the hub – as so many shops have. But there simply isn’t the silky smooth interoperability among tools like there is with Adobe or the dearly departed Final Cut Pro “classic”. However, that doesn’t mean it’s not possible. You can add advanced color correction through the Symphony option, plus Avid Pro Tools in your mixing rooms. In an Avid-centric facility, rooms will definitely be task-oriented, rather than provide the ease of switching functions in the same suite based on load, as you can with Creative Cloud.

The best path right now is Media Composer to Pro Tools. Unfortunately it ends there. Like Blackmagic, Avid only offers two hero applications in the post space – Media Composer/Symphony and Pro Tools. They have graphics products, but those are designed and configured for news on-air operations. This means that effects and graphics are typically handled through After Effects, Boris RED or Fusion.

Boris RED runs as an integrated tool, which augments the Media Composer timeline. However, RED uses its own user interface. That operation is relatively seamless, since any “roundtrip” happens invisibly within Media Composer. Fusion can be integrated using the Connect plug-in, just like between Fusion and Resolve. Automatic Duck’s AAF import functions have been integrated directly into After Effects by Adobe. It’s easy to send a Media Composer timeline into After Effects as a one-way trip. In fact, that’s where this all started in the first place. Finally, there’s also a direct connection with Baselight Editions for Avid, if you add that as a “plug-in” within Media Composer. As with Boris RED, clips open up in the Baselight interface, which has now been enhanced with a smoother shot-to-shot workflow inside of Media Composer.

While a lot of shops still use Media Composer as the hub, this seems like a very old-school approach. Many editors still love this NLE for its creative editing prowess, but in today’s mixed-format, mixed-codec, file-based post world, Avid has struggled to keep Media Composer competitive with the other options. There’s certainly no reason Media Composer can’t be the center – with audio in Pro Tools, color correction in Resolve, and effects in After Effects. However, most newer editors simply don’t view it the same way as they do with Adobe or even Apple. Generally, it seems the best Avid path is to “offline” edit in Media Composer and then move to other tools for everything else.

So that’s post in 2016. Four good options with pros and cons to each. Sorry to slight the Lightworks, Vegas Pro, Smoke/Flame and Edius crowds, but I just don’t encounter them too often in my neck of the woods. In any case, there are plenty of options, even starting at free, which makes the editing world pretty exciting right now.

©2016 Oliver Peters

NAB 2016 – Technology and Friends

df2216_01_sm

The annual National Association of Broadcasters convention and equipment show – aka The NAB Show – is one of Las Vegas’ biggest. Typically about 100,000 folks officially attend the April ritual, including actual NAB members, along with a much larger group of production and post professionals there to check out the gear and attend the various on and off-site workshops and sessions.

df2216_03For me, that’s part of it, together with the fact that I cover the show as a journalist writing for Digital Video magazine and CreativePlanetNetwork website. Rather than rehash here what I’ve already written, here are the links to my preview and wrap-up articles. If you want to hear what several industry pros thought of as the highlights of the show, check out our local Orlando Post Pros user group meeting, produced by Adrenaline Films and sponsored by Blackmagic Design.df2216_05

In addition, NAB for me is a time to reconnect in person with old and new friends from all over the country and the world. These are folks I’ve known for years, as well as some that I’ve originally met only online. NAB is a chance to spend some face-to-face time – if only for a few moments. It’s also a chance to connect with online friends for the first time and get a new perspective on their ideas. That’s something that’s often lacking in so much of today’s social media and internet forums.

df2216_04This year I had an opportunity to connect with my friends Philip Hodgetts and Greg Clarke from Intelligent Assistance. Most likely you know them as the brains behind such apps as 7toX, XtoCC, Sync-n-Link-X, Lumberjack and more. They also routinely record a web series called Lunch with Philip and Greg. So along with plenty of time at the NAB show, we stepped out to the Firefly restaurant down the road from the convention center. There we recorded an hour of good conversation over unexpectedly excellent food for another episode. A welcomed break from the show.df2216_02

If you get a chance to attend next year, make sure to allow some time to connect with your friends, too. Gear is cool for the nerd in all of us, but it’s not the only part of Vegas!

©2016 Oliver Peters