
One of the things I really liked about Final Cut Pro “legacy” was the ability to create and customize numerous screen layouts. By rearranging its collection of tabbed and floating windows, it was easy to design and save numerous, task-specific, personalized screen layouts of the user interface. When I edit, I prefer to work on dual-display workstations, so I can lay out my tools with plenty of screen real estate. This usually means source bins and clips in one screen and the viewers and timeline in the other.
This level of interface customization is one of the features that I miss in Final Cut Pro X. Apple’s basic design for FCP X is intended to optimize it for single-display use, especially iMacs and MacBook Pros. The user interface for FCP X is more static than FCP “legacy” – using fly-out panels instead of moveable, floating, tabbed or docking windows. Nevertheless, if you have a dual-screen set-up, there are actually quite a few variations that the interface enables. A nice feature is that some of the show/hide toggles can be mapped to the keyboard. For now, you can’t save configurations, but it is reasonably quick to open, close and swap interface elements. (Click any of the images for an expanded view.)

One interesting concept is that you can access various open FCP X Libraries using Mission Control. It’s not always fool-proof and I haven’t found it all that useful, but it is possible.

In a typical two-display workstation with the main menu on the right display, you can open the viewers or event browser on the secondary display. That’s left in this example, with the events set to display on the secondary monitor. The event browser includes a panel that displays the libraries, events, keyword collections and smart collections. A button in the lower left corner of the interface lets you hide this panel. Doing so sets the browser focus only on the clips for the selected location and thus reduces clutter.

The event browser can be set to display clips as skimmable, filmstrip thumbnails or as a list of clips. In the list view, the selected clip is displayed as a single filmstrip across the top of the event browser. The viewer can be set to be a single, unified viewer that toggles between clips and the timeline. Alternatively, a second event viewer can be opened for a traditional 2-up source/record display.

You may also choose to display the viewers on the secondary display, which leaves the timeline and events on the main display. Video scopes are tied to the viewers and can be displayed in a horizontal (next to the image) or vertical (under the image) position.
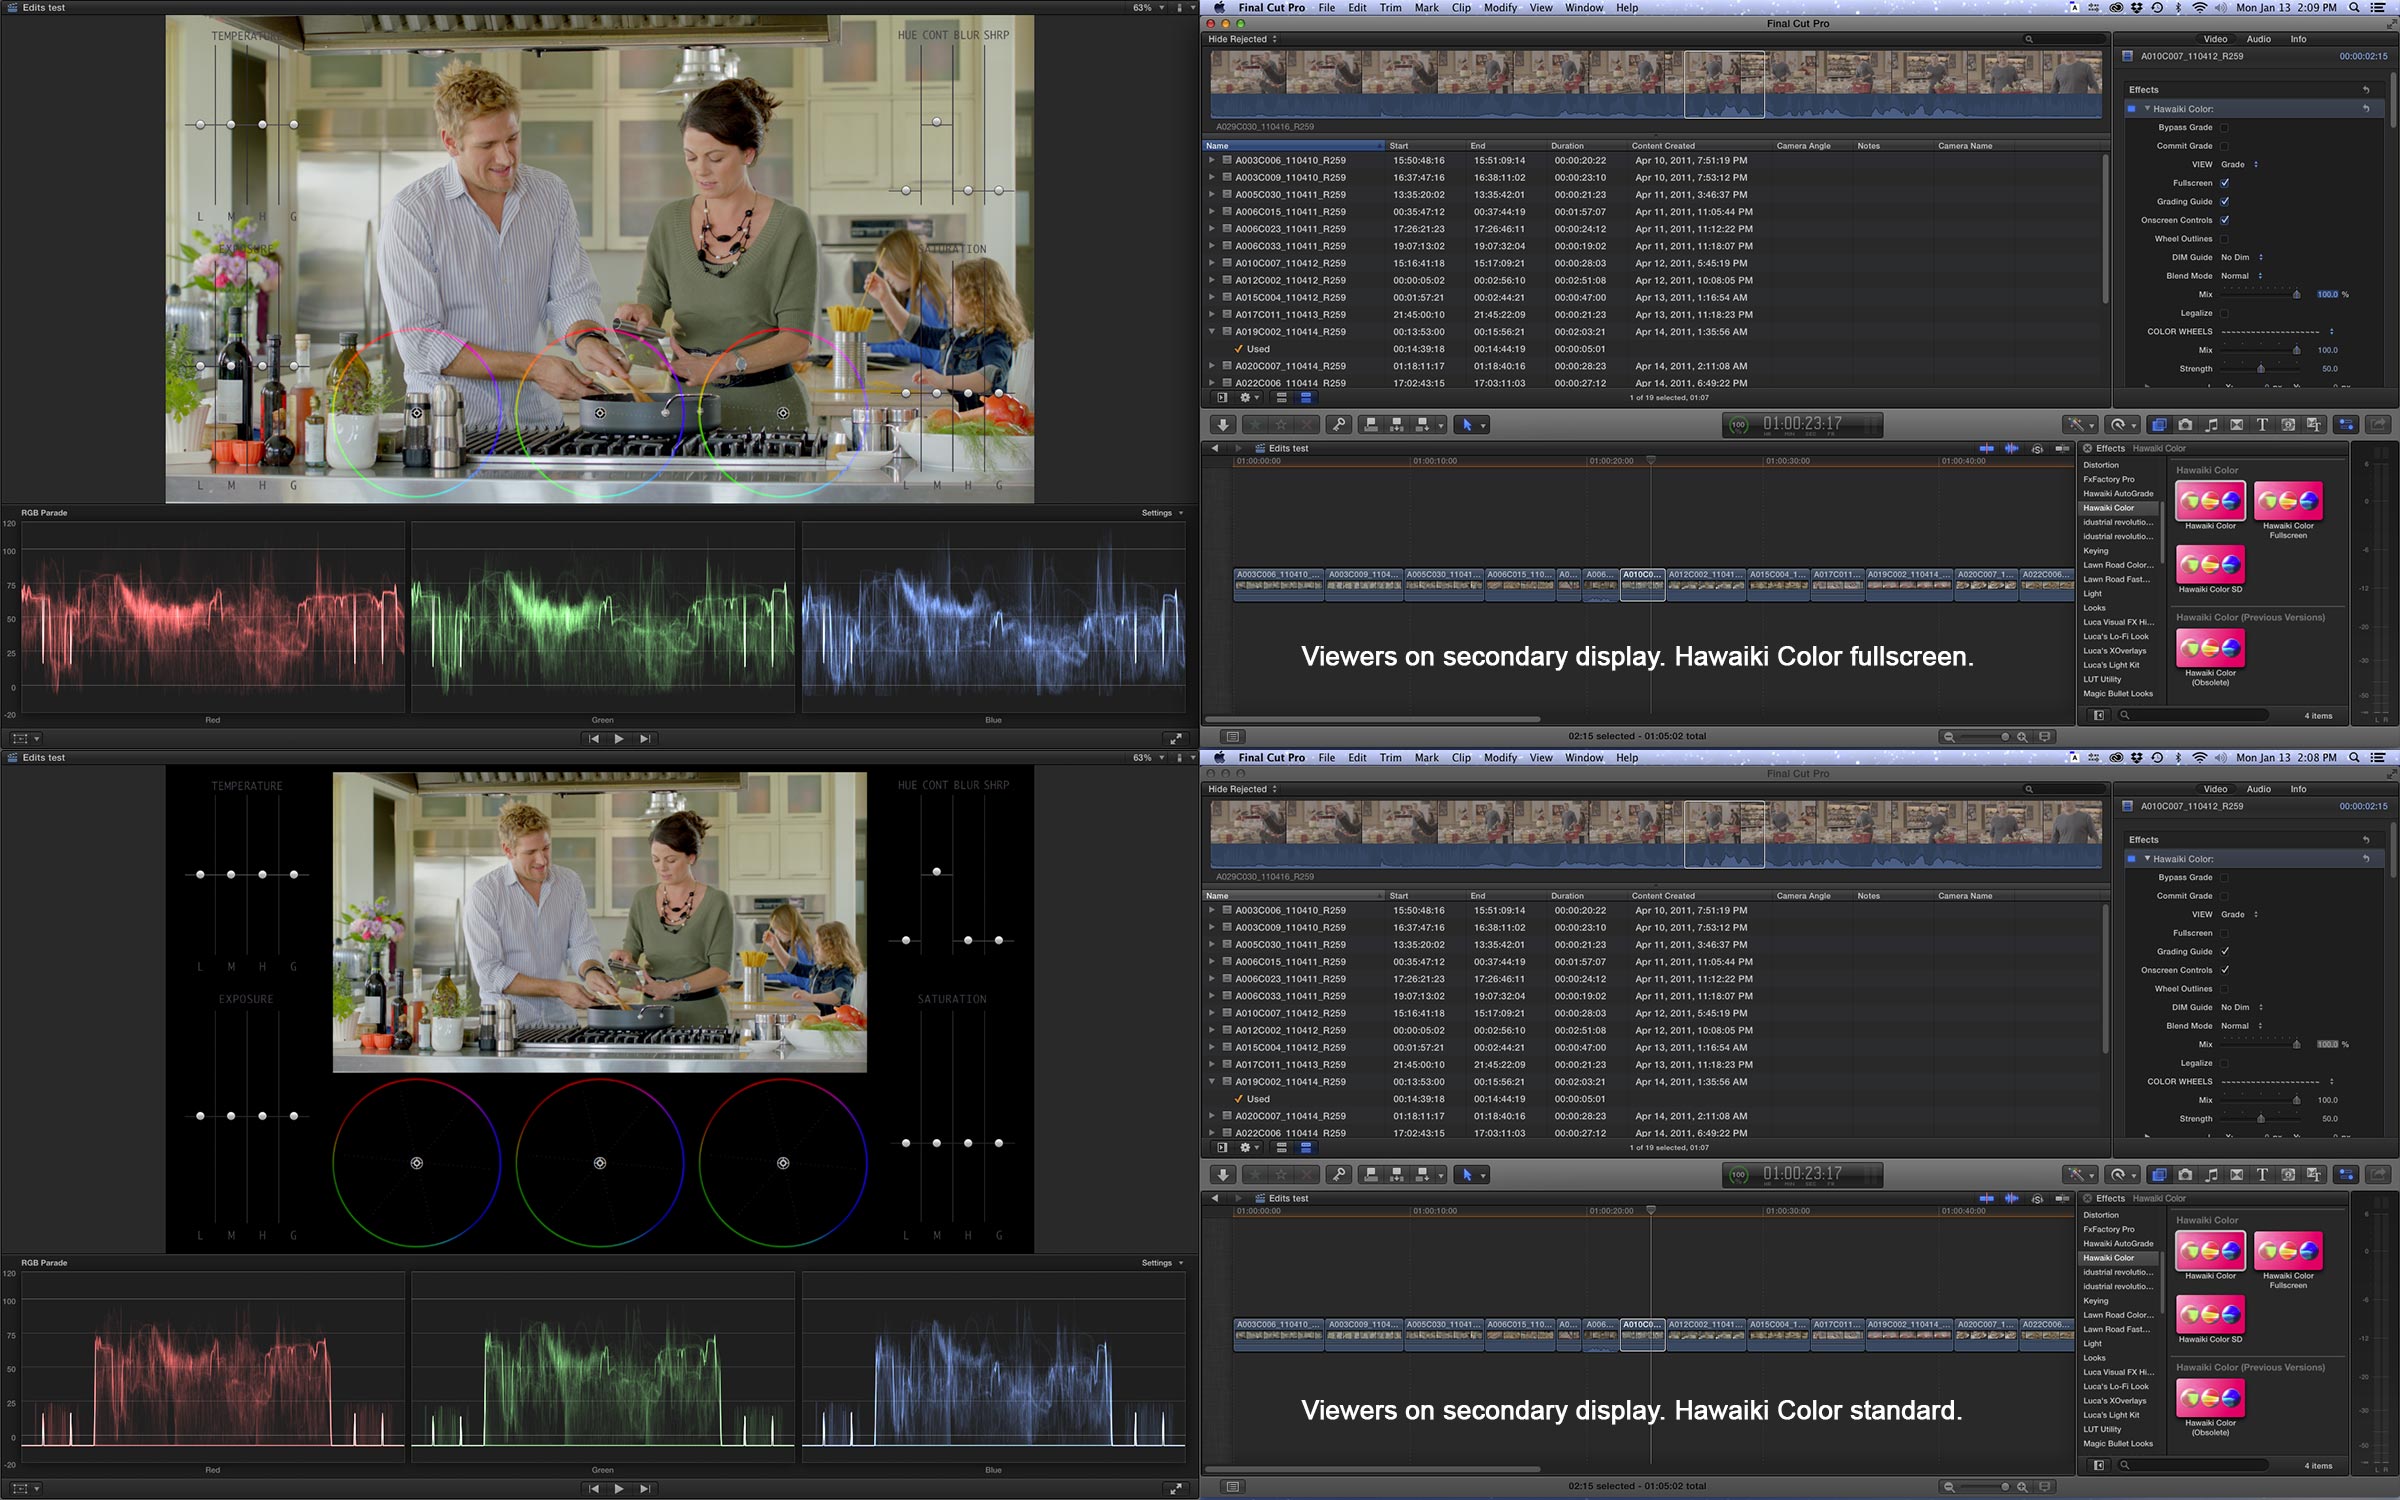
Some plug-ins use on-screen controls. One such filter is Hawaiki Color – a color grading tool. Its OSC may be displayed around the image or fullscreen as an image overlay. With the viewer on the secondary screen and scopes enabled, the editor maintains focus only on one screen while color correcting shots.

The timeline display offers several clip height options. The smallest is the “chiclet” view. The timeline clips can be expanded with other views that emphasize more of the picture information or more of the audio waveforms. In addition, video animation can be revealed for a clip. This will display keyframes for in-timeline adjustments.

I recently discovered that the order of which monitor is considered the primary and secondary display can be swapped. Simply drag the main window by the top header bar to the other monitor. As you do, the window on the secondary display automatically shifts to the opposite monitor. Then, click the green plus symbol at the top corner of the window to have it properly fill the screen. This example demonstrates that the fullscreen viewer window can be shifted onto either screen.

In this final example, the viewer/timeline and event browser (on the secondary display) are shifted from one screen to the next.
©2014 Oliver Peters
