
The industry has been eager to check out Blackmagic Design’s DaVinci Resolve 12. This “first look” is based on the initial build of the Resolve 12 public beta. A number of functions have not yet been enabled, so expect to see some changes in the product by the time you read this.
As with any public beta, the point is to get feedback and reap the benefit of crowdsourced quality testing, so be careful about using it on real jobs. That being said, so far I’ve found the public beta builds to be reasonably stable. I’ve had a chance to test the application on several different machines, including two 2009-2010 Mac Pro towers and a new 15” Retina MacBook Pro. Testing included a Sapphire 7950 and an Nvidia Quadro 4000 GPU, as well as the built-in Nvidia card on the laptop.
Blackmagic is no longer using the “Lite” name to identify the free version. The branding is now DaVinci Resolve 12 (free) and DaVinci Resolve 12 Studio ($995). The free version includes the majority of features and is limited to an output no larger that UltraHD 4K. The paid version adds advanced features, including stereoscopic functions, networked collaboration between users, multiple GPU support, and the ability to output at larger than UltraHD 4K frame sizes.
Blackmagic Design hardware products are required to output an analog or digital signal to an external video monitor or tape deck. If you are comfortable making color judgements based on the viewer image, then no hardware is require for operation and rendering. You can also hot rod your system with the DaVinci Control Surface ($29,995) or a number of supported third-party surfaces that are less costly.
Refreshing the user interface
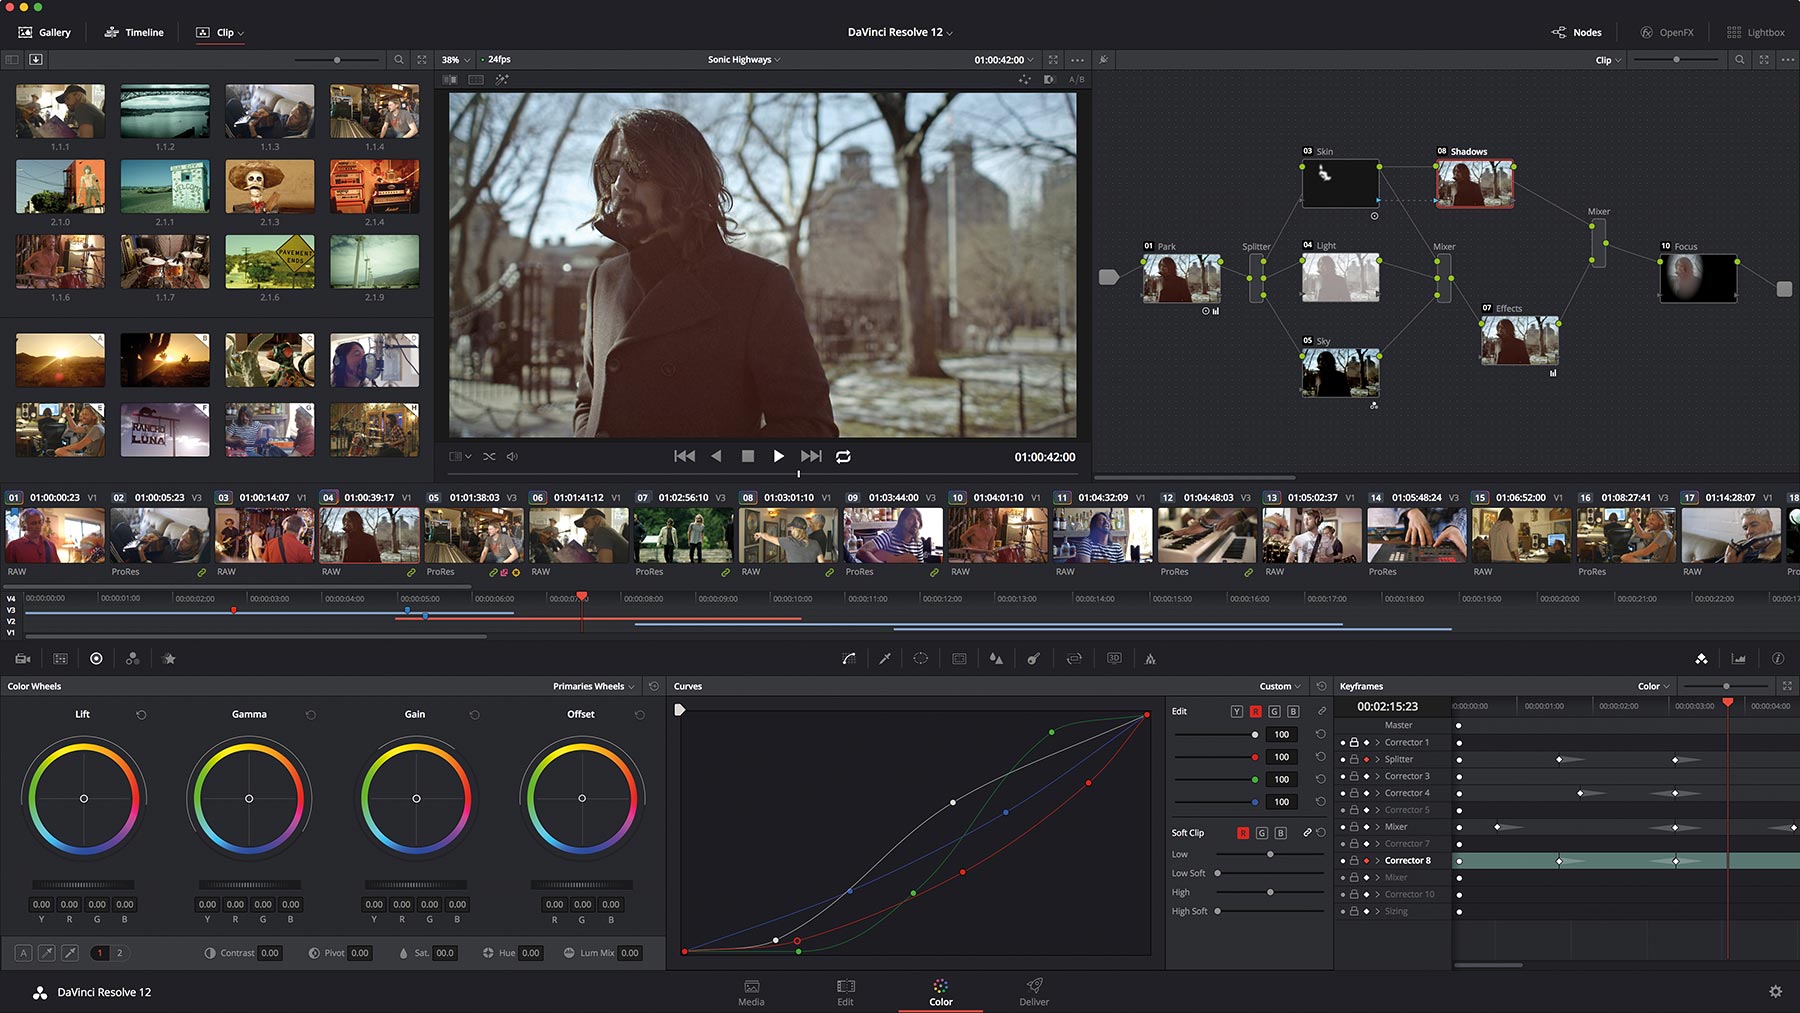
 DaVinci Resolve 12 ushers in a fresh user interface. Previous versions mimicked the style of Apple Final Cut Pro X, but the new UI is flatter with thinner fonts. It takes on the trendy design aesthetic employed in Windows 8/10 and Mac OS X/iOS. The background colors are a lighter grey with a faint blue cast to them. Although pleasing, I find that last part strange for a color correction application, where a true grey is considered the norm.
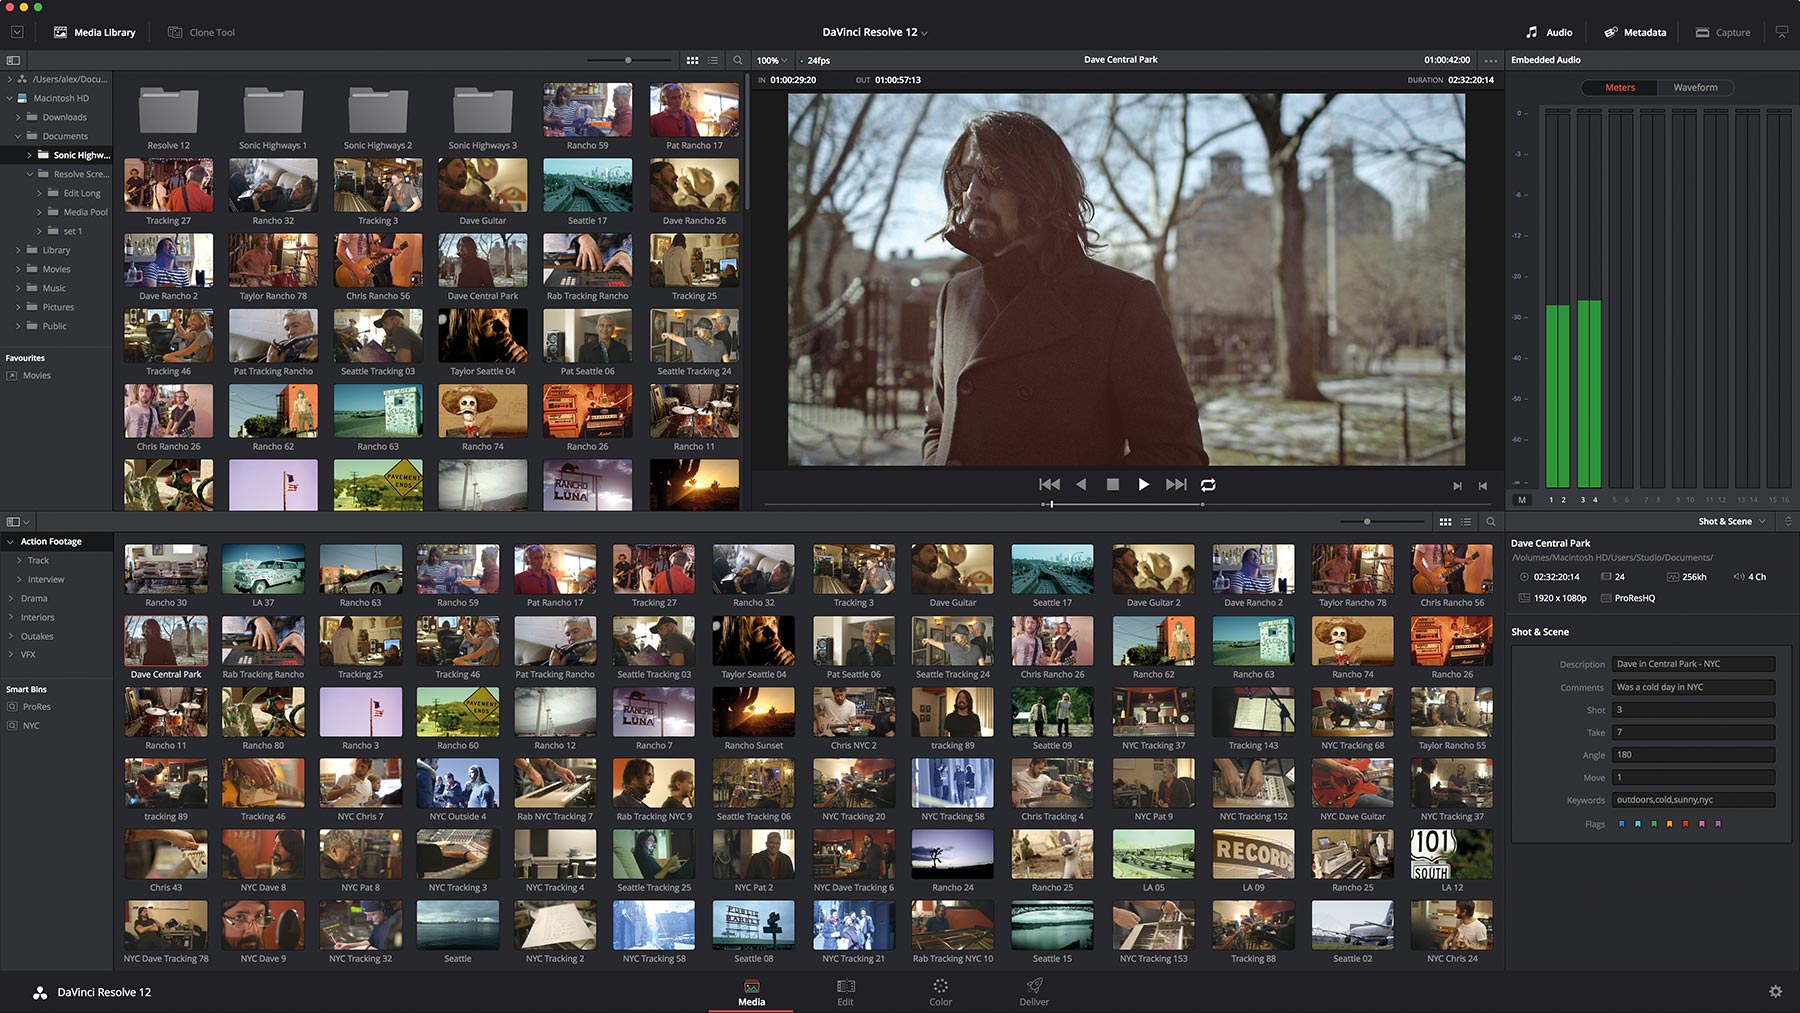
The interface has been optimized for single and dual-monitor systems, as well as higher-density displays, like Apple’s Retina. Resolve 12 is divided into four modes or pages: Media, Edit, Color, and Deliver. Software control panels can be opened or closed as needed, including videoscopes, media storage locations, mixers, audio meters, inspector, effects, and more. There are some interesting options to control whether or not a panel or window runs the full horizontal or vertical length of your display. However, there is no way to create a custom workspace by docking panels in different places and then saving that as your personal layout. Interface colors also can’t be personalized.
As before, timelines support sources with mixed formats and frame rates, however, the base timeline setting must match that of the project. This means you cannot have a 720p/59.94 and a 1080i/29.97 timeline within the same project. You can’t have multiple timelines open, but it’s easy to access different timelines in the same project quickly. You can also cut one timeline into another as a nested sequence. Such nests (as well as compound clips) can be decomposed in the timeline, leaving the original source clips to work with.
Resolve 12 no longer includes a separate section in the UI for timelines, as these are placed together with the source media in the Media Pool. One simple solution is to create a Bin for your edits and manually drag the timelines you’ve created into that Bin. Another option is to filter timelines into a Smart Bin by including some common element in the name. For example, you could append “seq” (for sequence) to the end of the name of each timeline. Set your filtering criteria to names that contain “seq” and then timelines will automatically show up in the Smart Bin that you’ve created for timelines.
Editing with Resolve 12
 As a a nonlinear editing application (NLE), Resolve 12 is an interesting mash-up among several other NLEs, including Premiere Pro, FCP 7 and FCP X. There are new features clearly intended for editors, including multi-camera editing. You can now organize clips and timelines into custom bins, add metadata, assign sortable color flags and other metadata values, and automatically filter clips into Smart Bins. You can sync grouped clips (double-system sound) and multi-camera clips using in-points, timecode, or audio waveforms. The multi-cam editing routine is similar to other NLEs, where you drop a multi-cam clip onto your main timeline and then cut between camera angles.
Blackmagic placed a lot of attention on timeline trim functions. It’s now possible to do some very elaborate asymmetrical trims of multiple clips. Slip/slide trimming and split audio is all very easy and fluid. There is no trim window, so on-the-fly JKL trimming – a la Media Composer – isn’t possible. When you trim via the mouse or keyboard, you get a 2-up preview in the viewer and a 4-up display when slipping and sliding clips. You can access a curve editor in the timeline for transitions, which lets you control the transition acceleration. When you select source clips in the list view mode of the browser, you get a skimmable filmstrip of the selected clip, much like in FCP X.
Video effects are still based on OpenFX, so any third-party filters and transitions that offer OFX host support (FilmConvert, BorisFX, NewBlueFX, etc.) will show up in either the Edit page effects palette or the Color page, depending on whether the filter is something that requires a color correction node in order to be applied. Blackmagic also includes its own toolbox of effects and transitions, including the new Smoothcut transition. This is a morphing dissolve designed to smooth jumpcuts between edited soundbites from on-camera interviews. It is similar to Adobe’s Morph Cut or Avid’s FluidMorph, but seems to rely more heavily on GPU processing. Therefore, you don’t have to wait until a lengthy analysis pass is completed before you can review the results. As with all of these effects, real-world results vary with how closely the alignment is on both sides of the cut. It tends to work best with a duration of two to four frames.
Audio went through big changes in Resolve 12 to improve performance and to add features. VST and AU plug-ins are supported. Any that are installed on your system will show up in the audio effects palette. Effects can be applied to clips or tracks and there’s automation-style track mixing. The way audio tracks are implemented seems confusing to me – especially audio track patching. Tracks can be mono, stereo, 5.1, or adaptive, but there’s no indication in the timeline window as to what type of track it is. When you edit a multi-cam clip to the timeline and the source audio contains several channels, then it is no longer possible to break those clips apart or access individual channels from the timeline. Both Adobe and Apple use similar methods, but with a better approach in each’s implementation. Like in Premiere Pro, it is best to start out by properly setting the source audio channel configuration in the clip properties menu for each clip. You can access this in the Media page.
Other improvements
 DaVinci Resolve 12 is not only about editing. Since Resolve is used a lot as a DIT tool to generate dailies, there’s a new capability in the Media page to apply color space changes and camera LUTs to a group of clips. If you shot log-encoded footage and apply a Rec709 LUT on the Media page, you’ll now see the corrected color throughout. The downside is that such LUTs are not visible on the Color page and can’t be removed in any of the color adjustment nodes.
The new blue and greenscreen 3D keyer is accessible on the Color page. It yields high-quality results and is aided by new, matte finesse controls, plus Resolve’s great masking and tracking capabilities. There’s also improved ACES support, better shot-matching between clips, and more.
Resolve 12 uses a central database to house all project files. This makes it harder to move files between users than with other NLEs. Previous versions let you export Resolve projects to move them to other systems, but now Resolve 12 adds copy, move, transcode, relink, and consolidate functions. Support for FCPXML (for projects offline-edited using FCP X) has been updated to the newest version of this format.
There had been a bug in how Resolve wrote FCPXML files, so going back into FCP X from Resolve exhibited relinking issues. This only occurred when importing on a different machine than where the files were generated. This bug appears to have been fixed in version 3 of the public beta build.
To include another tool for editors, Blackmagic added an AAF export to Pro Tools feature. I don’t have ProTools, so I wasn’t able to test the Pro Tools export properly. All audio clips are exported in .MXF format, which means many applications can’t play the audio. For example, when I imported the AAF into Apple Logic Pro X, the track sheet was blank. I have been able to send audio from Final Cut Pro X into Logic Pro X using X2Pro Audio Convert to create an AAF.
Performance
 Real-time media performance is critical to a good editing experience. Resolve 12 is optimized for hardware using the PCIe 3.0 bus, which supports greater bandwidth. Older Mac Pro towers or Windows computers that use PCIe 2.0, are going to be challenged when loaded with PCIe cards. You see this mainly in the Edit page, because more things are going on in the interface on that page. Windows user with the newest hardware and Mac users who own new “trash can” Mac Pros will most likely have a better editing experience than owners of legacy machines.
I experienced choppy video being displayed in the viewer of the Edit page, even though output through the Decklink was fine. Ironically, viewer and video output were smooth on the other pages. After consulting with Blackmagic, the following recommendations gave me the performance I would expect out of an NLE: run in the single-screen layout, close the audio mixer panel, close the audio meters, and/or switch the video monitoring setting to 8-bit. Of these, the mixer suggestion made the biggest difference. The ability to create on-the-fly, low-resolution proxies for editing wasn’t enabled with the first few builds of the public beta. It was turned on in build three. This gives you similar results to that of other NLEs running in a half-resolution, quarter-resolution or “dynamic real-time” mode.
One common mistake that I see users make, when I read some of the internet forum posts, is that they load up the timeline clips with color correction nodes and still expect real-time editing performance. Physics hasn’t changed. Adding effects and color correction to clips is going to negatively impact playback. As a general rule, get all of your editing done first and then save your color correction until last. You’ll be a lot happier.
Final thoughts
Once the official Resolve 12 release rolls out, we’ll see where it finds a place as an editor. This release won’t sway editors who are currently happy with one of the other popular NLEs to switch to Resolve 12 as their main axe. However, I suspect it will increasingly become the finishing tool of choice – probably edging out Autodesk Smoke over time. Now that the editing tools and performance are there, it becomes the ideal application for final edit revisions, grading, and mastering. It can already combine lists and media from a range of creative editing systems.
The other element in this equation is Fusion, the node-based composting application they picked up from EyeOn. There’s already a connecting plug-in between it and NLE timelines that Avid has enjoyed. With a bit more development time, I could clearly see some integration between Resolve and Fusion. That might be why “Studio” is now part of the name change. Hmmm…
When Resolve 11 came out, it, too, was touted as an editor. My critical assessment was that it was a grading tool that could be used as an editor, but you wouldn’t want to. With Resolve 12, Blackmagic has produced an application that is both grading tool and an editor. I could easily see myself using it as my secondary NLE. There is certainly great synergy between Final Cut Pro X and Resolve. Why not have both in your arsenal?
The enticement of a free editing application to many new users is hard to resist. Not to mention that it is cross-platform and unfettered by a software subscription business model. Clearly the development pace by Blackmagic Design since they acquired the product has been impressive. This makes me believe that Resolve will find a new audience willing to use it as their primary creative tool for start-to-finish post production.
Originally written for Digital Video magazine / CreativePlanetNetwork.
©2015 Oliver Peters
