CoreMelt TrackX

df_trackx_1_sm

Tracking isn’t something every editor does on a regular basis, but when you need it, very few NLEs have built-in tracking tools. This is definitely true with Apple Final Cut Pro X. CoreMelt makes some nice effects plug-ins, but in addition, they’ve produced a number of workflow tools that enhance the capabilities of Final Cut Pro X. These include Lock & Load X (stabilization) and SliceX (masking). The newest tool in the group is TrackX and like SliceX, it uses Mocha tracking technology licensed from Imagineer Systems. In keeping with the simplified controls common to FCP X effects, the tracking controls in TrackX are very easy to apply and use.

TrackX installs as three generators within FCP X – Simple Tracker, Track Layer and Track Text. All use the same planar-based Mocha tracker. The easiest to use – and where I get the best results – is the Simple Tracker. This lets you attach text or objects to a tracked item, so they travel with its movement.

The example used in their tutorial is of a downhill skier. As he races downhill, a timer read-out travels next to him. This works well and displays well, because the tracked objects do not have to perfectly adhere to each other. It uses a two-step process. First, create the item you want to attach and place it into a compound clip. Therefore, it can be a complex graphic and not just text. The second step is to track the object you want to follow. Apply the TrackX generator and trim to length, use the rectangle tool to select an area to be tracked, drop the compound clip into the filter control pane’s image well and then track forward or backwards. If there are hiccups within the tracks, you can manually delete or insert keyframes. Like other trackers, you can select the mode of analysis to be used, such as whether to follow position, scale or perspective.

df_trackx_2_smThe second TrackX generator is Track Layer. This worked well enough, but not nearly as well as the more advanced versions of Mocha that come with After Effects or are sold separately. This tool is designed to replace objects, such as inserting a screen image into a TV, window, iPad or iPhone. To use it, first highlight the area that will be replaced, by using the polygon drawing tool. Next, add the image to be used as the new surface. Then track. There are controls to adjust the scale and offset of the new surface image within its area.

In actual practice, I found it hard to get a track that wasn’t sloppy. It seems to track best when the camera is panning on an object without zooming or having any handheld rotation around the object. Since Mocha tracking is based on identifying flat planes, any three-dimensional motion around an object that results in a perspective change becomes hard to track. This is tough no matter what, but in my experience the standard Mocha trackers do a somewhat better job than TrackX did. A nice feature is a built-in masking tool, so that if your replacement surface is supposed to travel behind an object, like a telephone pole, you can mask the occluded area for realistic results.

Lastly, there’s Track Text. This generator has a built-in text editor and is intended to track objects in perspective. The example used in their demos is text, that’s attached to building rooftops in an aerial. The text is adjusted in perspective to be on the same plane as the roofs.

Overall, I liked the tools, but for serious compositing and effects, I would never turn to FCP X anyway. I would do that sort of work in After Effects. (TrackX does not install into Motion.) Nevertheless, for basic tracking, TrackX really fills a nice hole in FCP X’s power and is a tool that every FCP X editor will want at their fingertips.

For new features announced at NAB and coming soon, check out this video and post from FCP.co.

©2014 Oliver Peters

NAB 2014 Thoughts

Whodathunkit? More NLEs, new cameras from new vendors and even a new film scanner! I’ve been back from NAB for a little over a week and needed to get caught up on work while decompressing. The following are some thoughts in broad strokes.

Avid Connect. My trip started early with the Avid Connect costumer event. This was a corporate gathering with over 1,000 paid attendees. Avid execs and managers outlined the corporate vision of Avid Everywhere in presentations that were head-and-shoulders better than any executive presentations Avid has given in years. For many who attended, it was to see if there was still life in Avid. I think the general response was receptive and positive. Avid Everywhere is basically a realignment of existing and future products around a platform concept. That has more impact if you own Avid storage or asset management software. Less so, if you only own a seat of Media Composer or ProTools. No new software features were announced, but new pricing models were announced with options to purchase or rent individual seats of the software – or to rent floating licenses in larger quantities.

4K. As predicted, 4K was all over the show. However, when you talked to vendors and users, there was little clear direction about actual mastering in 4K. It is starting to be a requirement in some circles, like delivering to Netflix, for example; but for most users 4K stops at acquisition. There is interest for archival reasons, as well as for reframing shots when the master is HD or 2K.

Cameras. New cameras from Blackmagic Design. Not much of a surprise there. One is the bigger, ENG-style URSA, which is Blackmagic’s solution to all of the add-ons people use with smaller HDSLR-sized cameras. The biggest feature is a 10” flip-out LCD monitor. AJA was the real surprise with its own 4K Cion camera. Think KiPro Quad with a camera built around it. Several DPs I spoke with weren’t that thrilled about either camera, because of size or balance. A camera that did get everyone jazzed was Sony’s A7s, one of their new Alpha series HDSLRs. It’s 4K-capable when recorded via HDMI to an external device. The images were outstanding. Of course, 4K wasn’t everywhere. Notably not at ARRI. The news there is the Amiraa sibling to the Alexa. Both share the same sensor design, with the Amira designed as a documentary camera. I’m sure it will be a hit, in spite of being a 2K camera.

Mac Pro. The new Mac Pro was all over the show in numerous booths. Various companies showed housings and add-ons to mount the Mac Pro for various applications. Lots of Thunderbolt products on display to address expandability for this unit, as well as Apple laptops and eventually PCs that will use Thunderbolt technology. The folks at FCPworks showed a nice DIT table/cart designed to hold a Mac Pro, keyboard, monitoring and other on-set essentials.

FCP X. Speaking of FCP X, the best place to check it out was at the off-site demo suite that FCPworks was running during the show. The suite demonstrated a number of FCP X-based workflows using third-party utilities, shared storage from Quantum and more. FCP X was in various booths on the NAB show floor, but to me it seemed limited to partner companies, like AJA. I thought the occurrences of FCP X in other booths was overshadowed by Premiere Pro CC sightings. No new FCP X feature announcements or even hints were made by Apple in any private meetings.

NLEs. The state of nonlinear editing is in more flux than ever. FCP X seems to be picking up a little steam, as is Premiere Pro. Yet, still no clear market leader across all sectors. Autodesk announced Smoke 2015, which will be the last version you can buy. Following Adobe’s lead, this year they shift to a rental model for their products. Smoke 2015 diverges more from the Flame UI model with more timeline-based effects than Smoke 2013. Lightworks for the Mac was demoed at the EditShare booth, which will make it another new option for Mac editors. Nothing new yet out of Avid, except some rebranding – Media Composer is now Media Composer | Software and Sphere is now Media Composer | Cloud. Expect new features to be rolled in by the end of this year. The biggest new player is Blackmagic Design, who has expanded the DaVinci Resolve software into a full-fledged NLE. With a cosmetic resemblance to FCP X, it caused many to dub it “the NLE that Final Cut Pro 8 should have been”. Whether that’s on the mark or just irrational exuberance has yet to be determined. Suffice it to say that Blackmagic is serious about making it a powerful editor, which for now is targeted at finishing.

Death of i/o cards. I’ve seen little mention of this, but it seems to me that dedicated PCIe video capture cards are a thing of the past. KONA and Decklink cards are really just there to support legacy products. They have less relevance in the file-based world. Most of the focus these days is on monitoring, which can be easily (and more cheaply) handled by HDMI or small Thunderbolt devices. If you looked at AJA and Matrox, for example, most of the target for PCIe cards is now to supply the OEM market. AJA supplies Quantel with their 4K i/o cards. The emphasis for direct customers is on smaller output-only products, mini-converters or self-contained format converters.

Film. If you were making a custom, 35mm film scanner – get out of the business, because you are now competing against Blackmagic Design! Their new film scanner is based on technology acquired through the purchase of Cintel a few months ago. Now Blackmagic introduced a sleek 35mm scanner capable of up to 30fps with UltraHD images. It’s $30K and connects to a Mac Pro via Thunderbolt2. Simple operation and easy software (plus Resolve) will likely rekindle the interest at a number of facilities for the film transfer business. That will be especially true at sites with a large archive of film.

Social. Naturally NAB wouldn’t be the fun it is without the opportunity to meet up with friends from all over the world. That’s part of what I get out of it. For others it’s the extra training through classes at Post Production World. The SuperMeet is a must for many editors. The Avid Connect gala featured entertainment by the legendary Nile Rodgers and his band Chic. Nearly two hours of non-stop funk/dance/disco. Quite enjoyable regardless of your musical taste. So, another year in Vegas – and not quite the ho-hum event that many had thought it would be!

Click here for more analysis at Digital Video’s website.

©2014 Oliver Peters


Digital Anarchy

df_diganarch_3_smOne of the plug-in developers I’ve touched on from time to time is Digital Anarchy. They’ve developed a diverse repertoire of image enhancement plug-ins for photo and video hosts, as well as iOS devices. In the past, they’ve developed such interesting tools as ToonIt (now a Red Giant product), but current video offerings focus on Flicker Free, Knoll Sparks (Autodesk-only) and Beauty Box.

Flicker Free

Flicker Free is the newest plug-in and is designed specifically for flickering video – most notably time-lapse clips. It currently works in Final Cut Pro, After Effects and Premiere Pro. According to their website, versions for Avid, DaVinci Resolve, Assimilate Scratch and Sony Vegas will be coming soon. When you shoot time-lapse image sequences with a modern DSLR camera using electronic lenses, there is a minor luminance difference from one frame to the next. That’s because each time a new frame is exposed, the lens must return back to the identical iris setting as the previous frame. This does not happen with the precision needed for total seamlessness, when a series of images is played as a video clip. Flicker Free is a way to deflicker this varying exposure, but can also be successfully applied to high-frame-rate slow motion, rolling flicker caused by LED lighting and other issues. The controls are simple – just apply the filter and tweak the few sliders to taste.

Beauty Box

df_diganarch_1_sm

Beauty Box Video 3.0 is a skin smoothing filter that runs in After Effects, Assimilate Scratch, Avid, DaVinci Resolve, Final Cut Pro 7 and X, Premiere Pro, Nuke and Sony Vegas. If you are primarily a desktop software user (Apple, Adobe, Avid), then you’ll probably get the best results in After Effects. Selecting the range is like an HSL keyer, with dark and light color selections used to define the mask. The idea is to isolate skin color in an actor’s or actress’s face. Once the mask area is properly qualified, you have the ability to adjust contrast, saturation, hue and skin smoothing amounts. There are controls for additional sharpening and color correction, as well as shine removal. The newest 3.0 version is enhanced for GPU acceleration and is very responsive on a modern machine. Lastly, the mask area can be inverted, so that the smoothing operation is applied to everything outside of the face, for example.

Ugly Box

df_diganarch_2_smAround Halloween, Digital Anarchy also released a free variant of Beauty Box called Ugly Box. This was a special version that went the opposite direction of smoothing, by enhancing localized contrast. The effect of doing this is to intensify any texture in the skin. Then you can alter the hue, saturation and brightness. Although it’s a Halloween novelty, since you can make the “witch’s” face green, it could also be a useful tool in some productions like a zombie movie to enhance the effect of horror makeup.

©2014 Oliver Peters

Why film editors love Avid Media Composer

df_filmeditors_mc_1_sm

The editing of feature films is a small niche of the overall market for editing software, yet companies continue to highlight features edited with their software as a form of aspirational marketing to attract new users. Avid Technology has had plenty of competition since the start of the company, but the majority of mainstream feature films are still edited using Avid Media Composer software. Lightworks and Final Cut Pro “legacy” have their champions (soon to be joined by FCP X and Premiere Pro CC), but Media Composer has held the lead – at least in North America – as the preferred software for feature film editors.

Detractors of Avid like to characterize these film editors as luddites who are resistant to change. They like to suggest that the interface is stodgy and rigid and just not modern enough. I would suggest that change for change’s sake is not always a good thing. Originally Final Cut Pro got a foothold, because it did well with file-based workflows and was very cheap compared to turnkey workstations running Media Composer or Film Composer. Those days are long gone, so trying to make the argument based on cost alone doesn’t go very far.

Editing speed is gained through familiarity and muscle memory. When you hire a top-notch feature editor, you aren’t hiring them for their software prowess. Instead, you are hiring them for their mind, ideas and creativity. As such, there is no benefit to one of these editors in changing to another piece of software, just because it’s the cool kid on the block. Most know how they need to manipulate the software tools so well, that thinking about what to do in the interface just disappears.

Change is attractive to new users, with no preconceived preferences. FCP X acolytes like to say how much easier it is to teach new users FCP X than a track-based system, like FCP 7, Premiere Pro or Media Composer. As someone who’s taught film student editing workshops, my opinion is that it simply isn’t true. It’s all in what you teach, how you teach it and what you expect them to accomplish. In fact, I’ve had many who are eager to learn Media Composer, precisely because they know that it continues to be the “gold standard” for feature film editing software.

There are some concrete reasons why film editors prefer Media Composer. For many, it’s because Avid was their first NLE and it felt logical to them. For others, it’s because Avid has historically incorporated a lot of user input into the product. Here are a dozen factors that I believe keep the equation in favor of Avid Media Composer.

1. Film metadata – At the start of the NLE area, Avid was an offline editing system, designed to do the creative cut electronically. The actual final cut for release was done by physically conforming (cutting) camera negative to match the rough cut. Avid built in tools to cut at 24fps and to track the metadata back to film for frame-accurate lists that went to the lab and the negative cutter. Although negative cutting is all but dead today, this core tracking of metadata benefits modern versions of Media Composer and is still applicable to file-based workflows.

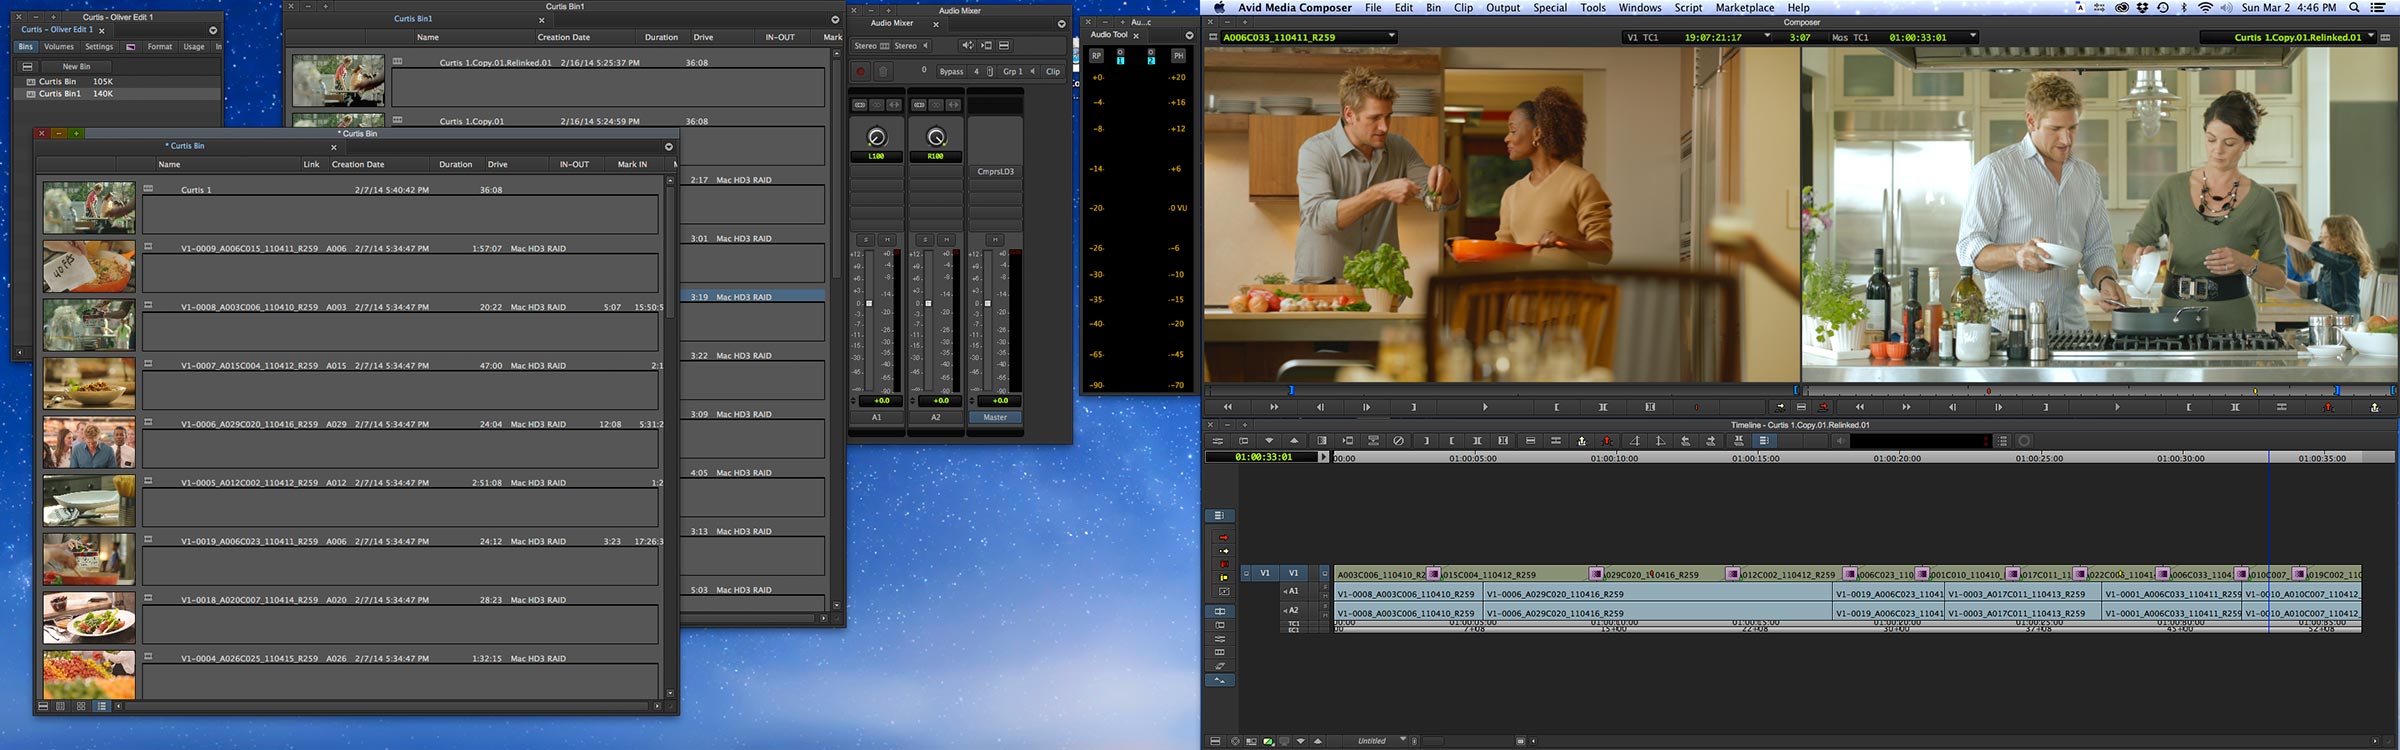
2. Trimming – Avid editors rave about the trim mode in Media Composer. It continues to be the best there is and has been augmented by Smart Tools for FCP-style contextual timeline editing. Many editors spend a lot of time trimming and nothing matches Media Composer.

3. Logical layout – When Avid started out, they sought the direct input from many working editors and this helped the interface evolve into something totally logical. For example, the keyboard position of JKL (transport controls) or mark/clear/go-to in/out is based on hand positions when placed on the keyboard and not an arbitrary choice by a software designer. If you look at the default keyboard map in Media Composer, there are fewer layers than the other apps. I would argue that Media Composer’s inherent design makes more layers unnecessary. In fact, more layers become more confusing.

 4. Script integration – Early on, Avid’s designers looked at how an actual written script might be used within the software. This is completely different than simply attaching copied-and-pasted text to a clip. With Media Composer, you can set up the bin with the actual script pages and link clips to the text of the dialogue. This is included with the base software as a manual process, but if you want to automate the linking, then the optional ScriptSync add-on will lighten the load. A second dialogue-driven option, PhraseFind, is great for documentary filmmakers. Some editors never use these features, but those that do, wouldn’t want to work any other way.

5. Built-in effect tools – The editorial team on most features gets involved in creating temporary visual effects. These are placeholders and style ideas meant to help the director and others visualize the effects. Sometimes these are editorial tricks, like an invisible split screen to combine different takes. The actual, final effect is done by the visual effects compositors. Avid’s internal tools, however, allow a talented film editor or assistant editor, to temp in an effect at a very high quality level. While Media Composer is certainly not a finishing tool equal to Avid DS (now EOL’ed) or Autodesk Smoke, the internal tools surpass all other desktop offline editors. FCP X requires third-party plug-ins or Motion 5 and Premiere Pro CC requires After Effects. With Media Composer, you have built-in rotosplining, tracking, one of the better keyers, stabilization and more. All without leaving the primary editing interface.

6. Surround mixing – Often film editors will build their rough cut with LCR (left-center-right) or full 5.1 surround panning. This helps to give a better idea of the theatrical mix and preps a sequence for early screenings with a preview or focus group audience. Other systems let you work in surround, too, but none as easily as with Media Composer, assuming you have the right i/o hardware.

7. Project sharing – You simply cannot share the EXACT SAME project file among simultaneous, collaborative users with any other editing application in the same way as you can with Media Composer and Avid’s Unity or Isis shared storage networks. Not every user needs that and there are certainly functional alternatives for FCP and Premiere Pro, as well as Media Composer. For film editors, the beauty of the Avid approach, is that everyone on the team can be looking at the exact same project. When changes are made to a sequence for a scene and the associated bin is saved, that updated info ripples to everyone else’s view. Large films may have as many as 15 to 20 connected users, once you tally editors, assistants and visual effects editors. This function is hard to duplicate with any alternative software.

8. Cross-platform and easy authorization – Media Composer runs under both Mac OS X and Windows on a wide range of machines. This makes it easy for editors on location to shift between a desktop workstation and a laptop, which may be of differing OS platforms. In the past, software licensing was via a USB license key (dongle), but newer versions use software authorization to activate the application. The software may be installed on any number of machines, with one active and authorized at any given time. De-activation and re-activation only takes a few seconds if you are connected to the Internet.

9. Portability of projects and media – Thanks to Avid’s solid media management with internal media databases, it’s easy to move drives between machines with no linking issues. Keep a common and updated project file on two machines and you can easily move a media drive back and forth between them. The software will instantly find all the correct media when Media Composer is launched. In addition, Avid has held one of the best track records for project interchange among older and newer versions.

10. Interoperability with lists – Feature film workflows are all about “playing well with others”. This means industry-standard list formats, like EDLs, AAFs and OMFs. I wish Media Composer would also natively read and write XMLs, but that’s a moving target and generally not as widely accepted in the facilities that do studio-level work. The other standards are all there and built into the tools. So sending lists to a colorist or audio editor/mixer requires no special third-party software.

11. Flexible media architecture – Avid has moved forward from the days when it only handled proprietary Avid media formats. Thanks to AMA, many native camera file formats and QuickTime codecs are supported. Through a licensing deal with Apple, even ProRes is natively supported, including writing ProRes MXF files on Apple workstations. This gives Media Composer wider support for professional codecs than nearly every other editing application. On top of that, you still have Avid’s own DNxHD, one of the best compression schemes currently in professional film and video use.

12. Robust – In most cases, Media Composer is a rock-solid application, with minimal hiccups and crashes. Avid editors have become very used to reliability and will definitely pipe up when that doesn’t happen. Generally Avid editors do not experience the sorts of RAM leaks that seem to plaque other editing software.

For the sake of full disclosure, I am a member of one of the advisory councils that are part of the Avid Customer Association. Obviously, you might feel that this taints what I’ve written above. It does not.

I’ve edited with Avid software since the early 90s, but I’ve edited for years with other applications, too. Most of the last decade leading up to Apple’s launch of Final Cut Pro X was spent on FCP “legacy”. The last couple of years have been spent trying to work the kinks out of FCP X. I’ve cut feature films on Media Composer, FCP 4-7, FCP X and even a Sony BVE-9100. I take a critical view towards all of them and go with what is best for the project.

Even though I don’t use many of the Avid-specific features mentioned above, like ScriptSync, I do see the strengths and why other film editors wouldn’t want to use anything else. My main goal here was to answer the question I hear so often, which is, “Why do they still use Avid?” I hope I’ve been able to offer a few answers.

For some more thoughts, take a look at these videos about DigitalFilm Tree’s transition from FCP to Media Composer and Alan Bell’s approach to using Avid products for cutting films like “The Hunger Games: Catching Fire”.

©2014 Oliver Peters