Generalists versus Specialists

“Jack of all trades, master of none” is a quote most are familiar with. But the complete quote “Jack of all trades, master of none, but oftentimes better than master of one” actually has quite the opposite perceived meaning. In the world of post production you have Jacks and Jills of all trades (generalists) and masters of one (specialists). While editors are certainly specialized in storytelling, I would consider them generalists when comparing their skillset to those of other specialists, such as visual effects artists, colorists, and audio engineers. Editors often touch on sound, effects, and color in a more general (often temp) way to get client approval. The others have to deliver the best, final results within a single discipline. Editors have to know the tools of editing, but not the nitty gritty of color correction or visual effects.

This is closely tied to the Pareto Principle, which most know as the 80/20 Rule. This principle states that 80% of the consequences come from 20% of the causes, but it’s been applied in various ways. When talking about software development, the 80/20 Rule predicts that 80% of the users are going to use 20% of the features, while only 20% of users will find a need for the other features. The software developer has to decide whether the target customer is the generalist (the 80% user) or the specialist (the 20% user). If the generalist is the target, then the challenge is to add some specialized features to service the advanced user without creating a bloated application that no one will use.

Applying these concepts to editing software development

When looking at NLEs, the first question to ask is, “Who is defined as a video editor today?” I would separate editors into three groups. One group would be the “I have to do it all” group, which generates most of what we see on local TV, corporate videos, YouTube, etc. These are multi-discipline generalists who have neither the time nor interest in dealing with highly specialized software. In the case of true one-man bands, the skill set also includes videography, plus location lighting and sound.

The “top end” – national and international commercials, TV series, and feature films – could be split into two groups: craft (aka film or offline) editors and finishing (aka online) editors. Craft editors are specialists in molding the story, but generalists when it comes to working software. Their technical skills don’t have to be the best, but they need to have a solid understanding of visual effects, sound, and color, so that they can create a presentable rough cut with temp elements. The finishing editor’s role is to take the final elements from sound, color, and the visual effects houses, and assemble the final deliverables. A key talent is quality control and attention to detail; therefore, they have no need to understand dedicated color, sound, or effects applications, unless they are also filling one of these roles.

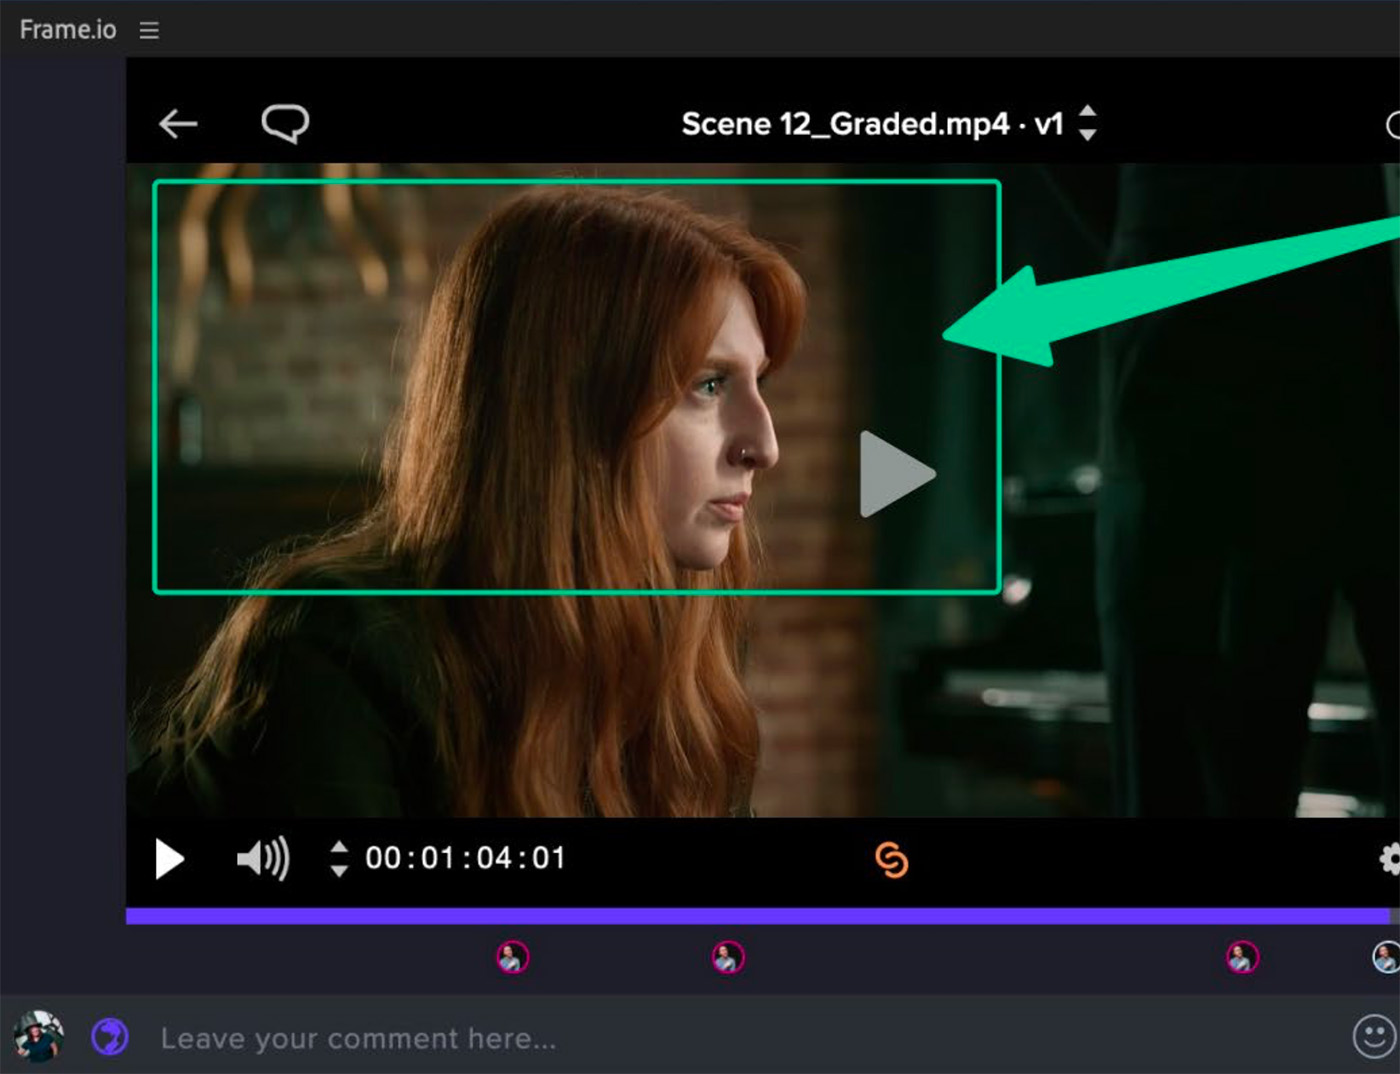
My motivation for writing this post stemmed from an open letter to Tim Cook, which many editors have signed – myself included. Editors have long been fans of Apple products and many gravitated from Avid Media Composer to Apple Final Cut Pro 1-7. However, when Apple reimagined Final Cut and dropped Final Cut Studio in order to launch Final Cut Pro X many FCP fans were in shock. FCPX lacked a number of important features at first. A lot of these elements have since been added back, but that development pace hasn’t been fast enough for some, hence the letter. My wishlist for new features is quite small. I recognize Final Cut for what it is in the Apple ecosystem. But I would like to see Apple work to raise the visibility of Final Cut Pro within the broader editing community. That’s especially important when the decision of which editing application to use is often not made by editors.

Blackmagic Design DaVinci Resolve – the über-app for specialists

This brings me to Resolve. Editors point to Blackmagic’s aggressive development pace and the rich feature set. Resolve is often viewed as the greener pasture over the hill. I’m going to take a contrarian’s point of view. I’ve been using Resolve since it was introduced as Mac software and recently graded a feature film that was cut on Resolve by another editor.

Unfortunately, the experience was more problematic than I’ve had with grades roundtripped to Resolve from other NLEs. Its performance as an editor was quite slow when trying to move around in the timeline, replace shots, or trim clips. Resolve wouldn’t be my first NLE choice when compared to Premiere Pro, Media Composer, or Final Cut Pro. It’s a complex program by necessity. The color management alone is enough to trip up even experienced editors who aren’t intimately familiar with what the various settings do with the image.

DaVinci Resolve is an all-in-one application that integrates editing (2 different editing models), color correction (aka grading), Fusion visual effects, and the Fairlight DAW. Historically, all-in-ones have not had a great track record in the market. Other such über-apps would include Avid|DS and Autodesk Smoke. Avid pulled the plug on DS and Autodesk changed their business model for the Flame/Smoke/Lustre product family into subscription. Neither DS nor Smoke as a standalone application moved the needle for market share.

At its core, Resolve is a grading application with Fusion and Fairlight added in later. Color, effects, and audio mixing are all specialized skills and the software is designed so that each specialist if comfortable with the toolset presented on those pages/modes. I believe Blackmagic has been attempting to capitalize on Final Cut editor discontent and create the mythical “FCP8” or “FC Extreme” that many wanted. However, adding completely new and disparate functions to an application that at its core is designed around color correction can make it quite unwieldy. Beginning editors are never going to touch most of what Resolve has to offer and the specialists would rather have a dedicated specialized tool, like Nuke, After Effects, or Pro Tools.

Apple Final Cut Pro – reimagining modern workflows for generalists

Apple makes software for generalists. Pages, Numbers, Keynote, Photos, GarageBand, and iMovie are designed for that 80%. Apple also creates advanced software for the more demanding user under the ProApps banner (professional applications). This is still “generalist” software, but designed for more complex workflows. That’s where Final Cut Pro, Motion, Compressor, and Logic Pro fit.

Apple famously likes to “skate to where the puck will be” and having control over hardware, operating system, and software gives the teams special incite to develop software that is optimized for the hardware/OS combo. As a broad-based consumer goods company Apple also understands market trends. In the case of iPhones and digital photography it also plays a huge role in driving trends.

When Apple launched Final Cut Pro X the goal was an application designed for simplified, modernized workflows – even if “Hollywood” wasn’t quite ready. This meant walking away from the comprehensive “suite of tools” concept (Final Cut Studio). They chose to focus on a few applications that were better equipped for where the wider market of content creators was headed – yet, one that could still address more sophisticated needs, albeit in a different way.

This reimagining of Final Cut Pro had several aspects to it. One was to design an application that could easily be used on laptops and desktop systems and was adaptable to single and dual screen set-ups. It also introduced workflows based on metadata to improve edit efficiency. It was intended as a platform with third parties filling in the gaps. This means you need to augment FCP to cover a few common industry workflows. In short, FCP is designed to appeal to a broad spectrum of today’s “professionals” and not how one might have defined that term in the early 1990s, when nonlinear editing first took hold.

For a developer, it gets down to who the product is marketed towards and which new features to prioritize. Generalists are going to grow the market faster, hence a better return on development resources. The more complex an application becomes, the more likely it is to have bugs or break when the hardware or OS is updated. Quality assurance testing (QA) expands exponentially with complexity.

Final thoughts

Do my criticisms of Resolve mean that it’s a bad application? No, definitely not! It’s powerful in the right hands, especially if you work within its left-to-right workflow (edit -> Fusion -> color -> Fairlight). But, I don’t think it’s the ideal NLE for craft editing. The tools are designed for a collection of specialists. Blackmagic has been on this path for a rather long time now and seem to be at a fork in the road. Maybe they should step back, start from a clean slate, and develop a fresh, streamlined version of Resolve. Or, split it up into a set of individual, focused applications.

So, is Final Cut Pro the ideal editing platform? It’s definitely a great NLE for the true generalist. I’m a fan and use it when it’s the appropriate tool for the job. I like that it’s a fluid NLE with a responsive UI design. Nevertheless, it isn’t the best fit for many circumstances. I work in a market and with clients that are invested in Adobe Creative Cloud workflows. I have to exchange project files and make sure plug-ins are all compatible. I collaborate with other editors and more than one of us often touches these projects.

Premiere Pro is the dominant NLE for me in this environment. It also clicks with how my mind works and feels natural to me. Although you hear complaints from some, Premiere has been quite stable for me in all my years of use. Premiere Pro hits the sweet spot for advanced editors working on complex productions without becoming overly complex. Product updates over the past year have provided new features that I use every day. However, if I were in New York or Los Angeles, that answer would likely be Avid Media Composer, which is why Avid maintains such dominance in broadcast operations and feature film post.

In the end, there is no right or wrong answer. If you have the freedom to choose, then assess your skills. Where do you fall on the generalist/specialist spectrum? Pick the application that best meets your needs and fits your mindset.

For another direct comparison check out this previous post.

©2022 Oliver Peters

Adobe’s Frame Rollout

Adobe acquired Frame.io last October. The latest Adobe Creative Cloud application updates showcase the first formal integration of Frame.io as a product within the Creative Cloud ecosystem. Frame.io had already developed a Premiere Pro integration using Adobe’s extensions architecture; however, the latest version of Premiere Pro and After Effects adds an integrated interface panel called Review with Frame.io.

Now your individual Adobe Creative Cloud subscription includes a Frame.io account at no additional charge. This includes 100GB of cloud storage (separate from existing Creative Cloud storage) for up to five projects, use by two collaborators, and unlimited access for reviewers. If you need more storage or to add more collaborators, then you can upgrade to a larger Frame.io plan, but at additional cost.

Adobe Creative Cloud Team and Enterprise accounts don’t fall under this plan and those admins will need to consult Adobe or Frame.io for a plan that best meets their needs. In other words, if you are a production company paying for an Adobe Team account with multiple users on the account, you don’t get 100GB of “free” Frame.io storage for each user. This offering is primarily designed for individual Adobe Creative Cloud subscribers.

Something to know before you start

There’s a gotcha for some existing Frame.io customers. You activate your new Adobe CC Frame.io service by logging in with the same e-mail and password as used for your Adobe ID. Let’s say you work freelance at a facility and are a collaborator on their Frame.io Team account. In that case, you might be using a personal email address to log into Frame.io. However, if that email is the same as used for your personal Adobe ID, then Frame.io does not know how to differentiate between the two.

To rectify this you need to use a different email for one of these two log-ins. This is generally a minor issue, since most people have more than one email address that they use. In my own case, I needed to change my Adobe ID email, which was a relatively quick procedure. This allows me to separately access either of the two Frame.io accounts as a collaborator, based on which email I log in with.

One confusing thing I encountered was that the account starts as a 30-day trial for a Frame.io Team account, so it looks like you are going to get billed extra after the trial ends. This is not the case. I think it’s a mistake for Adobe and Frame.io to do this, because they are trying to upsell you to the paid account. Fortunately there’s no need to enter payment information up front. I wish that this was clearer in the marketing details. Hopefully Adobe will correct this after the initial rollout. At the end of the 30-trial, you will be asked whether to pay or end the trial. If you opt to end the trial, then the account reverts to the free plan, which is the one included with your Adobe Creative Cloud subscription.

Getting started

Open the Review with Frame.io panel in Premiere Pro or After Effects and sign-in using your Adobe ID. This will open your default browser and send you to the Frame.io website to complete the sign-in. As long as you stay signed in, you can access Frame.io either in your web browser or within the panel. If you sign out, then next time you’ll need to sign in again using the Adobe ID.

I won’t go into how Frame.io itself works, since there are plenty of tutorials. This integration doesn’t change any of the operation. The Frame.io panel works like the previous extensions panel. A clip with reviewer comments can be synced to your Premiere Pro timeline for easy changes. Or you can simply work from the web portal and ignore the panel entirely. 100GB is plenty if your intent is to use Frame.io for low-resolution review files. However, if your intention is a larger, more complex workflow, then you may need to upgrade your Frame.io account after all.

Enter C2C

The bigger picture is that Frame.io is enthusiastically pushing its camera-to-cloud (C2C) workflow. I’m not really a big believer in this concept, but I know plenty of companies are going to announce more cloud and remote services at NAB. For many reasons, I don’t believe that all of our media will be in the cloud in a decade or two. However, I think Adobe does. In my opinion, it’s not a particularly good goal for users or the planet. But, I digress. In today’s world, what C2C offers in conjunction with the Premiere Pro integration is a Dropbox-style experience.

Let’s say your videographer is recording a corporate CEO interview in Los Angeles. The company’s PR rep is in New York and the editor in Atlanta. And there’s a very short turnaround schedule. In this basic scenario, both the videographer and editor are collaborators on a Frame.io project. While the interview is being recorded, the feed is being uploaded to Frame.io in near real-time. This requires some hardware on the camera side or it could be done by someone on set right after the recording ends. Once it’s in Frame.io, the PR rep in NYC can access and review the takes. The editor in Atlanta also sees the footage appear in the Frame.io panel within Premiere Pro. Files can be downloaded from the panel to the editor’s drives and the edit can start right away.

Given most standard internet speeds today and the 100GB bucket, this workflow makes sense if you are uploading smaller camera proxy files. Some proxies can actually be good enough to master with – especially in fast turnaround situations. In other scenarios, the proxies might be used to start the edit and later replaced with the high-res camera originals, once received from the shoot.

I feel that such situations are a lot fewer than the marketers want you to believe. Moving high-res files over the internet is never fast. FedEx often still offers the better option. So unless you really do need to get started right away, just wait for the media to arrive a day or so later. However, C2C for the purpose of an out-of-town producer reviewing takes remotely – especially in light of workflow changes caused by COVID over the past couple of years – has gained steam.

Frame.io is clear that just because they are an Adobe company doesn’t change their dedication to other workflows and other applications, such as Final Cut Pro. New announcements include native FilmLight Baselight integration, an app for Apple TV, and C2C partnerships with FiLMiC Pro.

If you are a current Frame.io customer without any Adobe subscription – no problem. Nothing changes for you. I’ve been using Frame.io since it launched and have been happy with the service. There are occasional glitches, but no worse than any other internet service, including your regular e-mail provider. Better yet, clients love the process. It’s not perfect, but it is one of the better review-and-approval sites and services on the market. If this is the first time you start using Frame.io by virtue of your Adobe subscription, then you are bound to see your daily workflow enhanced.

©2022 Oliver Peters

Analogue Wayback, Ep. 8

Nonlinear editing in the early days.

At the dawn of the “Hollywood East” days in central Florida, our post house, Century III, took up residency at Universal Studios Florida. As we ramped up the ability to support episodic television series production, a key member joined our team. John Elias was an A-list Hollywood TV series editor who’d moved to Florida in semi-retirement. Instead of retiring, he joined the company as our senior film editor.

Based on John’s experience in LA, our NLE of choice at that time was the Cinedco Ediflix. Like many of the various early NLEs, the Ediflix was a Rube Goldberg contraption. The edit computer controlled 12 VHS decks designed to mimic random access playback. The edit interface was controlled using a light pen. The on-screen display emulated numbered dialogue lines and vertical take lines somewhat like a script supervisor’s notation – only without any text for dialogue.

Shooting ratios were reasonable in those days; therefore, a day of filming was generally no more than an hour of footage. The negative would come back from the lab. The colorist would transfer and sync dailies in the telecine room, recording color-corrected footage to the camera master reels (1″ Type C). Dailies would then be copied to 3/4″ Umatic to be loaded into the Ediflex by the assistant editor. This included adding all the script information in a process called Script Mimic. The 3/4″ footage was copied to 12 duplicate VHS videocassettes (with timecode) for the Ediflex to use as its media.

The decks were industrial-grade JVC players. Shuttling and cueing performance was relatively fast with 60-minute cassettes. To edit and/or play a scene, the Ediflex would access the VHS deck closest to the desired timecode, cueing and switching between different decks to maintain real-time playback of a sequence. On most scripted shows, the editor could get through a scene or often even a complete act without the need to wait on a machine to cue or change videocassette loads.

Rough cuts were recorded back to 3/4″ for review by the director and producers. When the edit was locked, an EDL was transferred via floppy disk to the online edit bay where the film transfer masters were conformed at full quality. Since the Ediflex systems used an internal timebase corrector, image quality was reasonable and you could easily check for issues like proper lip-sync. So, while the system was a bit clunky in operation, it was head and shoulders better for film and TV offline editing than the digital upstarts – mainly thanks to relatively better image quality.

We leased four full Ediflex systems plus assistant stations by 1990. John and our team of offline editors cut numerous series, films, and even some custom, themed attraction programs. It was in this climate that Avid Technology came onto the scene and had to prove itself. We had seen one of the earliest Avid demos at NAB when they were still back in the “pipe-and-drape” section of the show floor. Most editors who were there will likely remember the Top Gun demo project and just how awful the image quality really was. There was no common computer media architecture, so Avid had to invent their own. As I remember, these were 4-bit images – very low-res and very posterized. But, most of the core editing functions were in place. 

Avid was making headway among commercial editors. The company was also eager to gain traction in the long-form market. As the resident post house on a major studio lot in a promising new market, making a successful sale to us was definitely of interest to them. To see if this was the right fit, Avid brought in a system for John to test. Avid legend Tom Ohanian also came down to train and work with John and run through a test project. They took an episode of one of the shows to see how the process compared with our experiences using Ediflex.

Unfortunately, this first test wasn’t great. Well into the week, the Mac’s internal drive crashed, thus corrupting the project file and bins. Your media becomes useless when the project is gone. This meant starting over. Needless to say, John was not a happy camper. When the cut was done, we decided to have the series producer review the rough cut to see if the quality was acceptable. This was the Swamp Thing series – a Universal property that you can still find in distribution. The show is dark and scenes generally happen at night. As the producer reviewed the edit, it was immediately clear that the poor image quality was a no-go at that time. It was impossible to see sync or proper eyeline on anything other than close-up shots. That temporarily tanked our use of Avid for series work.

Fast forward a couple of years. Avid’s image quality had improved and there was at least one in town. As a test run, we booked time on that unit and I cut a statewide citrus campaign. This was a more successful experience, so we soon added an Avid to our facility. This eventually grew to include several Media Composers, shared storage, and even a hero room rebuilt around Avid Symphony (a separate unit from Media Composer back then). Those systems were ultimately used to cut many shows, commercials, feature films, and IllumiNations: Reflections of Earth – a show that enjoyed a 20-year run at EPCOT.

©2022 Oliver Peters

Boris FX Optics 2022

Boris FX is a respected developer of visual effects tools for video. With the introduction of Optics in 2020, Boris FX further extended that expertise into the photography market. Optics installs as a plug-in for Adobe Photoshop, Lightroom, and Bridge. Optics is also installed as a standalone app that supports a variety of still image formats, including camera RAW. So, if you’ve avoided an Adobe subscription, you are still in luck. Before you go any further, I would encourage you to read my 2020 review of Optics (linked here) for an overview of how it works and how to use it.

How has Optics 2022 changed? 

Since that introduction in late 2020, Optics has gone through several free updates, but the 2022 version requires a small upgrade fee for existing users. If you are new to Optics, it’s available though subscription or perpetual licensing and includes a trial period to test the waters.

At first glance, Optics 2022 looks and operates much like the previous versions. Key changes and improvements for Optics 2022 include Mac M1 native support, Metal acceleration of most Sapphire filters, UI enhancements, and mask exchange with Photoshop. However, the big new features include the introduction of a Particle Illusion category with over 1700 emitters, more Sapphire filters, and the Beauty Studio filter set from Continuum. The addition of Particle Illusion might seem a bit odd for a photography application, but by doing so, Boris FX has enhanced Optics as a graphic design tool.

Taking those point-and-shoot photos into Optics 

I’ve used Optics since its introduction and was eager to review Optics 2022 when Boris FX contacted me. There was a local British car show this past Saturday – a superb opportunity to take some photos of vintage Jags, MGs, Minis, Bentleys, Triumphs, and Morgans on a sunny Florida weekend. To make this more real, I decided to shoot the stills with my plain vanilla iPhone SE 2020 using FiLMiC Pro’s FirstLight still photo app. Somewhere along the line, iOS and FirstLight have been updated to allow camera RAW photography. This wasn’t initially available and technically the SE doesn’t support Apple’s ProRAW codec. However, FirstLight now enables RAW recording of DNG files, which are kissing cousins of ProRAW. In the RAW mode, you get the full 4:3, 12MP sensor image. Alternate aspect ratios or in-app film emulations will be disabled.

After a morning of checking out classic cars, I returned home, AirDropped the stills to my iMac and started testing Optics. As RAW photos, the first step in Photoshop is to make any adjustment in the Adobe Camera RAW module before the photo opens in Photoshop. Next, send the layer to Optics, which launches the Optics 2022 application and opens that image in the Optics interface. When you’ve completed your Optics adjustments, click Apply to send the image back to Photoshop as a flat, rasterized image layer or a smart filter.

Working with layers and filters

As I discussed in my 2020 post, Optics itself is a layer-based system, similar to Photoshop. Each layer has separate blend and masking controls. Typically you add one effect per layer and stack more layers as you build up the look. The interface permits you to enable/disable individual layers, compare before and after versions, and adjust the display size and resolution.

Effects are organized into categories (FilmLab, Particle Illusion, Color, Light, etc) and then groups of filters within each category. For example, the Stylize category includes the various Sapphire paint filters. Each filter selection includes a set of presets. When you apply a filter preset, the parameters panel allows you to fine-tune the look and the adjustment of that effect, so you aren’t locked into the preset.

In addition to the parameters panel, many of the effects include on-screen overlay controls for visual adjustment. This is especially helpful with the Particle Illusion effects. For instance, you can change or modify the path of a lightning bolt by moving the on-screen points of the emitter.

Handling file formats

Optics supports TIFF, JPEG, PNG, and RAW formats, so you can open those straight into Optics without Photoshop. In the case of my DNG files, the first effect to be applied is a Develop filter. You can tweak the image values much like in the Adobe Camera RAW module. The operation for creating your look is the same as when you come from Photoshop, except that there is no Apply function. You will need to Save or Save As to export a flat, rasterized TIFF, PNG, or JPEG file. 

Unlike Photoshop, Optics does not have its own layered image format. You can save and recall a set-up. So if you’ve built up a series of filter layers for a specific look, simply save that set-up as a file (minus the image itself). This can be recalled and applied to any other image and modified to adapt that set-up for the new image. If you save the file in the TIFF format, then you have the option to save it with the set-up embedded. These files can be opened back up in Optics along with the various filter layers for further editing.

Performance

As I worked through my files on my iMac, Optics 2022 performed well, but I did experience a number of application crashes of just Optics. When Optics crashes, you lose any adjustments made to the image in Optics. However, when I tested Optics 2022 on my mid-2014 15″ MacBook Pro using the same RAW images, the application was perfectly stable. So it could be some sort of hardware difference between the two Macs.

Here’s one workflow item to be aware of between Photoshop and Optics. If you crop an image in Photoshop, the area outside of the crop still exists, but is hidden. That full image without the crop is the layer sent to Optics. If you apply a stylized border effect, the border is applied to the edges of the full image. Therefore, some or all of the border will be cropped upon returning to Photoshop. Optics includes internal crop controls, so in that instance, you might wish to crop in Optics first, apply the border, and then match the crop for the whole image once back in Photoshop.

All in all, it’s a sweet application that really helps when stuck for ideas about what to do with an image when you want to elevate it above the mundane. Getting great results is fast and quite enjoyable – not to mention, infinitely easier than in Photoshop. Overall, Optics is a great tool for any photographer or graphic designer.

Click through the gallery images below to see further examples of looks and styles created with Boris FX Optics 2022.

©2022 Oliver Peters