Adobe Premiere Pro CC is the dominant NLE that I encounter amongst my clients. Editors who’ve shifted over from Final Cut Pro “classic” may have simply transferred existing skills and working methods to Premiere Pro. This is great, but it’s easy to miss some of the finer points in Premiere Pro that will make you more productive. Here are seven tips that can benefit nearly any project.
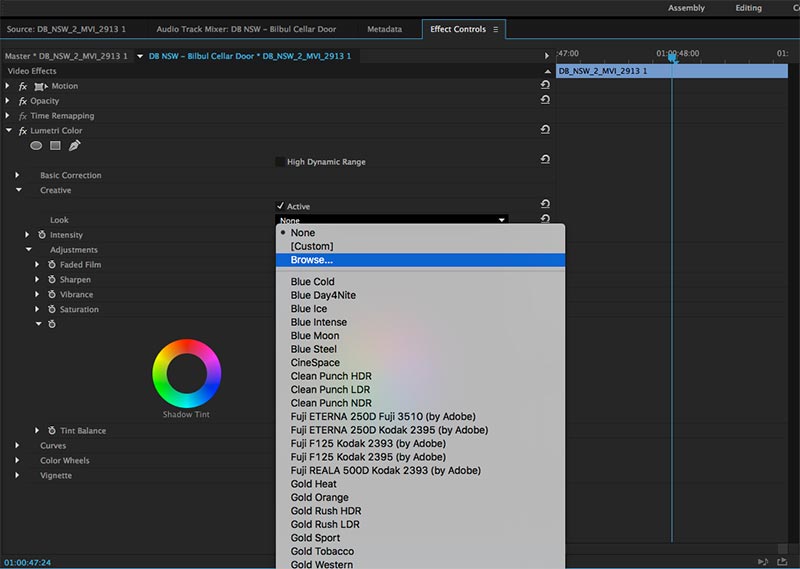 LUTs/Looks – With the addition of the Lumetri Color panel, it’s easy to add LUTs into your color correction workflow. You get there through the Color workspace preset or by applying a Lumetri Color effect to a timeline clip. Import a LUT from the Basic Correction or Creative section of the controls. From here, browse to any stored LUT on your hard drive(s) and it will be applied to the clip. There are plenty of free .cube LUTs floating around the web. However, you may not know that Look files, created through Adobe SpeedGrade CC in the .look format, may also be applied within the Creative section. You can also find a number of free ones on the web, including a set I created for SpeedGrade. Unlike LUTs, these also support effects used in SpeedGrade.
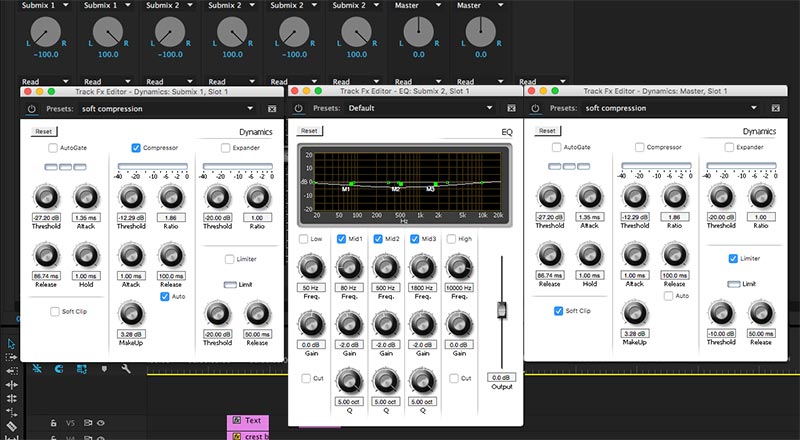 Audio Mixing – Premiere Pro features very nice audio tools and internal audio mixing is a breeze. I typically use three filters on nearly every mix I create. First, I will add a basic dynamic compressor to all of my dialogue tracks. To keep it simple, I normally use the default preset. Second, I will add an EQ filter to my music tracks. Here, I will set it to notch out the midrange slightly, which lets the dialogue sit a bit better in the mix. Finally I’ll add limiting to the master track. Normally this is set to soft clip at -10db. If I have specific loudness specs as part of my delivery requirements, then I’ll route my mix through a submaster bus first and apply the limiting to the submaster. I will apply the RADAR loudness meter to the master bus and adjust accordingly to be compliant.
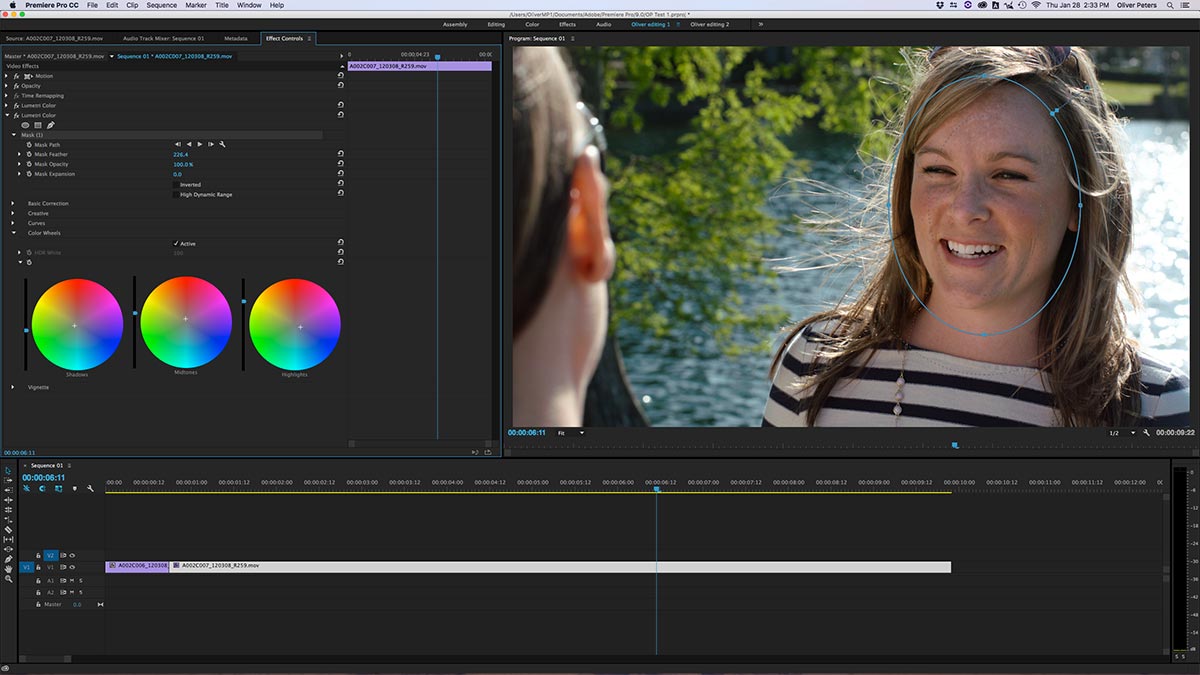 Power windows – This is a term that came from DaVinci Resolve, but is often used generically to talk about building up a grade on a shot by isolating areas within the image. For example, brightening someone’s face more so than the overall image. You can do this in Premiere Pro by stacking up more than one Lumetri Color effect onto a clip. Start by applying a Lumetri Color effect and grade the overall shot. Next, apply a second instance of the effect and use the built-in Adobe mask tool to isolate only the selection that you want to add the second correction to, such as an oval around someone’s head. Tweak color as needed. If the shot moves around, you can even use the internal tracker to have your mask follow the object. Do you have another area to adjust? Simply add a third effect and repeat the process.
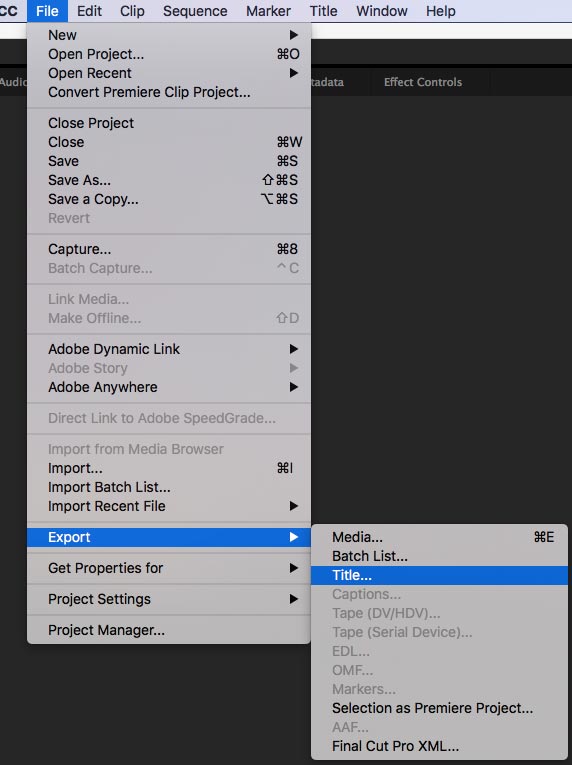 Export/import titles – Premiere Pro titles are created in the Title Designer module and these titles can be exported as a separate metadata file (.prtl format). Let’s say that you have a bunch of titles that you plan to use repeatedly on new projects, but you don’t want to bring these in from one project to the next. You can do this more simply by exporting and re-importing the title’s data file. Simply select the title in the bin and then File/Export/Title. The hitch is that Adobe’s Media Browser will not recognize the .prtl format and so the easiest way to import it into a new project is to drag it from the Finder location straight into the new Premiere Pro project. This will create a new title inside of the new project. Both instances of this title are unique, so editing the title in any project won’t effect how it appears elsewhere.
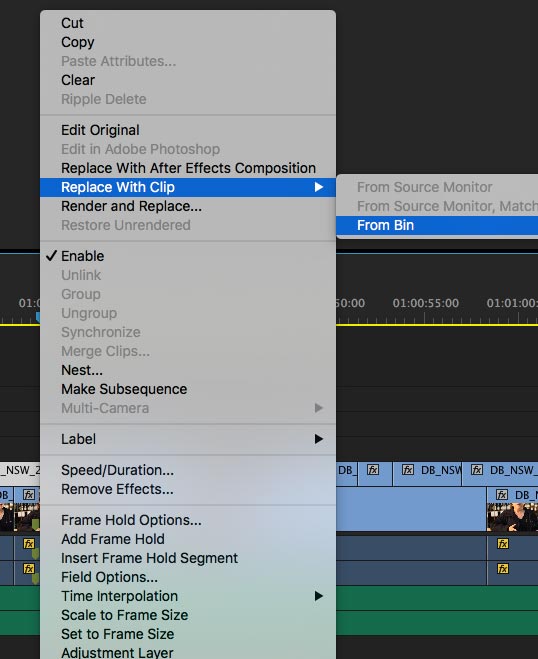 Replace with clip – I work on a number of productions where there’s a base version of a commercial and then a lot of versions with small changes to each. A typical example is a spot that uses many different lower third phone numbers, which are market-specific. The Replace function shaves hours off of this workflow. I first duplicate a completed sequence and rename it. Then I select the correct phone number in the bin, followed by selecting the clip in the timeline to be changed. Right-click and choose Replace with Clip/From Bin. This will update the content of my timeline clip with the new phone number. Any effects or keyframes that have been applied in the timeline remain.
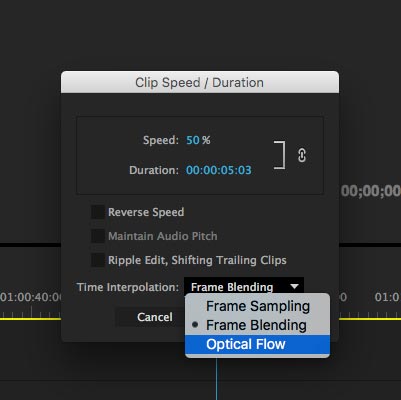 Optical flow speed changes – In a recent update, optical flow interpolation was added as one of the speed change choices. Other than the obvious uses of speed changes, I found this to be a get way of creating slower camera moves that look nearly perfect. Optical flow can be tricky – sometimes creating odd motion artifacts – and at other times it’s perfect. I have a camera slider move or pan along a mantle containing family photos. The move is too fast. So, yes, I can slow it down, but the horizontal motion will leave it as stuttering or blurred. However, if I slow it to exactly 50% and select optical flow, in most cases, I get very good results. That’s because this speed and optical flow have created perfect “in-between” frames. A :05 move is now :10 and works better in the edit. If I’m going to use this same clip a lot, I simply render/export it is as a new piece of media, which I’ll bring back into the project as if it were a VFX clip.
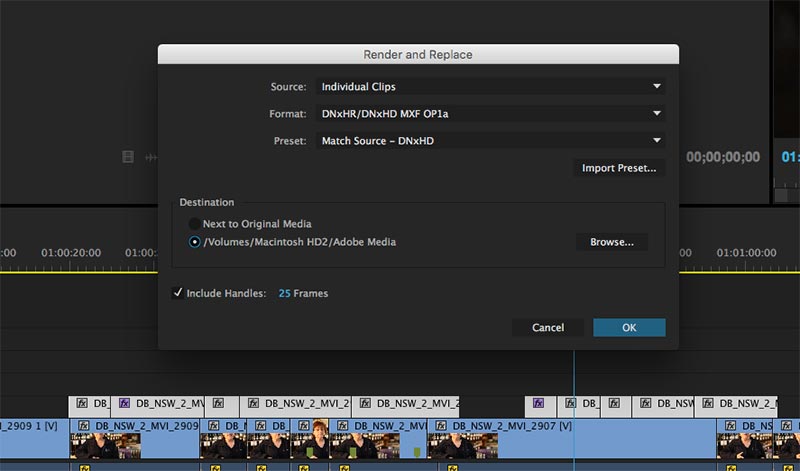 Render and replace – Premiere Pro CC is great when you have a ton of different camera formats and want to work with native media. While that generally works, a large project will really impede performance, especially in the editing sequence. The alternative is to transcode the clips to an optimized or so-called mezzanine format. Adobe does this in the sequence rather than in the bin and it can be done for individual clips or every clip within the sequence. You might have a bunch of native 4K .mp4 camera clips in a 1080p timeline. Simply select the clips within the timeline that you would like to transcode and right-click for the Render and Replace dialogue. At this point you have a several options, including whether to use clip or sequence settings, handle length, codec, and file location. If you choose “clip”, then what you get is a new, trimmed clip in an optimized codec, which will be stored in a separate folder. This becomes a great way to consolidate your media. The clip is imported into your bin, so you have access to both the original and the optimized clip at the original settings. Therefore, your consolidated clips are still 4K if that’s how they started.
This also works for Dynamic Link After Effects compositions. Render and Replace those for better timeline performance. But if you need to go back to the composition in order to update it in After Effects, that’s just a few clicks away.
©2016 Oliver Peters
