As an early adopter of Avid systems at a highly visible facility, I first got to know Steve Bayes through his on-site visits. He was the one taking notes about how a customer used the product and what workflow improvements they’d like to see. Over the years, as an editor and tech writer, we’ve kept in touch through his travels from Avid to Media 100 and on to Apple. It was always good to get together and decompress at the end of a long NAB week.
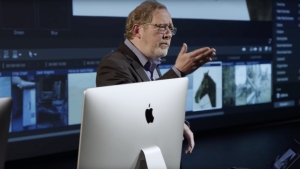
With a career of using as well as helping to design and shepherd a wide range of post-production products, Steve probably knows more about a diverse field of editing systems than most other company managers at editing systems manufacturers. Naturally many readers will know him as Apple’s Senior Product Manager for Final Cut Pro X, a position he held until last year. But most users have little understanding of what a product manager actually does or how the products they love and use every day get from the drawing board into their hands. So I decided to sit down with Steve over Skype and pull back the curtain just a little on this very complex process.
______________________________________________________
[OP] Let’s start this off with a deep dive into how a software product gets to the user. What part does a product manager play in developing new features and where does engineering fit into that process?
[SB] I’m a little unconventional. I like to work closely with the engineers during their design and development, because I have a strong technical and industry background. More traditional product managers are product marketing managers who take a more hands-off, marketing-oriented approach. That’s important, but I never worked liked that.
My rule of thumb is that I will tell the engineers what the problem is, but I won’t tell them how to solve it. In many cases the engineers will come back and say, “You’ve told us that customers need to do this ‘thing.’ What do they really want to achieve? Are you telling us that they need to achieve it exactly like this?” And so you talk that out a bit. Maybe this is exactly what the customers really want to do, because that’s what they’ve always done or the way everyone else does it. Maybe the best way to do it is based on three other things in emerging technology that I don’t know about.
In some cases the engineers come back and say, “Because of these other three things you don’t know about, we have some new ideas about how to do that. What do you think?” If their solution doesn’t work, then you have to be very clear about why and be consistent throughout the discussion, while still staying open to new ways of doing things. If there is a legitimate opportunity to innovate, then that is always worth exploring.
Traveling around the world talking to post-production people for almost 30 years allowed me to act as the central hub for that information and an advocate for the user. I look at it as working closely in partnership with engineering to represent the customer and to represent the company in the bigger picture. For instance, what is interesting for Apple? Maybe those awesome cameras that happen to be attached to a phone. Apple has this great hardware and wonderful tactile devices. How would you solve these issues and incorporate all that? Apple has an advantage with all these products that are already out in the world and they can think about cool ways to combine those with professional editing.
In all the companies I’ve worked for, we work through a list of prioritized customer requests, bug fixes, and things that we saw on the horizon within the timeframe of the release date or shortly thereafter. You never want to be surprised by something coming down the road, so we were always looking farther out than most people. All of this is put together in a product requirements document (PRD), which lays out everything you’d like to achieve for the next release. It lists features and how they all fit together well, plus a little bit about how you would market that. The PRD creates the starting point for development and will be updated based on engineering feedback.
 You can’t do anything without getting sign-off by quality assurance (QA). For example, you might want to support all 10,000 of the formats coming out, but QA says, “Excuse me? I don’t think so!” [laughs] So it has to be achievable in that sense – the art of the possible. Some of that has to do with their resources and schedule. Once the engineers “put their pencils down,” then QA starts seriously. Can you hit your dates? You also have to think about the QA of third parties, Apple hardware, or potentially a new operating system (OS). You never, ever want to release a new version of Final Cut and two weeks later a new OS comes out and breaks everything. I find it useful to think about the three points of the development triangle as: the number of features, the time that you have, and the level of stability. You can’t say, “I’m going to make a really unstable release, but it’s going to have more features than you’ve ever seen!” [laughs] That’s probably a bad decision.
Then I start working with the software in alpha. How does it really work? Are there any required changes? For the demo, I go off and shoot something cool that is designed specifically to show the features. In many ways you are shooting things with typical problems that are then solved by whatever is in the new software. And there’s got to be a little something in there for the power users, as well as the new users.
As you get closer to the release, you have to make decisions about whether things are stable enough. If some feature is not going to be ready, then you could delay it to a future release — never ideal, but better than a terrible user experience. Then you have to re-evaluate the messaging. I think FCP X has been remarkably stable for all the releases of the last eight years.
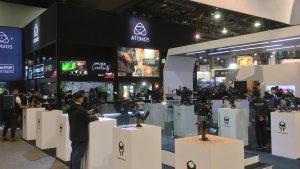
You also have to bring in the third parties, like developers, trainers, or authors, who provide feedback so we can make sure we haven’t broken anything for them. If there was a particularly important feature that required third parties to help out, I would reach out to them individually and give them a little more attention, making sure that their product worked as it should. Then I would potentially use it in my own presentation. I worked closely with SpeedScriber transcription software when Apple introduced subtitling and I talked every day with Atomos while they were shooting the demo in Australia on ProRes RAW.
[OP] What’s the typical time frame for a new feature or release – from the germ of an idea until it gets to the user?
[SB] Industry-wide, companies tend to have a big release and then a series of smaller releases afterwards that come relatively quickly. Smaller releases might be to fix minor, but annoying bugs that weren’t bad enough to stop the larger release. You never ship with “priority one” (P1) bugs, so if there are some P2s or P3s, then you want to get to them in a follow-up. Or maybe there was a new device, codec, camera, or piece of hardware that you couldn’t test in time, because it wasn’t ready. Of course, the OS is changing while you are developing your application, as well. One of my metaphors is that “you are building the plane while you are flying it.” [laughs]
I can’t talk about the future or Apple specifically, but historically, you can see a big release might take most of a year. By the time it’s agreed upon, designed, developed, “pencils down – let’s test it” – the actual development time is not as long as you might think. Remember, you have to back-time for quality assurance. But, there are deeper functions that you can’t develop in that relatively short period of time. Features that go beyond a single release are being worked on in the background and might be out in two or three releases. You don’t want to restrict very important features just to hit a release date, but instead, work on them a bit longer.
Final Cut is an excellent application to demonstrate the capabilities of Apple hardware, ease of use, and third party ecosystem. So you want to tie all these things together as much as you can. And every now and then you get to time things so they hit a big trade show! [laughs]
[OP] Obviously this is the work of a larger team. Are the romanticized tales of a couple of engineers coming out of the back room with a fully-cooked product more myth than reality?
[SB] Software development is definitely a team effort. There are certain individuals that stand out, because they are good at what they do and have areas of specialty. They’ll come back and always give you more than you asked for and surprise you with amazing results. But, it’s much more of a coordinated effort – the customer feedback, the design, a team of managers who sign off on all that, and then initial development.
 If it doesn’t work the way it’s supposed to, you may call in extra engineers to deal with the issues or to help solve those problems. Maybe you had a feature that turned out more complicated than first thought. It’s load balancing – taking your resources and moving them to where they do the most good for the product. Plus, you are still getting excellent feedback from the QA team. “Hey, this didn’t work the way we expected it to work. Why does it work like that?” It’s very much an effort with those three parts: design, engineering, and QA. There are project managers, as well, who coordinate those teams and manage the physical release of the software. Are people hitting their dates for turning things in? They are the people banging on your door saying, “Where’s the ‘thing with the stuff?'” [laughs]
There are shining stars in each of these areas or groups. They have a world of experience, but can also channel the customer – especially during the testing phase. And once you go to beta, you get feedback from customers. At that point, though, you are late in the process, so it’s meant to fix bugs, not add features. It’s good to get that feature feedback, but it won’t be in the release at that point.
[OP] Throughout your time at various companies, color correction seems to be dear to you. Avid Symphony, Apple Color when it was in the package, not to mention the color tools in Final Cut Pro X. Now nearly every NLE can do color grading and the advanced tools like DaVinci Resolve are affordable to any user. Yet, there’s still that very high-end market for systems like Filmlight’s Baselight. Where do you see the process of color correction and grading headed?
[SB] Color has always meant the difference for me between an OK project and a stellar project. Good color grading can turn your straw into gold. I think it’s an incredibly valuable talent to have. It’s an aesthetic sense first, but it’s also the ability to look at an image and say, “I know what will fix that image and it will look great.” It’s a specialized skill that shouldn’t be underrated. But, you just don’t need complex gear anymore to make your project better through color grading.
Will you make it look as good as a feature film or a high-end Netflix series? Now you’re talking about personnel decisions as much as technology. Colorists have the aesthetic and the ability to problem-solve, but are also very fast and consistent. They work well with customers in that realm. There’s always going to be a need for people like that, but the question is what chunk of the market requires that level of skill once the tools get easier to use?
 I just think there’s a part of the market that’s growing quickly – potentially much more quickly – that could use the skills of a colorist, but won’t go through a separate grading step. Now you have look-up tables, presets, and plug-ins. And the color grading tools in Final Cut Pro X are pretty powerful for getting awesome results even if you’re not a colorist. The business model is that the more you can do in the app, the easier it is to “sell the cut.” The client has to see it in as close to the finished form as possible. Sometimes a bad color mismatch can make a cut feel rough and color correction can help smooth that out and get the cut signed off. As you get better using the color grading tools in FCP X, you can improve your aesthetic and learn how to be consistent across hundreds of shots. You can even add a Tangent Wave controller if you want to go faster. We find ourselves doing more in less time and the full range of color grading tools in FCP X and the FX Plug plug-ins can play a very strong roll in improving any production.
[OP] During your time at Apple, the ProRes codec was also developed. Since Apple was supplying post-production hardware and software and no professional production cameras, what was the point in developing your own codec?
[SB] At the time there were all of these camera codecs coming out, which were going to be a very bad user experience for editing – even on the fastest Mac Pros at the time. The camera manufacturers were using compression algorithms that were high quality, but highly compressed, because camera cards weren’t that fast or that big. That compression was difficult to decode and play back. It took more processing power than you could get from any PC at that time to get the same number of video streams compared with digitizing from tape. In some cases you couldn’t even play the camera original video files at all, so you needed to transcode before you could start editing. All of the available transcoding codecs weren’t that high in quality or they had similar playback problems.
 Apple wanted to make a better user experience, so ProRes was originally designed as an intermediate codec. It worked so well that the camera manufacturers wanted to put it into their cameras, which was fine with Apple, as long as you met the quality standards. Everyone has to submit samples and work with the Apple engineers to get it to the standard that Apple expects. ProRes doesn’t encode into as small file sizes as some of the other camera codecs; but given the choice between file size, quality, and performance, then quality and performance were more important. As camera cards and hard drives get bigger, faster, and cheaper, it’s less of an issue and so it was the right decision.
[OP] The launch of Final Cut Pro X turned out to be controversial. Was the ProApps team prepared for the industry backlash that happened?
[SB] We knew that it would be disruptive, of course. It was a whole new interface and approach. It integrated a bunch of cutting edge technology that people weren’t familiar with. A complete rewrite of the codebase was a huge step forward as you can see in the speed and fluidity that is so crucial during the creative process. Metadata driven workflows, background processing, magnetic timeline — in many ways people are still trying to catch up eight years later. And now FCP X is the best selling version of Final Cut Pro ever.
[OP] When Walter Murch used Final Cut Pro to edit the film, Cold Mountain, it gained a lot of attention. Is there going to be another “Cold Mountain moment” for anyone or is that even important anymore?
[SB] Post Cold Mountain? [chuckle] You have to be careful — the production you are trying to emulate might have nothing to do with your needs on an everyday basis. It may be aspirational, but by adopting Hollywood techniques, you aren’t doing yourself any favors. Those are designed with budgets, timeframes, and a huge crew that you don’t have. Adopt a workflow that is designed for the kind of work you actually do.
When we came up in the industry, you couldn’t make a good-looking video without going to a post house. Then NLEs came along and you could do a bunch of work in your attic, or on a boat, or in a hotel room. That creative, rough-cut market fractured, but you still had to go to an online edit house. That was a limited world that took capital to build and it was an expense by the hour. Imagine how many videos didn’t get made, because a good post house cost hundreds of dollars an hour.
Now the video market has fractured into all these different outlets – streaming platforms, social media, corporate messaging, fast-turnaround events, and mobile apps. And these guys have a ton of powerful equipment, like drones, gimbals, and Atomos ProRes RAW recorders – and it looks great! But, they’re not going to a post house. They’re going to pick up whatever works for them and at the end of the day impress their clients or customers. Each one is figuring out new ways to take advantage of this new technology.
 One of the things Sam Mestman teaches in his mobile filmmaking class is that you can make really high-quality stuff for a fraction of the cost and time, as long as you are going to be flexible enough to work in a non-traditional way. That is the driving force that’s going to create more videos for all of these different outlets. When I started out, the only way you could distribute directly to the consumer was by mailing someone a VHS tape. That’s just long gone, so why are we using the same editing techniques and workflows?
I can’t remember the last time I watched something on broadcast TV. The traditional ways of doing things are a sort of assembly line — every step is very compartmentalized. This doesn’t stand to benefit from new efficiencies and technological advances, because it requires merging traditional roles, eliminating steps, and challenging the way things are charged for. The rules are a little less strict when you are working for these new distribution platforms. You still have to meet the deliverable requirements, of course. But if you do it the way you’ve always done it, then you won’t be able to bring it in on time or on budget in this emerging world. If you want to stay competitive, then you are forced to make these changes — your competition maybe already has. How can you tell when your phone doesn’t ring? And that’s why I would say there are Cold Mountain moments all the time when something gets made in a way that didn’t exist a few years ago. But, it happens across this new, much wider range of markets and doesn’t get so much attention.
[OP] Final Cut Pro X seems to have gained more professional users internationally than in the US. In your writings, you’ve mentioned that efficiency is the way local producers can compete for viewers and maintain quality within budget. Would you expand upon that?
[SB] There are a range of reasons why FCP X and new metadata-driven workflows are expanding in Europe faster than the US. One reason is that European crews tend to be smaller and there are fewer steps between the creatives and decision-making execs. The editor has more say in picking their editing system. I see over and over that editors are forced to use systems they don’t like in larger projects and they love to use FCP X on their own projects. When the facilities listen to and trust the editors, then they see the benefits pretty quickly. If you have government funded TV (like in many countries in Europe), then they are always under public pressure to justify the costs. Although they are inherently conservative, they are incentivized to always be looking for new ways to improve and that involves risks. With smaller crews, Europeans can be more flexible as to what being “an editor” really means and don’t have such strict rules that keep them from creating motion graphics – or the photographer from doing the rough cut. This means there is less pressure to operate like an assembly line and the entire production can benefit from efficiencies.
 I think there’s a huge amount of money sloshing around in Europe and they have to figure out how to do these local-language productions for the high quality that will compete with the existing broadcasters, major features, and the American and British big-budget shows. So how are you going to do that? If you follow the rules, you lose. You have to look at different methods of production.
Subscription is a different business model of continuing revenue. How many productions will the subscription model pay for? Netflix is taking out $2 billion in bonds on top of the $1 billion they already did to fund production and develop for the local languages. I’ve been watching the series Criminal on Netflix. It’s a crime drama based on police interrogations, with separate versions done in four different countries. English, French, German, and Spanish. Each one has its own cultural biases in getting to a confession (and that’s why I watched them all!). I’ve never seen anything like it before.
The guys at Metronome in Denmark used this moment as an opportunity to take some big chances with creating new workflows with FCP X and shared storage. They are using 1.5 petabytes of storage, six Synology servers, and 30 shows being edited right now in FCP X. They use the LumaForge Jellyfish for on-location post-production. If someone says it can’t be done, you need to talk to these guys and I’m happy to make the introduction.
I’m working with another company in France that shot a series on the firefighters of Marseilles. They shot most of it with iPhones, but they also used other cameras with longer lenses to get farther away from the fires. They’re looking at a series of these types of productions with a unique mobile look. If you put a bunch of iPhones on gimbals, you’ve got a high-quality, multi-cam shoot, with angles and performances that you could never get any other way. Or a bunch of DSLRs with Atomos devices and the Atomos sync modules for perfect timecode sync. And then how quickly can you turn out a full series? Producers need to generate a huge amount of material in a wide range of languages for a wide range of markets and they need to keep the quality up. They have to use new post-production talent and methods and, to me, that’s exciting.
[OP] Looking forward, where do you see production and post technology headed?
[SB] The tools that we’ve developed over the last 30 years have made such a huge difference in our industry that there’s a part of me that wants to go back and be a film student again. [laughs] The ability for people to turn out compelling material that expresses a point of view, that helps raise money for a worthy cause, that helps to explain a difficult subject, that raises consciousness, that creates an emotional engagement – those things are so much easier these days. It’s encouraging to me to see it being used like this.
The quality of the iPhone 11 is stunning. With awesome applications, like Mavis and FiLMiC Pro, these are great filmmaking tools. I’ve been playing around with the DJI Osmo Pocket, too, which I like a lot, because it’s a 4K sensor on a gimbal. So it’s not like putting an iPhone on a gimbal – it’s all-in-one. Although you can connect an iPhone to it for the bigger screen.
Camera technology is going in the direction of more pixels and bigger sensors, more RAW and HDR, but I’d really like to see the next big change come in audio. It’s the one place where small productions still have problems. They don’t hire the full-time sound guy or they think they can shoot just with the mic attached to the hot shoe of the camera. That may be OK when using only a DSLR, but the minute you want to take that into a higher-end production, you’re going to need to think about it more.
Again, it’s a personnel issue. I can point a camera at a subject and get a pretty good recording, but to get a good sound recording – that’s much harder for me at this point. In that area, Apogee has done a great job with MetaRecorder for iOS. It’s not just generating iXML to automatically name the audio channels when you import into FCP X — you can actually label the FCP X roles in the app. It uses Timecode Systems (now Atomos) for multiple iOS recording devices to sync with rock-solid timecode and you can control those multiple recorders from a single iOS device. I would like to see more people adopt multiple microphones synced together wirelessly and controlled by an iPad.
One of the things I love about being “semi-retired” is if something’s interesting to me, I just dig into it. It’s exciting that you can edit from an iPad Pro, you can back up to a Gnarbox, you can shoot high-quality video with your iPhone or a DJI Osmo Pocket, and that opens the world up to new voices. If you were to graph it – the cost of videos is going down and to the right, the number of videos being created in going up and to the right, and at some point they cross over. That promises a huge increase in the potential work for those who can benefit from these new tools. We are close to that point.
It used to be that if your client went to another post house, you lost that client. It was a zero sum game — I win — you lose. Now there are so many potential needs for video we would never have imagined. Those clients are coming out of the woodwork and saying, “Now I can do a video. I’ll do some of it myself, but at some point I’ll hand it off to you, because you are the expert.” Or they feel they can afford your talent, because the rest of the production is so much more efficient. That’s a growing demand that you might not see until your market hits that crossover point.
This article also appears at FCPco.
©2019 Oliver Peters