Nikon + RED – Assimilation or Innovation?

Wow! That was my reaction upon reading the news on Thursday morning that Nikon will be acquiring RED. While these things take time to be finalized, according to the Nikon statement, “RED will become a wholly-owned subsidiary of Nikon.” This news was unexpected by the industry and is bound to fuel chatter at next month’s NAB, even though RED hasn’t participated with a large booth for several years.

RED burst onto the scene in 2005 with the goal of creating a digital cinema camera with 4K recording capability. Up until that time, digital cameras used for motion pictures had included the “Panavised” Sony F900 HDCAM (Star Wars, Ep. II: Attack of the Clones) and Grass Valley Viper (Collateral). Both of these used a three-CCD sensor design that generated an HD image recording to an internal or external recorder. To compare, the original RED One and subsequent RED models use a single-chip, Bayer-pattern sensor. It can be argued that the combination of three 1920 x 1080 CCDs (R, G, and B) is actually of higher resolution than one 4K Bayer sensor, where the total number of monochrome pixels are filtered to be 2/4th green and 1/4th each for red and blue. RED’s models are now up to 8K, so that point is largely moot.

A feisty start-up

At their first NAB, RED could be found with a large alpine mountaineering tent as their booth and a long line of people waiting to see test images. Subsequent NAB booths were all interesting in their own way. At the beginning, RED’s founder, Jim Jannard (also founder of Oakley), was taking deposits for camera orders without a working camera yet. Many thought it was a scam, but as we know, RED delivered the goods. In those early years, the ever-present Ted Schilowitz was the face of RED, promoting the camera at many worldwide events.

From this early start, RED cameras became popular on major motion pictures, thanks in part to directors like Steven Soderbegh (Che), Peter Jackson (The Hobbit), and David Fincher (Gone Girl). According to Ars Technica, “at the peak of its movie market share in 2016, over 25 percent of the top 100 grossing domestic films were shot on RED cameras.” However, with Sony upping its cinema game and ARRI becoming a major digital camera provider with the Alexa, RED’s dominance has waned among the top tier of productions.

REDCODE – the secret sauce

The RED cameras internally record camera raw digital files at film speeds, using REDCODE – a Wavelet-based compressed codec. This software was the brainchild of developer Graeme Nattress and garnered RED a patent, which they have vigorously defended ever since. While my layman’s opinion is that the patent is dubious, I applaud RED for defending it as their intellectual property. Lawsuits between RED and other companies, related to the patent as well as other issues, have included LG, ARRI, Sony, Apple, Nikon, and more. This intellectual property will now belong to Nikon.

To date there really has been no direct competitor doing this exact same thing without legal challenge. The general workaround is to use an external device that handles the camera raw recording, like an Atomos Ninja. In fact, Nikon cameras have utilized this to record Nikon motion imagery into the Apple ProRes RAW codec on a Ninja recorder. Another method is what Blackmagic Design does in their cameras, which is to partially decode the data onboard the camera before recording it to a file. While some slam this method as not being truly raw, from my experience in working with these files inside of DaVinci Resolve and other applications, Blackmagic’s raw files generally give me the same flexibility as do RED files.

Working with RED media

I have edited numerous films and other projects that were shot with RED cameras. I have also finished and color corrected many of these, along with others where I didn’t do the offline edit. While the codec is flexible, in my opinion the file structure is not. The clip organization was built around technical limitation of two decades ago.

Clip recordings that exceed 4GB are split into multiple spanned files. These appear as if they are one contiguous file during playback, but aren’t. These “partial” files are grouped into a folder for each clip. File management and relinking is problematic as a result, especially when proxy files come into play. I have had countless media management issues between the offline and the online edit with RED files, when proxies were used. My hope is that if anything comes out of this acquisition, it’s a modern file structure like that used by Blackmagic Design and ARRI for their cameras.

Going forward

At this point, everything that I or anyone else says about future developments is going to be 100% speculation and personal opinion without any inside knowledge. Until the ink is dry on the agreement, things could change. However, assuming they don’t, then RED becomes a subsidiary division of the larger Nikon group of companies. While most of us think of Nikon as a camera and lens manufacturer, the company is into a wide range of product categories. We’ll have to wait and see whether or not cross-pollination occurs between the two camera divisions and whether their goals align.

RED currently offers seven camera models with multiple product options for each. These range from starting prices of $5,995 for a Komodo 6K up to $44,995 for the V-Raptor XL [X]. Add accessories and lenses on top of this. One potential and logical change could be a switch to – or the addition of – Nikon’s lens mount system as either the RED standard or an option when purchasing the camera. (RED used to offer Nikon mounts as accessories for the DSMC/DSMC2 camera brains, which have since been discontinued.)

One could also imagine that Nikon might do away with the lower priced REDs, like the Komodo line, and preserve RED cameras as only a premium brand. Another variation of this theory would be to repackage the Komodo line into a Nikon-branded product. I doubt that the RED brand name goes away, since it’s got great name recognition and that might actually be worth more than the company itself. But by making such a move, it differentiates Nikon from RED cameras in terms of market sector. This would also elevate the brand recognition of Nikon-branded cameras for indie filmmakers, YouTube content creators, etc. That being said, the latest Nikon flagship cameras have been getting high marks. The Nikon Z9 has even found a place as the astronaut camera onboard the International Space Station.

If, as many have opined, this acquisition is all about the codec, then it would pretty much guarantee that you’ll see REDCODE capture integrated into at least some of Nikon’s video DSLRs. Maybe you’ll even see Nikon license use of the codec to other manufacturers. Most of the tech press have been positioning this as a battle between Nikon and ARRI, Sony, and/or Canon. But the up-and-comer is Blackmagic Design. I could easily see the battle shaping up as Nikon with RED duking it out for market share against Blackmagic’s URSA and Cinema Camera product lines.

As with any acquisition, the future success is often determined by the combination of the two corporate cultures. Or as one friend opined – Will the the kaizen of Japanese management come into conflict with RED’s edgy style? Time will tell. Nevertheless, I think the combination could be a good thing and result in speeding up Nikon’s product development, while also slowing RED’s down ever-so-slightly. That could be a good thing for content creators.

©2024 Oliver Peters

Game Changers

Thanks to Apple’s recent “Scary Fast” event and the subsequent BTS video revealing that the content was shot with an iPhone, friends and I have had conversations about game-changing technology. The knee jerk response of fanboys any time a high profile filmmaker does anything using an iPhone is what a gamer changer it will be to produce an entire feature film using an iPhone. While I don’t doubt that will eventually happen, analysis of Apple’s BTS video makes it clear that an awful lot went into overcoming the limitations inherent in the iPhone camera system. But this isn’t the first time the term “game changer” has been applied to new and interesting technologies.

Over the years, many technologies for production and post have been viewed as game changers. Think of things like 3D stereoscopic films, VR/AR glasses, the Lytro light-field camera, and others. In nearly all cases, the impact – when it did actually materialize – changed an element in the process, but not the workflow. For example, in the transition from photochemical film processes to video/digital, the film workflow components (labs, negative cutting, color timing, etc) were simply replaced by their electronic equivalents (DITs, conforming/finishing, digital grading, etc).

When the RED Digital Camera Company brought the RED One to market, it was by no means the first nor only digital “film” camera. While RED One did expand the boundaries of resolution from HD to 4K and beyond, the company did not end up “owning” the digital acquisition market. This eventually fell to ARRI. Although later to market, the Alexa has become the gold standard for most filmmakers. Sure, a lot of films are shot with RED and Sony cameras, but it’s ARRI Alexas that dominate the top tier of films.

There are many reasons for ARRI over RED, in spite of the fact that on paper RED’s cameras might seem better. Many it’s because RED cameras originally required non-standard support gear, or because the film community may have been turned off by RED founder Jim Jannard’s bravado. While these might all be factors, what’s more likely the case is that the ARRI company, Arriflex cameras, and ARRI lighting and support gear have been a filmmaking staple for a century. Plus, with high budget film and video projects, cameras and production gear are generally rented. The cost of a camera is a small percentage of the total budget. Going back to the the original premise, there is little advantage from a budget standpoint to using an iPhone – aside from the novelty of doing so.

Let’s look at post. Certainly nonlinear digital editing has had a majoring impact. But it hasn’t really changed the processes involved. For instance, branched stories – an idea that some thought NLEs would encourage – have only had limited success. Netflix’s “Black Mirror: Bandersnatch” is really the only such mainstream film that comes to mind. Avid Media Composer has become the dominant feature film/broadcast TV NLE, in spite of not being the only option at the start. Granted, this is a niche market with a small number of users compared with social media influencers and others working with different brands of editing software.

In spite of challengers, Avid Media Composer is still here. Apple looked promising in the Final Cut Pro “legacy” days, when prominent users like Walter Murch, Angus Wall, and Kirk Baxter cut several high profile feature films with it. Yet even with all that buzz, FCP didn’t make a significant dent in the number of Media Composer seats in Hollywood. Fast forward to the mangled launch of Final Cut Pro X over a decade ago. That put a nail into FCP’s coffin for Hollywood. What Apple promoted as a gamer changer – and Final Cut Pro (formerly X) does offer unique and innovative features – turned out to be a big “whatever” for film editors. Even though some film editors adopted the new Final Cut Pro, Adobe has been able to capitalize on the former FCP “legacy” editors, but Avid is still king in Hollywood.

There are many factors involved. A big one is that experienced editors know the software inside and out and many have decades of experience in its operation. It doesn’t matter if something else is faster or more efficient. If the software you use is second nature, then a few extra keystrokes simply melt away thanks to muscle memory. Another factor is that, like camera gear, post gear is rented by the project and/or supplied by known post facilities with an existing investment in Avid-centric systems. Those companies want to recoup their investment, rather than pursue something that might be trendy for a short period of time.

It’s also worth noting that Media Composer is the sibling of Pro Tools, which is the dominant audio software used in film and TV post. There’s a certain synergy to having the picture and sound cutting/mixing tools come from the same manufacturer. Finally, as a piece of software, Media Composer (owned or subscription) is dirt cheap compared with the computers and storage used to run it. In spite of ongoing financial issues, Avid survives because of the “if it ain’t broke, don’t fix it” mentality. I really don’t see the newest challengers, like Blackmagic Design DaVinci Resolve and Adobe Premiere Pro, doing much to change that outside of a few editors.

The moral of the story is that the next time you hear something pronounced as a game changer, be skeptical. Few things are truly that. A product can bend production and post workflows, but very few completely upend or revolutionize how traditional film and TV content is produced, posted, and distributed. In 2024, I’m sure plenty of AI-related tools will be touted as revolutionary, game changing, or something similar. Before you get too excited, take breath and think about whether it will truly change how you work. Or better yet, should it?

©2024 Oliver Peters

Impressions of NAB 2023

2023 marks the 100th year of the NAB Convention, which started out as a radio gathering in New York City. This year you could add ribbons to your badges indicating the number of years that you’d attended – 5, 10, etc. My first NAB was 1979 in Dallas, so I proudly displayed the 25+ ribbon. Although I haven’t attended each one in those intervening years, I have attended many and well over 25.

Some have been ready to sound the death knell for large, in-person conventions, thanks to the pandemic and proliferation of online teleconferencing services like Zoom. 2019 was the last pre-covid year with an attendance of 91,500 – down from previous highs of over 100,000. 2022 was the first post-covid NAB and attendance was around 52,400. That was respectable given the climate a year ago. This year’s attendance was over 65,000, so certainly an upward trend. If anything, this represents a pent-up desire to kick the tires in person and hook back up with industry friends from all over the world. My gut feeling is that international attendance is still down, so I would expect future years’ attendance to grow higher.

Breaking down the halls

Like last year, the convention spread over the Central, North, and new West halls. The South hall with its two floors of exhibition space has been closed for renovation. The West hall is a three-story complex with a single, large exhibition floor. It’s an entire convention center in its own right. West hall is connected to the North hall by the sidewalk, an enclosed upstairs walkway, as well as the LVCC Loop (the connecting tunnel that ferries people between buildings in Teslas). From what I hear, next year will be back to the North, Central, and South halls.

As with most NAB conventions, these halls were loosely organized by themes. Location and studio production gear could mostly be found in Central. Post was mainly in the North hall, but next year I would expect it to be back in the South hall. The West hall included a mixture of vendors that fit under connectivity topics, such as streaming, captioning, etc. It also included some of the radio services.

Although the booths covered nearly all of the floor space, it felt to me like many of the big companies were holding back. By that I mean, products with large infrastructure needs (big shared storage systems, large video switchers, huge mixing desks, etc) were absent. Mounting a large booth at the Las Vegas Convention Center – whether that’s for CES or NAB – is quite costly, with many unexpected charges.

Nevertheless, there were still plenty of elaborate camera sets and huge booths, like that of Blackmagic Design. If this was your first year at NAB, the sum of the whole was likely to be overwhelming. However, I’m sure many vendors were still taking a cautious approach. For example, there was no off-site Avid Connect event. There were no large-scale press conferences the day before opening.

The industry consolidates

There has been a lot of industry consolidation over the past decade or two. This has been accelerated thanks to the pandemic. Many venerable names are now part of larger holding companies. For example, Audiotonix owns many large audio brands, including Solid State Logic, DiGiCo, Sound Devices, among others. And they added Harrison to their portfolio, just in time for NAB. The Sennheiser Group owns both Sennheiser and Neumann. Grass Valley, Snell, and Quantel products have all been consolidated by Black Dragon Capital under the Grass Valley brand. Such consolidation was evident through shared booth space. In many cases, the brands retained their individual identities. Unfortunately for Snell and Quantel, those brands have now been completely subsumed by Grass Valley.

A lot of this is a function of the industry tightening up. While there’s a lot more media production these days, there are also many inexpensive solutions to create that media. Therefore, many companies are venturing outside of their traditional lanes. For example. Sennheiser still manufactures great microphone products, but they’ve also developed the AMBEO immersive audio product line. At NAB they demonstrated the AMBEO 2-Channel Spatial Audio renderer. This lets a mixer take surround mixes and/or stems and turn them into 2-channel spatial mixes that are stereo-compatible. The control software allows you to determine the stereo width and amount of surround and LFE signal put into the binaural mix. In the same booth, Neumann was demoing their new KH 120-II near-field studio monitors.

General themes

Overall, I didn’t see any single trend that would point to an overarching theme for the show. AI/ML/Neural Networks were part of many companies’ marketing strategy. Yet, I found nothing that jumped out like the current public fascination with ChatGPT. You have to wonder how much of this is more evolutionary than revolutionary and that the terms themselves are little more than hype.

Stereoscopic production is still around, although I only found one company with product (Stereotec). Virtual sets were aplenty, including a large display by Vu Studios and even a mobile expando trailer by Magicbox for virtual set production on-location. Insta360 was there, but tucked away in the back of Central hall.

Of course, everyone has a big push for “the cloud” in some way, shape, or form. However, if there is any single new trend that seems to be getting manufacturers’ attention, it’s passing video over IP. The usual companies who have dealt in SDI-based video hardware, like AJA, Blackmagic Design, and Matrox, were all showing IP equivalents. Essentially, where you used to send SDI video signals using the uncompressed SDI protocol, you will now use the SMPTE ST 2110 IP protocol to send it through 1GigE networks.

The world of post production

Let me shift to post – specifically Adobe, Avid, and Blackmagic Design. Unlike Blackmagic, neither Avid nor Adobe featured their usual main stage presentations. I didn’t see Apple’s Final Cut Pro anywhere on the floor and only one sighting in the press room. Avid’s booth was a shadow of itself, with only a few smaller demo pods. Their main focus was showing the tighter integration between Media Composer and Pro Tools (finally!). There were no Pro Tools control surfaces to play with. However, in their defense, NAMM 2023 (the large audio and music products exhibition) was held just the week before. Most likely this was a big problem for any audio vendor that exhibits at both shows. NAMM shifts back to January in 2024, which is its historical slot on the calendar.

Uploading media to the cloud for editing has been the mantra at Frame io, which is now under the Adobe wing. They’ve enhanced those features with direct support by Fujifilm (video) and Capture One (photography). In addition, Frame has improved features specific to the still photography market. New to the camera-to-cloud game is also Atomos, which demoed its own cloud-based editor developed by asset management developer Axle ai.

Adobe demoed the new, text-based editing features for Premiere Pro. It’s currently in beta, but will soon be in full release. In my estimation, this is the best text-based method of any of the NLEs. Avid’s script-based editing is optimized for scripted content, but doesn’t automatically generate text. Its strength is in scripted films and TV shows, where the page layout mimics a script supervisor’s lined script.

Adobe’s approach seems better for documentary projects. Text is generated through speech-to-text software within Premiere Pro. That is now processed on your computer instead of in the cloud. When you highlight text in the transcription panel, it automatically marks the in and out points on that source clip. Then, using insert and overwrite commands while the transcription panel is still selected, automatically edit that portion of the source clip to the timeline. Once you shift your focus to the timeline, the transcription panel displays the edited text that corresponds to the clips on the timeline. Rearrange the text and Premiere Pro automatically rearranges the clips on the timeline. Or rearrange the clips and the text follows.

Meanwhile over at Blackmagic Design’s massive booth, the new DaVinci Resolve 18.5 features were on full display. 18.5 is also in beta. While there are a ton of new features, it also includes automatic speech-to-text generation. This felt to me like a work-in-progress. So far, only English is supported. It creates text for the source and you can edit from the text panel to the timeline. However, unlike Premiere Pro, there is no interaction between the text and clips in the timeline.

I was surprised to see that Blackmagic Design was not promoting Resolve on the iPad. There was only one demo station and no dedicated demo artist. I played with it a bit and it felt to me like it’s not truly optimized for iPadOS yet. It does work well with the Speed Editor keyboard. That’s useful for any user, since the Cut page is probably where anyone would do the bulk of the work in this version of Resolve. When I used the Apple Pencil, the interface lacked any feedback as icons were clicked. So I was never quite sure if an action had happened or not when I used the Pencil. I’m not sure many will do a complete edit with Resolve on the iPad; however, it could evolve into a productive tool for preliminary editing in the field.

Here’s an interesting side note. Nearly all of the Blackmagic Design demo pods for DaVinci Resolve were running on Apple’s 24″ candy-colored iMacs. Occasionally performance was a bit sluggish from what I could tell. Especially when the operator demoed the new Relight feature to me. Nevertheless, they seemed to work well throughout the show.

In other Blackmagic news, all of the Cloud Store products are now shipping. The Cintel film scanner gets an 8mm gate. There are now IP versions of the video cards and converters. There’s an OLPF version of the URSA Mini Pro 12K and you can shoot vertical video with the Pocket Cinema Camera that’s properly tagged as vertical.

Of course, not everyone wants their raw media in the cloud and Blackmagic Design wasn’t showing the only storage products. Most of the usual storage vendors were present, including Facilis, OpenDrives, Synology, OWC, and QNAP. The technology trends include a shift away from spinning drives towards solid state storage, as well as faster networking protocols. Quite a few vendors(like Sonnet) were showing 25GbE (and faster) connections. This offers a speed improvement over the 1GbE and 10GbE ports and switches that are currently used.

Finally, one of the joys of NAB is to check out the smaller booths, where you’ll often find truly innovative new products. These small start-ups often grow into important companies in our industry. Hedge is just such a company. Tucked into a corner of the North hall, Hedge was demonstrating its growing portfolio of essential workflow products. Another start-up, Colourlab AI shared some booth space there, as well, to show off Freelab, their new integration with Premiere Pro and DaVinci Resolve.

That’s a quick rundown of my thoughts about this year’s NAB Show. For other thoughts and specific product reviews, be sure to also check out NAB coverage at Pro Video Coalition, RedShark News, and postPerspective. There’s also plenty of YouTube coverage.

Click on any image below to view an NAB slideshow.

©2023 Oliver Peters

Time to Rethink ProRes RAW?

The Apple ProRes RAW codec has been available for several years at this point, yet we have not heard of any professional cinematography camera adding the ability to record ProRes RAW in-camera. I covered ProRes RAW with some detail in these three blog posts (HDR and RAW Demystified, Part 1 and Part 2, and More about ProRes RAW) back in 2018. But the industry has changed over the past few years. Has that changed any thoughts about ProRes RAW?

Understanding RAW

Today’s video cameras evolved their sensor design from a three CCD array for RGB into a single sensor, similar to those used in still photo cameras. Most of these sensors are built using a Bayer pattern of photosites. This pattern is an array of monochrome receptors that are filtered to receive incoming green, red, and blue wavelengths of light. Typically the green photosites cover 50% of this pattern and red and blue each cover 25%. These photosites capture linear light, which is turned into data that is then meshed and converted into RGB pixel information. Lastly, it’s recorded into a video format. Photosites do not correlate in a 1:1 relationship with output pixels. You can have more or fewer total photosite elements in the sensor than the recorded pixel resolution of the file.

The process of converting photosite data into RGB video pixels is done by the camera’s internal electronics. This process also includes scaling, gamma encoding (Rec709, Rec 2020, or log), noise reduction, image sharpening, and the application of that manufacturer’s proprietary color science. The term “color science” implies some type of neutral mathematical color conversion, but that isn’t the case. The color science that each manufacturer uses is in fact their own secret sauce. It can be neutral or skewed in favor of certain colors and saturation levels. ARRI is a prime example of this. They have done a great job in developing a color profile for their Alexa line of cameras that approximates the look of film.

All of this image processing adds cost, weight, and power demands to the design of a camera. If you offload the processing to another stage in the pipeline, then design options are opened up. Recording camera raw image data achieves that. Camera raw is the monochrome sensor data prior to the conversion into an encoded video signal. By recording a camera raw file instead of an encoded RGB video file, you defer the processing to post.

To decode this file, your operating system or application requires some type of framework, plug-in, or decoding/developing software in order to properly interpret that data into a color image. In theory, using a raw file in post provides greater control over ISO/exposure and temperature/tint values in color grading. Depending on the manufacturer, you may also apply a variety of different camera profiles. All of this is possible and still have a camera file that is of a smaller size than its encoded RGB counterpart.

In-camera recording, camera raw, and RED

Camera raw recording preceded the introduction of the RED One camera. These usually consisted of uncompressed movie files or image sequences recorded to an external recorder. RED introduced the ability to record a Wavelet-compressed, 4K camera raw signal at 24fps. This was a movie file recorded onboard the camera itself. RED was granted a number of patents around these processes, which preclude any other camera manufacturer from doing that exact same thing, unless entering into a licensing agreement with RED. So far these patents have been successfully upheld against Sony and Apple among others.

In 2007 – part way through the Final Cut Pro product run – Apple introduced its family of ProRes codecs. ProRes was Apple’s answer to Avid’s DNxHD codec, but with some improvements, like resolution independence. ProRes not only became Apple’s default intermediate codec, but also gained stature as the mastering and delivery codec of choice, regardless of which NLE you were using. (Apple was awarded an Engineering Emmy Award this year for the ProRes codecs.)

By 2010 Apple was successful in convincing ARRI to use ProRes as its internal recording codec with the introduction of the (then new) line of Alexa cameras. (ARRI camera raw recording was a secondary option using ARRIRAW and a Codex recorder.) Shooting with an Alexa, recording high-quality ProRes files, and posting those directly within FCP or any other compatible NLE created the simplest and smoothest capture-edit-deliver pipeline of any professional post workflow. That remains unchanged even today.

Despite ARRI’s success, only a few other camera manufacturers have adopted ProRes as an internal recording option. To my knowledge these include some cameras from AJA, JVC, Blackmagic Design, and RED (as a secondary file to REDCODE). The lack of widespread adoption is most likely due to Apple’s licensing arrangement, coupled with the fact that ProRes is a proprietary Apple format. It may be a de facto industry standard, but it’s not an official standard sanctioned by an industry standards committee.

The introduction of Apple’s ProRes RAW codecs has led many in the industry to wait with bated breath for cameras to also adopt ProRes RAW as their internal camera raw option. ARRI would obviously be a candidate. However, the RED patents would seem to be an impediment. But what if Apple never had that intention in the first place?

Do we have it all wrong?

When Apple introduced ProRes RAW, it did so in partnership with Atomos. Just like Sony, ARRI, and Panasonic recording their camera raw signals to an external recorder, sending a camera raw signal to an external Atomos monitor/recorder is a viable alternative to in-camera recording. Atomos’ own disagreements with RED have now been settled. Therefore, embedding the ProRes RAW codec into their products opens up that recording format to any camera manufacturer. The camera simply has to be capable of sending a compatible camera raw signal (as data) over SDI or HDMI to the connected Atomos recorder.

The desire to see ProRes RAW in-camera stems from the history of ProRes adoption by ARRI and the impact that had on high-end production and post. However, that came at a time when Apple was pushing harder into various pro film and video markets. As we’ve learned, that course was corrected by Steve Jobs, leading to the launch of Final Cut Pro X. Apple has always been about ease and democratization – targeting the middle third of a bell curve of users, not necessarily the top or bottom thirds. For better or worse, Final Cut Pro X refocused Apple’s pro video direction with that in mind.

In addition, during this past decade or more, Apple has also changed its approach to photography. Aperture was a tool developed with semi-pro and pro DSLR photographers in mind. Traditional DSLRs have lost photography market share to smart phones – especially the iPhone. Online sharing methods – Facebook, Flickr, Instagram, cloud picture libraries – have become the norm over the traditional photo album. And so, Aperture bit the dust in favor of Photos. From a corporate point-of-view, the rethinking of photography cannot be separated from Apple’s rethinking of all things video.

Final Cut Pro X is designed to be forward-thinking, while cutting the chord with many legacy workflows. I believe the same can be applied to ProRes RAW. The small form factor camera, rigged with tons of accessories including external displays, is probably more common these days than the traditional, shoulder-mounted, one-piece camcorder. By partnering with Atomos (and maybe others in the future), Apple has opened the field to a much larger group of cameras than handling the task one camera manufacturer at a time.

ProRes RAW is automatically available to cameras that were previously stuck recording highly-compressed M-JPEG or H.264/265 formats. Video-enabled DSLRs from manufacturers like Nikon and Fujifilm join Canon and Panasonic cinematography cameras. Simply send a camera raw signal over HDMI to an Atomos recorder. And yet, it doesn’t exclude a company like ARRI either. They simply need to enable Atomos to repack their existing camera raw signal into ProRes RAW.

We may never see a camera company adopt onboard ProRes RAW and it doesn’t matter. From Apple’s point-of-view and that of FCPX users, it’s all the same. Use the camera of choice, record to an Atomos, and edit as easily as with regular ProRes. Do you have the depth of options as with REDCODE RAW? No. Is your image quality as perfect in an absolute (albeit non-visible) sense as ARRIRAW? Probably not. But these concerns are for the top third of users. That’s a category that Apple is happy to have, but not crucial to their existence.

The bottom line is that you can’t apply classic Final Cut Studio/ProRes thinking to Final Cut Pro X/ProRes RAW in today’s Apple. It’s simply a different world.

____________________________________________

Addendum

The images I’ve used in this post come from Patrik Pettersson. These clips were filmed with a Nikon Z6 DSLR recording to an Atomos Ninja V. He’s made a a few sample clips available for download and testing. More at this link. This brings up an interesting issue, because most other forms of camera raw are tied to a specific camera profile. But with ProRes RAW, you can have any number of cameras. Once you bring those into Final Cut Pro X, you don’t have the correct camera profile with a color science that matches that model for each any every camera.

In the case of these clips, FCPX doesn’t offer any Nikon profiles. (Note: This was corrected with the FCPX 10.4.9 update.) I decided to decode the clip (RAW to log conversion) using a Sony profile. This gave me the best possible results for the Nikon images and effectively gives me a log clip similar to that from a Sony camera. Then for the grade I worked in Color Finale Pro 2, using its ACES workflow. To complete the ACES workflow, I used the matching SLog3 conversion to Rec709.

The result is nice and you do have a number of options. However, the workflow isn’t as straightforward as Apple would like you to believe. I think these are all solvable challenges, but 1) Apple needs to supply the proper camera profiles for each of the compatible cameras; and 2) Apple needs to publish proper workflow guides that are useful to a wide range of users.

©2020 Oliver Peters

Ford v Ferrari

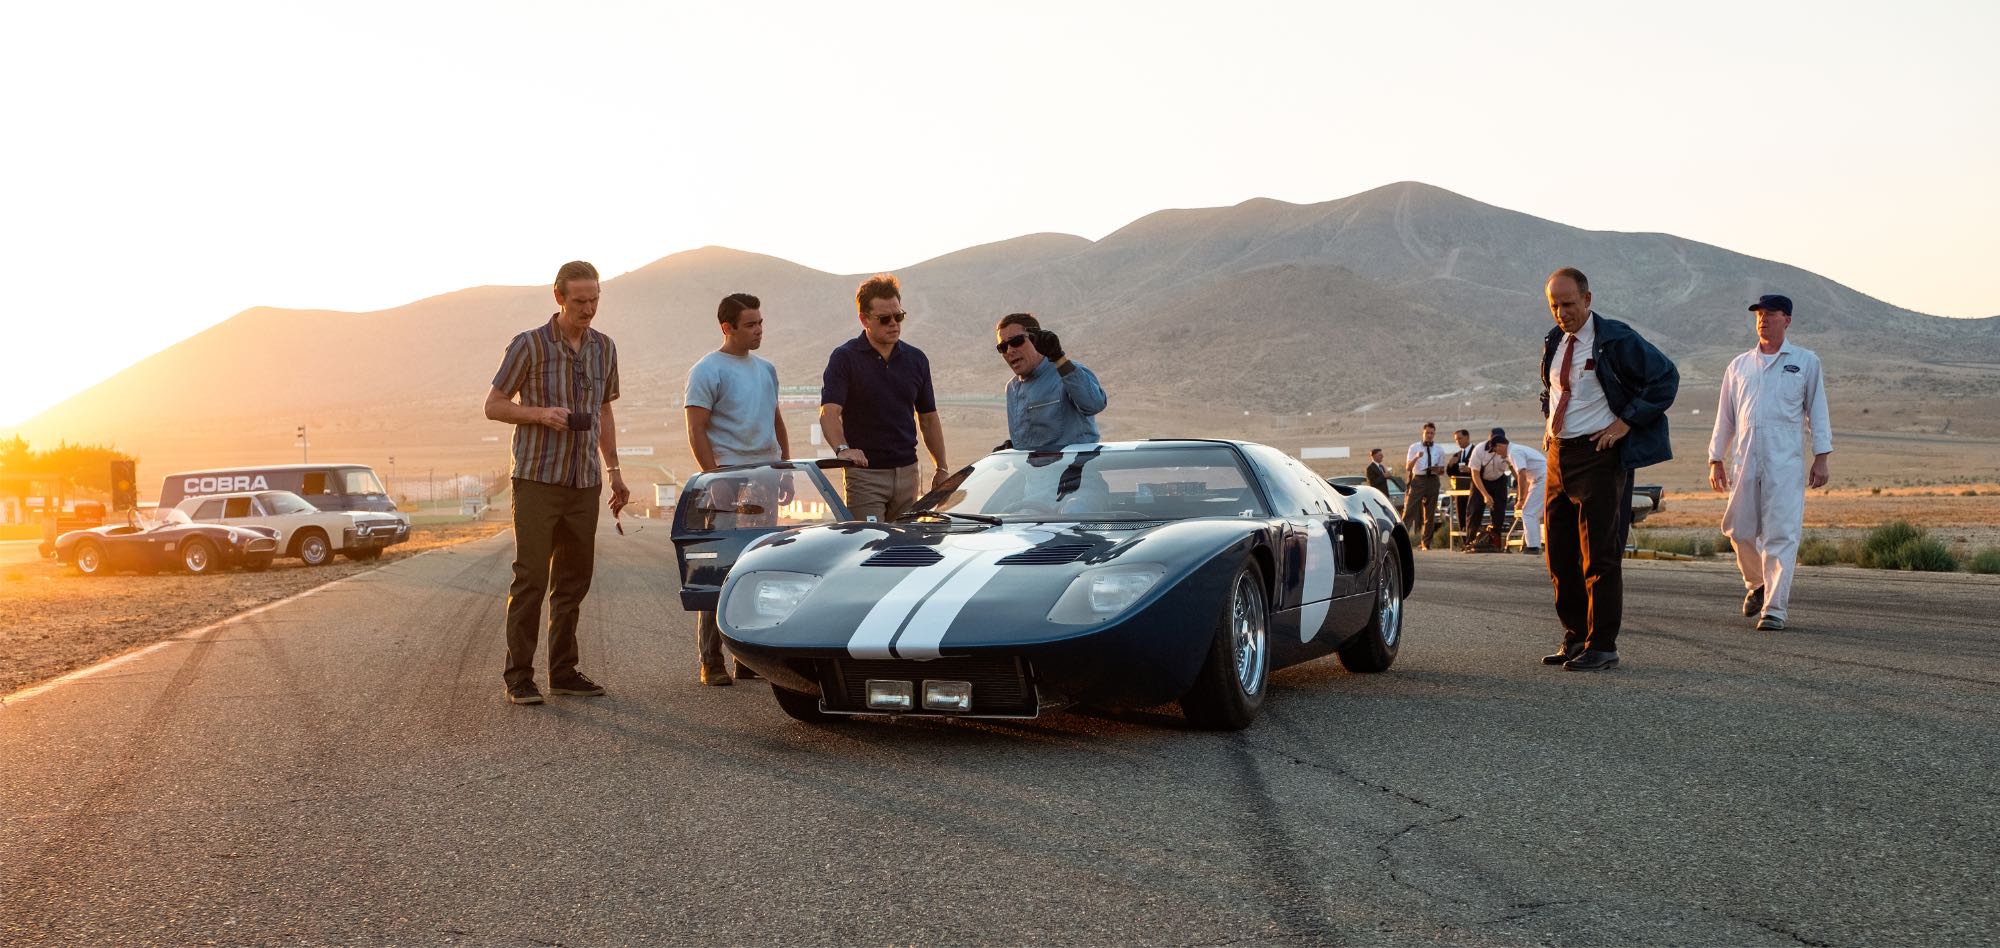
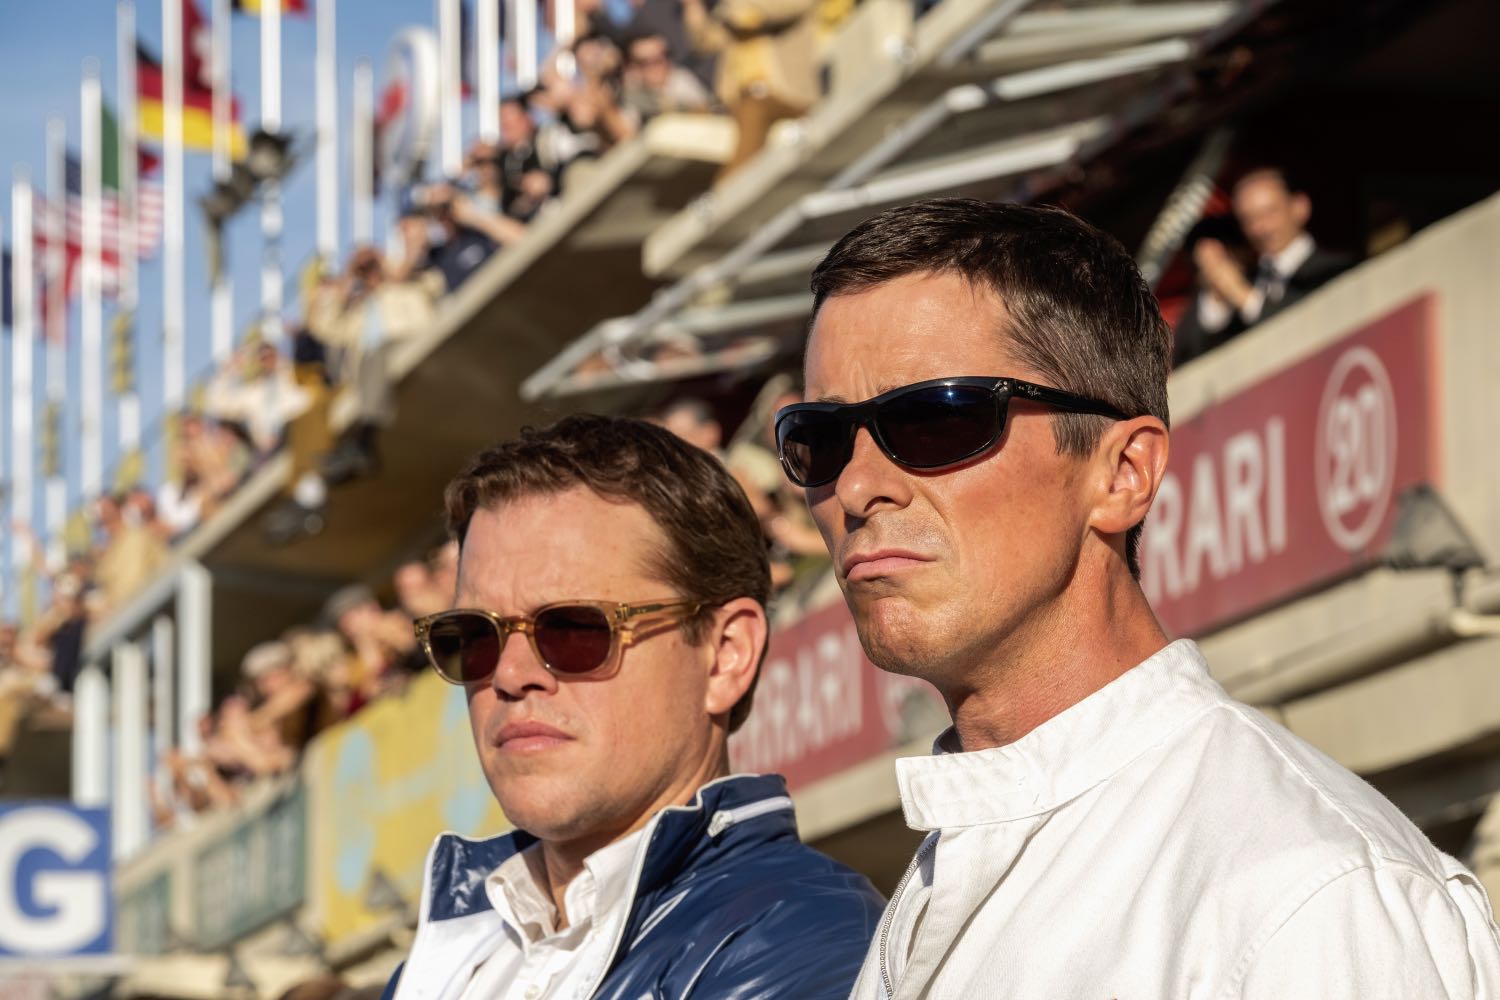
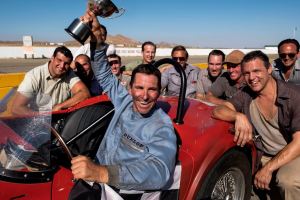
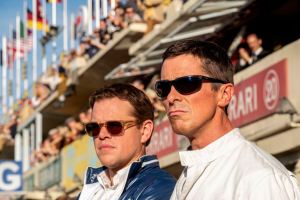
Outraged by a failed attempt to acquire European carmaker Ferrari, Henry Ford II sets out to trounce Enzo Ferrari on his own playing field – automobile endurance racing. Unfortunately, the effort falls short, leading Ford to turn to independent car designer, Carroll Shelby. But Shelby’s outspoken lead test driver, Ken Miles, complicates the situation by making an enemy out of Ford Senior VP Leo Beebe. Nevertheless, Shelby and his team are able to build one of the greatest race cars ever – the GT40 MkII – setting the showdown between the two auto legends at the 1966 24 Hours of Le Mans. Matt Damon and Christian Bale star as Shelby and Miles.

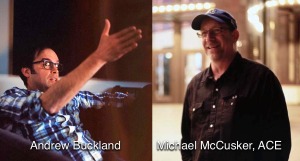
The challenge of bringing this clash of personalities to the screen was taken on by director James Mangold (Logan, Wolverine, 3:10 to Yuma) and his team of long time collaborators. I recently spoke with film editors Michael McCusker, ACE (Walk the Line, 3:10 to Yuma, Logan) and Andrew Buckland (The Girl on the Train) about what it took to bring Ford v Ferrari together.

_____________________________________________

[OP] The post team for this film has worked with James Mangold on quite a few films. Tell me a bit about the relationship.

[MM] I cut my very first movie, Walk The Line, for Jim 15 years ago and have since cut his last six movies. I was the first assistant editor on Kate & Leopold, which was shot in New York in 2001. That’s where I met Andrew, who was hired as one of the local New York film assistants. We became fast friends. Andrew moved out to LA in 2009 and I hired him to assist me on Knight & Day. We’ve been working together for 10 years now.

I always want to keep myself available for Jim, because he chooses good material, attracts great talent, and is a filmmaker with a strong vision who works across multiple genres. Since I’ve worked with him, I’ve cut a musical movie, a western, a rom-com, an action movie, a straight-up superhero movie, a dystopian superhero movie, and now a car racing film.

[OP] As a film editor, it must be great not to get type-cast for any particular cutting style.

[MM] Exactly. I worked for David Brenner for years as his first. He was able to cross genres and that’s what I wanted to do. I knew even then that the most important decisions I would make would be choosing projects. I couldn’t have foreseen that Jim was going to work across all these genres – I simply knew that we worked well together and that the end product was good.  

[OP] In preparing for Ford v Ferrari, did you study any other recent racing films, like Ron Howard’s Rush?

[MM] I saw that movie and liked it. Jim was aware of it, too, but I think he wanted to do something a little more organic. We watched a lot of older racing films, like Steve McQueen’s Le Mans and Frankenheimer’s Grand Prix. Jim’s original intention was to play the racing in long takes and bring the audience along for the ride. As he was developing the script and we were in preproduction, it became clear that there was so much more drama that was available for him to portray during the racing sequences than he anticipated. And so, the races took on more of an energized pace.

[OP] Energized in what way? Do you mean in how you cut it or in a change of production technique, like more stunt cameras and angles?

[MM] I was fortunate to get involved about two-and-a-half months prior to the start of production. We were developing the Le Mans race in pre-vis, which required a lot of editing and discussions about shot design and figuring out what the intercutting was going to be during that sequence, which is like the fourth act of the movie. You’re dealing with Mollie and Peter [Ken Miles’ wife and son] at home watching the race, the pit drama, what’s going on with Shelby and his crew, with Ford and Leo Beebe, and also, of course, what’s going on in the car with Ken. It’s a three act movie unto itself, so Jim was trying to figure out how it was all going to work, before he had to shoot it. That’s where I came in. The frenetic pace of Le Mans was more a part of the writing process – and part of the writing process was the pre-vis. The trick was how to make sure we weren’t just following cars around a track. That’s where redundancy can tend to beleaguer an audience in racing movies. 

[OP] What was the timeline for production and post?

[MM] I started at the end of May 2018. Production began at the the beginning of August and went all the way through to the end of November. We started post in earnest at the beginning of November of last year, took some time off for the holidays, and then showed the film to the studios around February or March.

The challenge was that there was going to be a lot of racing footage, which meant there was going to be a LOT of footage. I knew I was going to need a strong co-editor, so Andrew was the natural choice. He had been cutting on his own and cutting with me over the years. We share a common approach to editing and have a similar aesthetic. There was a point when things got really intense and we needed another pair of hands, so I brought in Dirk Westervelt to help out for a couple of months. That kept our noses above water, but the process was really enjoyable. We were never in a crisis mode. We got a great response from preview audiences and, of course, that calms everybody down. At that point it was just about quality control and making sure we weren’t resting on our laurels. 

[OP] How long was your initial cut and what was your process for trimming the film down to the present run time?

[MM] We’re at 2:30:00 right now and I think the first cut was 3:10:00 or 3:12:00. The Le Mans section was longer. The front end of the movie had more scenes in it. We ended up lifting some scenes and rearranging others.  Plus, the basic trimming of scenes brought the length down. But nothing was the result of a panic, like, “Oh my God, we’ve got to get to 2:30:00!” There were no demands by the studio or any pressures we placed upon ourselves to hit a particular running time. I like to say that there’s real time and there’s cinematic time. You can watch Once Upon a Time in America, which is 3:45:00, and feel likes it’s an hour. Or you can watch an 89-minute movie and feel like it’s drudgery. We just wanted to make sure we weren’t overstaying our welcome. 

[OP] How extensively did you re-arrange scenes during the edit? Or did the structure of the film stay pretty much as scripted?

[MM] To a great degree it stayed as scripted. We had some scenes in the beginning that we felt were a little bit tangential and weren’t serving the narrative directly and those were cut. The real endeavor of this movie starts the moment that these two guys [Shelby and Miles] decide to tackle the challenge of developing this car. There’s a scene where Miles sees the car for the first time at LAX. We understood that we had to get to that point in a very efficient way, but also set up all the other characters – their motives and their desires.

It’s an interesting movie, because it starts off with a lot of characters. But then it develops into a movie about two guys and their friendship. So it goes from an ensemble piece to being about Ken and Carroll, while at the same time the scope of the movie is opening up and becoming larger as the racing is going on. For us, the trickiest part was the front end – to make sure we spent enough time with each character so that we understood them, but not so much time that audience would go, “Enough already! Get on with it!”

[OP] Were you both racing fans before you signed onto this film?

[AB] I was not.

[MM] When I was a kid, I watched a lot of racing. I liked CART racing – open wheel racing – not so much stock car racing. As I grew older, I lost interest, particularly when CART disbanded and NASCAR took over. So, I had an appreciation for it. I went to races, like the old Ontario 500 here in California.

[OP] Did that help inform your cutting style for this film?

[MM] I don’t think so. Where it helped was knowing the sound of the broadcasters and race announcers. I liked Chris Economaki and Jim McKay – guys who were broadcasting the races when I was a kid. I was intrigued about how they gave us the narrative of the race. It came in handy while we were making this movie, because we were able to get our hands on some of Jim McKay’s actual coverage of Le Mans and used it in the movie. That brings so much authenticity.

[OP] Let’s dive deeper into the sound for this film. I would imagine that sound design was integral to your rough cuts. How did you tackle that?

 [AB] We were fortunate to have the sound team on very early during preproduction. We were cutting in a 5.1 environment, so we wanted to create sound design early in the process. The sounds may have not been the exact engine sounds that would end up in the final, but they were adequate to allow you to experience the scenes as intended and to give the right feel.  Because we needed to get Jim’s response early, some of the races were cut with the production sound – from the live mics during filming. This allowed us and Jim to quickly see how the scenes would flow. Other scenes were cut strictly MOS, because the sound design would have been way too complicated for the initial cut of the scene. Once the scene was cut visually, we’d hand over the scene to Don [Sylvester, sound supervisor] who was able to provide us with a set of 5.1 stems. That was great, because we could recut and repurpose those stems for other races.

[MM] We had developed a strategy with Don to split the sound design into four or five stems to give us enough discrete channels to recut these sequences. The stems were a palette of interior perspectives, exterior perspectives, crowds, car-bys, and so on. By employing this strategy, we didn’t need to continually turn over the cut to sound for patch-up work. Then, as Don went out and recorded the real cars and was developing the actual sounds for what was going to be used in the mix, he’d generate new stems and we would put them into the Avid. This was extremely informative to Jim, because he could experience our Avid temp mix in 5.1 and give notes, which ultimately informed the final sound design and the mix. 

[OP] What about temp music? Did you also weave that into your rough cuts?

[MM] Ted Caplan, our music editor, has also worked with Jim for 15 years. He’s a bit of a renaissance man – a screenwriter, a novelist, a one-time musician, and a sound designer in his own right. When he sits down to work with music, he’s coming at it from a story point-of-view. He has a very instinctual knowledge of where music should start and it happens to dovetail into the aesthetic that Jim, Andrew, and I are working towards. None of us like music to lead scenes in a way that anticipates what the scene is going to be about before you experience it.

Specifically, for this movie, it was challenging to develop what the musical tone of the movie would be. Ted was developing the temp track along with us from a very early stage. We found over time that not one particular musical style was going to work. Which is to say that this is a very complex score. It includes a kind of surf rock sound with Carroll Shelby in LA; an almost jaunty, lounge jazz sound for Detroit and the Ford executives; and then the hard-driving rhythmic sound for the racing.

(The final score was composed by Marco Beltrami and Buck Sanders.)

[OP] I presume you were housed in multiple cutting rooms at a central facility. Right?

[MM] We cut at 20th Century Fox, where Jim has a large office space. We cut Logan and Wolverine there before this movie. It has several cutting spaces, I was situated between Andrew and Don. Ted was next to Don and John Berri, our additional editor, and assistants were right around the corner. It makes for a very efficient working environment. 

[OP] Since the team was cutting with Avid Media Composer, did any of its features stand out to you for this film?

[Both] FluidMorph! (laughs)

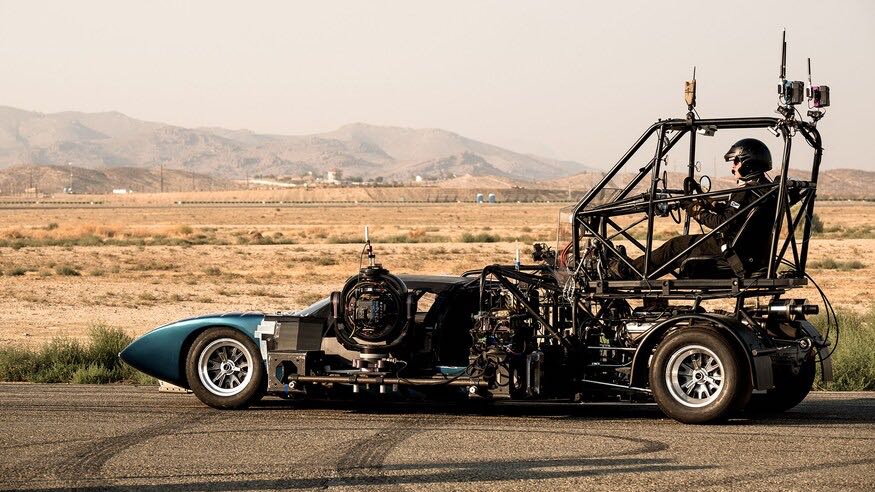
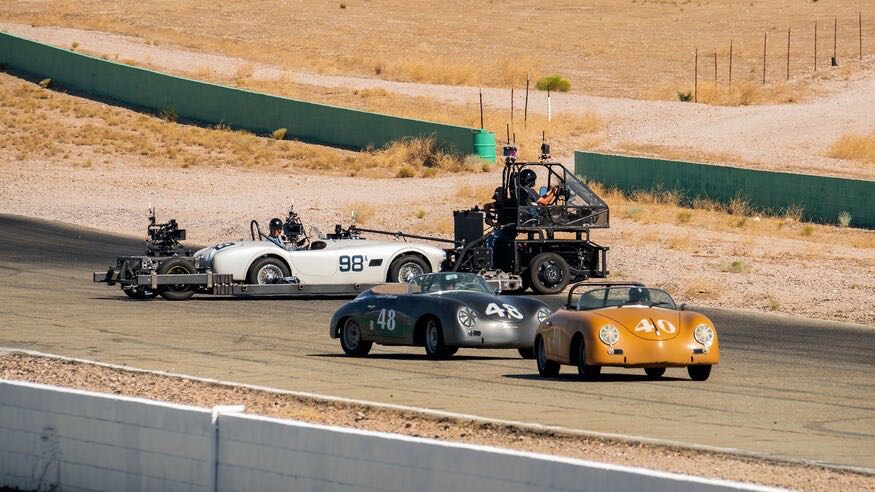
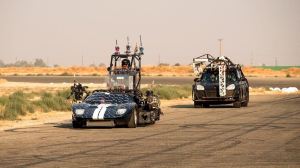
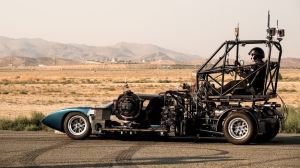
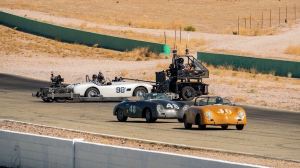
[MM] FluidMorph, speed-ramping – we often had to manipulate the shot speeds to communicate the speed of the cars. A lot of these cars were kit cars that could drive safely at a certain speed for photography, but not at race speed. So we had to manipulate the speed a lot to get the sense of action that these cars have.

[OP] What about Avid’s Script Integration feature, often referred to as ScriptSync? I know a lot of narrative editors love it.

[MM] I used ScriptSync once a few years ago and I never cut a scene faster. I was so excited. Then I watched it and it was terrible. To me there’s so much more to editing than hitting the next line of dialogue. I’m more interested in the lines between the lines – subtext. I found that with ScriptSync I could put the scene together quickly, but it was flat as a pancake. I do understand the value of it in certain applications. For instance, I think it’s great on straight comedy. It’s helpful to get around and find things when you are shooting tons of coverage for a particular joke. But for me, it’s not something I lean on. I mark up my own dailies and find stuff that way.

[OP] Tell me a bit more about your organizational process. Do you start with a KEM roll or stringouts of selected takes?

[MM] I don’t watch dailies, which sounds weird. By that I mean, I don’t watch them in a traditional sense. I don’t start in the morning, watch the dailies, and then start cutting. And I don’t ask my assistants to organize any of my dailies in bins. I come in and grab the scene that I have in front on me. I’ll look at the last take of every set-up really quickly and then I spend an enormous amount of time – particularly on complex scenes – creating a bin structure that I can work with. Sometimes it’s the beats in a scene, sometimes I organize by shot size, sometimes by character – it depends on what’s driving the scene. That’s the way I learn my footage – by organizing it. I remember shot sizes. I remember what was shot from set-up to set-up. I have a strong visual memory of where things are in a bin. So, if I ask an assistant to do that, then I’m not going to remember it. If I do it myself, then I’ll remember it. If there are a lot of resets or restarts in a take, I’ll have the assistant mark those up. But, I’ll go through and mark up beats or pivotal points in a scene, or particularly beautiful moments. And then I’ll start cutting.

[AB] I’ve adopted a lot of Mike’s methodology, mainly because I assisted Mike on a few films. But it actually works for me, as well. I have a similar aesthetic to Mike. I’ve used ScriptSync before and I tend to agree that it discourages you from seeing – as Mike described – the moments between lines. Those moments are valuable to remember.  

[OP] I presume this film was shot digitally. Right?

[MM] It was primarily shot with [ARRI] Alexa 65 LF cameras, plus some other small format cameras. A lot of it was shot with old anamorphic lenses on the Alexa that allowed them to give it a bit of a vintage feeling. It’s interesting that as you watch it, you see the effect of the old lenses. There’s a fall-off on the edges, which is kind of cool. There were a couple of places where the subject matter was framed into the curve of the lens, which affects the focus. But we stuck with it, because it feels ‘of the time.’

[OP] Since the film takes place in the 1960s and with racing action sequences, I presume there were quite a few visual effects to properly place the film in time. Right?

[MM] There’s a ton of that. The whole movie is a period film. We could temp certain things in the Avid for the rough cuts. John Berri was wrangling visual effects. He’s a master in the Avid, but also Adobe After Effects. He has some clever ways of filling in backgrounds or green screens with temp elements to give the director an idea of what’s going to go there. We try to do as much temp work in the Avid as we are capable of doing, but there’s so much 3D visual effects work in this movie that we weren’t able to do that all of the time.

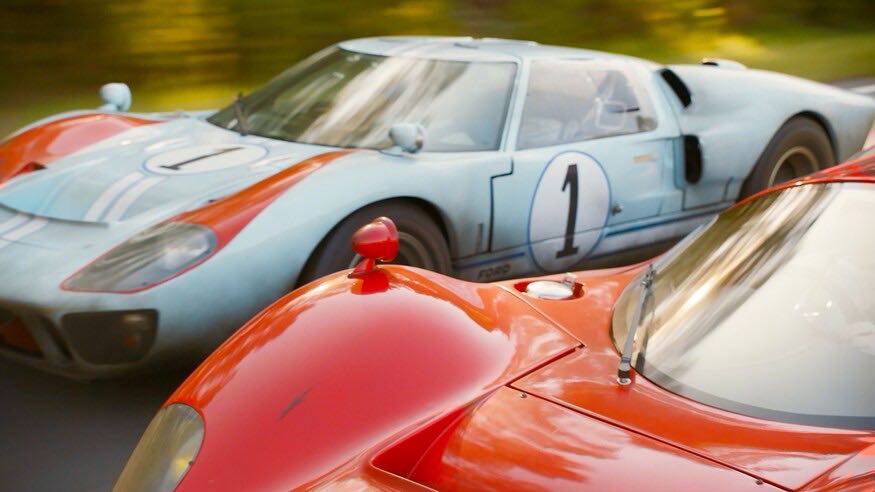
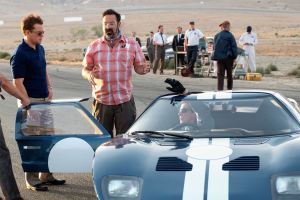
The caveat, though, is that the racing is real. The cars are real. The visual effects work was for a lot of the backgrounds. The movie was shot almost entirely in Los Angeles with some second unit footage shot in Georgia. The current, modern day Le Mans track isn’t at all representative of what Le Mans was in 1966, so there was no way to shoot Le Mans. Everything had to be doubled and then augmented with visual effects. In addition to Georgia, where they shot most of the actual racing for Le Mans, they went for a week to France to get some shots of the actual town of Le Mans. Of those, I think only about four of those shots are left. (laughs)

[OP] Any final thoughts about how this film turned out? 

[MM] I’m psyched that people seem to like the film. Our concern was that we had a lot of story to tell. Would we wear audiences out? We continually have people tell us, “That was two and a half hours? We had no idea.” That’s humbling for us and it’s a great feeling. It’s a movie about these really great characters with great scope and great racing. That goes back to the very advent of movies. You can put all the big visual effects in a film that you want to, but it’s really about people.

[AB] I would absolutely agree. It’s more of a character movie with racing.  Also, because I am not a ‘racing fan’ per se, the character drama really pulled me into the film while working on it.

[MM] It’s classic Hollywood cinema. I feel proud to be part of a movie that does what Hollywood does best.

The article is also available at postPerspective.

For more, check out this interview with Steve Hullfish.

©2019 Oliver Peters