In 2010 Steve Jobs famously provided us with the analogy that traditional computers are like trucks in the modern era. Not that trucks were going away, but simply were no longer a necessity for most of us, now that the majority of the populace wasn’t engaged in farming. While trucks would continue to be purchased and used, far fewer people actually needed them, because the car covered their needs. The same was true, he felt, of traditional computers.
Jobs is often characterized as being a consumer market-driven guy, but I believe the story is more nuanced. After all, he founded NeXT Computer, which clearly made high-end workstations. Job also became the major shareholder in Pixar Animation Studios – a company that not only needed advanced, niche computing power, but also developed some of its own specialized graphics hardware and software. So a mix of consumer and advanced computing DNA runs throughout Apple.
By the numbers
Unless you’ve been under a rock, you know that Apple revealed its new 2019 Mac Pro at the WWDC earlier this month. This year’s WWDC was an example of a stable, mature Apple firing on all cylinders. iPhone unit sales have not been growing. The revenue has, but that’s because the prices have been going up. Now it’s time to push all of the company’s businesses, including iPad, services, software, and the Mac. Numbers are hard to come by, although Apple has acknowledged that the Mac unit by itself is nearly a $25 billion business and that it would be close to being in the Fortune 100 on its own. There’s a ratio of 80/20 Mac laptops to desktops. For comparison to the rest of the PC world, Apple’s marketshare is around 7%, ranking fourth behind Lenovo, HP, and Dell, but just ahead of Acer. There are 100 million active macOS users (Oct 2018), although Windows 10 adoption alone runs eight times larger (Mar 2019).
We can surmise from this information that there are 20 million active Mac Pro, iMac, iMac Pro, and Mac mini users. It’s fair to assume that a percentage of those are in the market for a new Mac Pro. I would project that maybe 1% of all Mac users would be interested in upgrading to this machine – i.e. around 1 million prospective purchasers. I’m just spit-balling here, but at a starting price of $6,000, that’s a potential market of $6 billion in sales before factoring in any upgrade options or new macOS users!
A funny thing happened on the way to the WWDC
 Apple went through a computing platform progression from the old Quadra 950 and 9600 towers to the first Intel Mac Pro towers over the course of the mid-1990s to 2006. The second generation of the older Mac Pro was released during 2009. So in a dozen-plus years, Apple customers saw seven major processor/platform changes and had come to expect a constant churn. In essence, plan on replacing your system every few years. However, from 2009 onward, customers that bought those Mac Pros had a machine that could easily last, be productive, and still be somewhat competitive ten years later. The byproduct of this was the ability to plan longer life expectancy for the hardware you buy. No longer an automatic two to three year replacement need.
Even the 2013 Mac Pro has lasted until now (six years later) and remains competitive with most machines. The miscalculation that Apple made with the 2013 Mac Pro was that pro customers would prefer external expandability versus internal hardware upgrades. Form over function. That turned out to be wrong. I’m probably one of the few who actually likes the 2013 Mac Pro under the right conditions. It’s an innovative design, but unfortunately one that can’t be readily upgraded.
The second major change in computing hardware is that now “lesser” machines are more than capable of doing the work required in media and entertainment. During those earlier days of the G3/G4/G5 PowerMacs and the early Intel Mac Pros, Apple didn’t make laptops and all-in-ones that had enough horsepower to handle video editing and the like. Remember the colorful, plastic iMacs and white eMacs? Or what about the toilet-seat-like iBook laptop? Good enough for e-mail, but not what you would want for editing.
Now, we have a wide range of both Mac and PC desktop computers and laptops that are up to the task. In the past, if you needed a performance machine, then you needed a workstation class computer. Nothing else would do. Today, a general purpose desktop PC that isn’t necessarily classed as a workstation is more than sufficient for designers, editors, and colorists. In the case of Apple, there’s a range of laptops and all-in-ones that cover those needs at many different price points.
The 2019 Mac Pro Reveal
Let me first say that I didn’t attend WWDC and I haven’t seen the new Mac Pro in person. I hope to be able to do a review at some point in the future. The bottom line is that this is purely an opinion piece for now.
 There have certainly been a ton of internet comments about this machine – both positive and negative. Price is the biggest pain point. Clearly Apple intends this to be a premium product for the customer with demanding computing requirements. You can spin the numbers any way you like and people have. Various sites have speculated that a fully-loaded machines could drive the starting price from $6,000 to as high as $35K to $50K. The components that Apple defines in the early tech information do not perfectly match equivalent model numbers available on the suppliers’ websites. No one knows for sure how the specific Intel Xeon being used by Apple equates to other Xeons listed on Intel’s site. Therefore, exact price extrapolations are simply guesses for now.
In late 2009 I purchased an entry model 8-core Mac Pro. With some storage and memory upgrades, AppleCare, sales tax, and a small business discount, I paid around $4,000. The inflation difference over the decade is about 17%, so that same hardware should cost me $4,680 today. In fairness, Apple has a different design in this new machine and there are technologies not in my base 2009 machine, such as 10GigE, Thunderbolt 3, a better GPU, etc. Even though this new machine may be out of my particular budget right now, it’s still an acceptable value when compared with the older Mac Pros.
 Likewise, if you compare the 2019 Mac Pro to comparable name brand workstations, like an HP Z8, you’ll quickly find that the HP will cost more. One clear difference, though is that HP also offers smaller, less costly workstation models, such as the Z2, Z4 and Z6. The PC world also offers many high quality custom solutions, such as Puget Systems, which I have reviewed.
One design decision that could have mitigated the cost a bit is the choice of CPU chips. Apple has opted to install Xeons chips in all of its Mac Pro designs. Same with the iMac Pro. However, Intel also offers very capable Core i9 CPUs. The i9 chips offer faster core speeds and high core counts. The Xeons are designed to be run flat out 24/7. However, in the case of video editing, After Effects, and so on, the Core i9 chip may well be the better solution. These apps really thrive on fast single-core speeds, so having a 12-core or 28-core CPU, where each core has a slower clock speed, may not give you the best results. Regardless of benefit, Xeons do add to Apple’s hard costs in building the machine. Xeons are more expensive that Core chips. In some direct comparisons, a Xeon can garner $1,000 over Intel’s retail price of the equivalent Core CPU.
 The ultimate justification for buying a Mac Pro tower isn’t necessarily performance alone, but rather longevity and expandability. As I outlined above, customers have now been conditioned to expect the system to last and be productive for at least a decade. That isn’t necessarily true of an all-in-one or a laptop. This means that if you amortize the investment in a 2019 Mac Pro over a ten-year period, it’s actually quite reasonable.
The shame – and this is where much of the internet ire is coming from – is that Apple didn’t offer any intermediate models, like HP’s Z4 or Z6. I presume that Apple is banking on those customers buying iMacs, iMac Pros, Mac minis, or MacBook Pros instead. Couple one of these models with an external GPU and fast external storage and you will have plenty of power for your needs today. It goes without saying that comparing this Mac Pro to a custom PC build (which may be cheaper) is a non-starter. A customer for this Mac Pro will buy one, pure and simple. There is built-in price elasticity to this niche of the market. Apple knows that and the customers know it.
Nuts and bolts
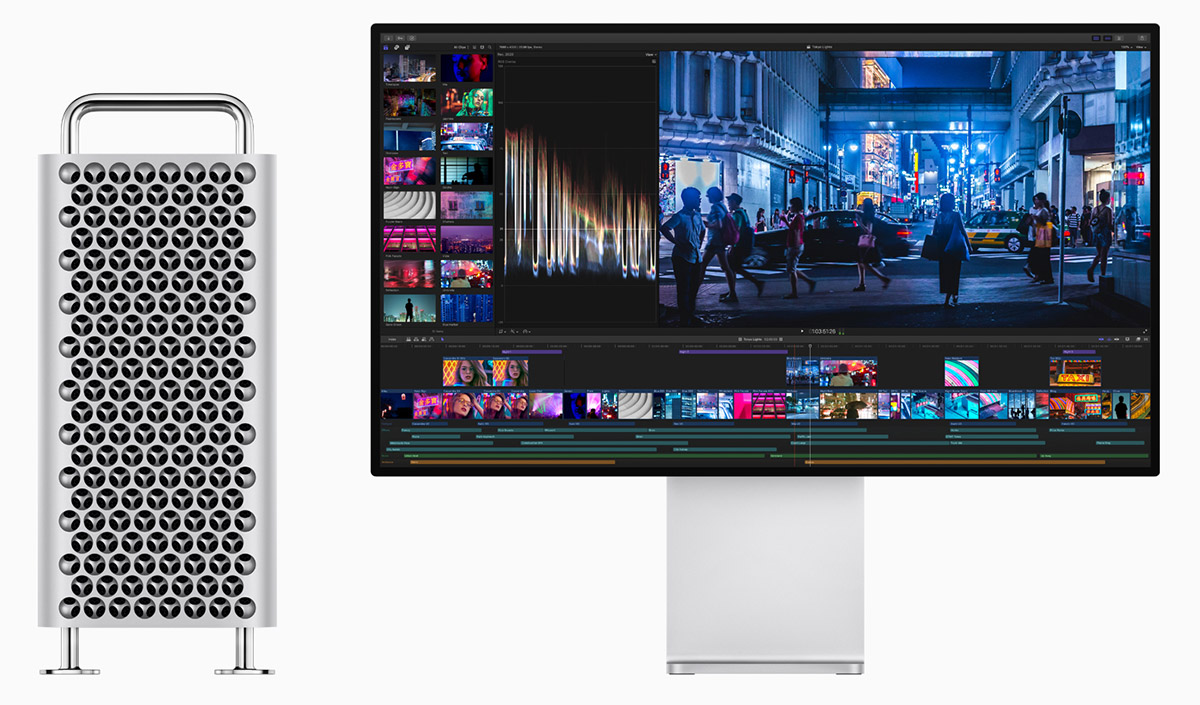
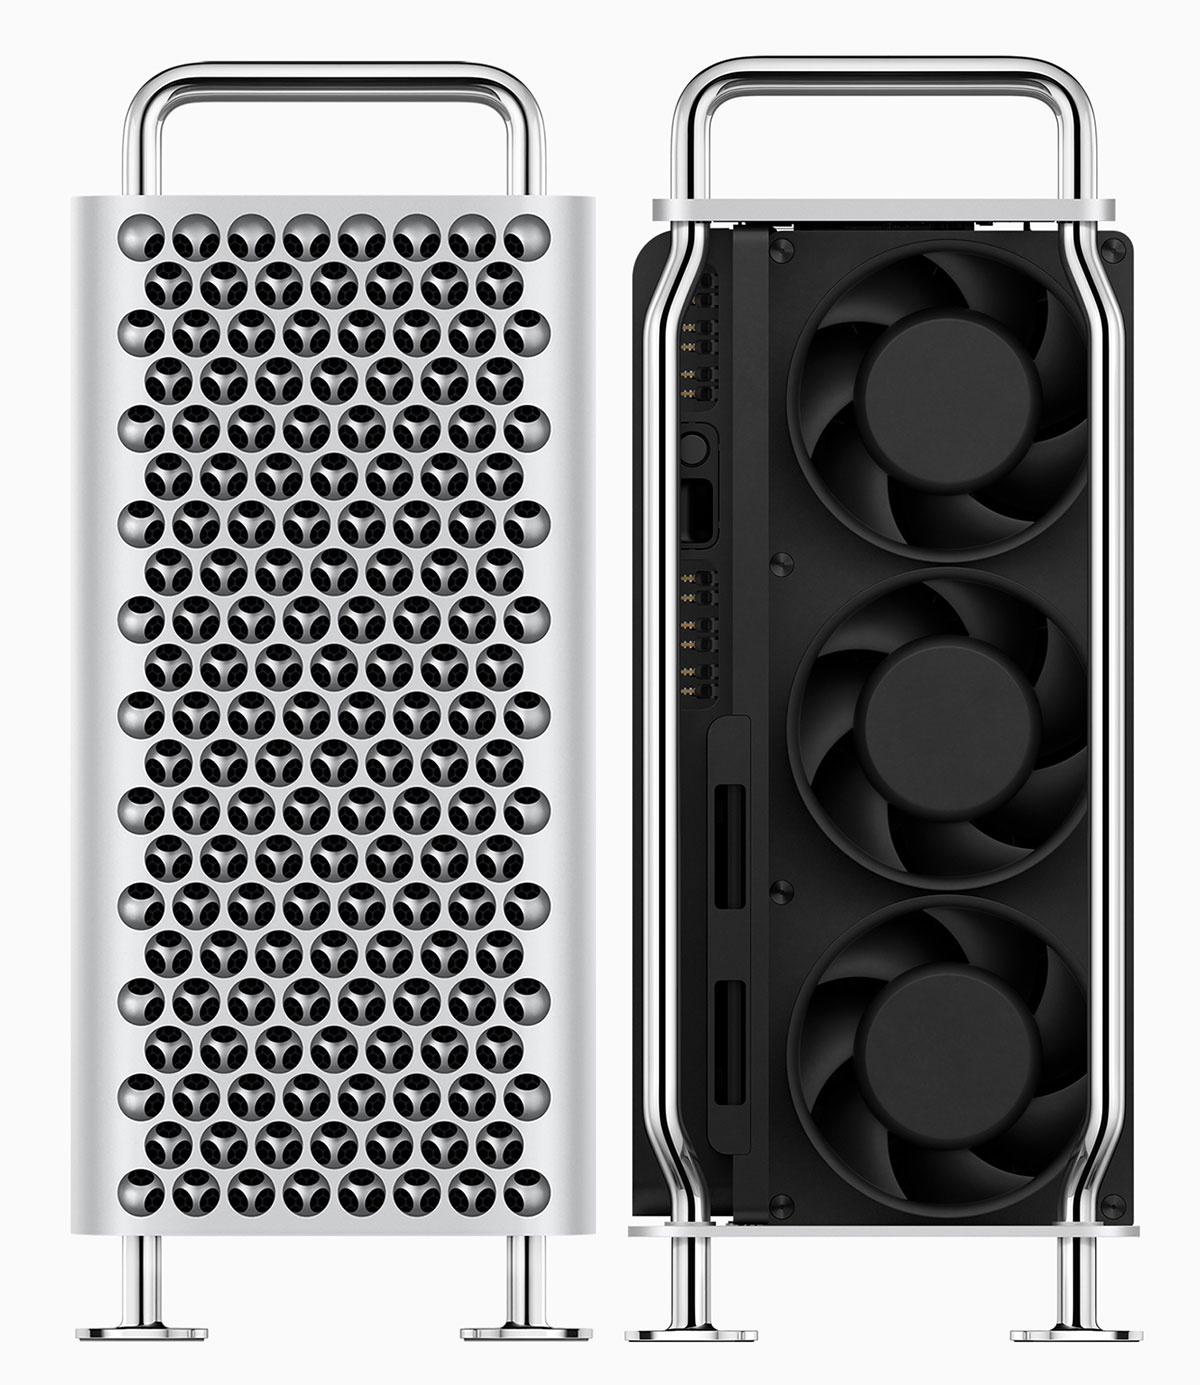
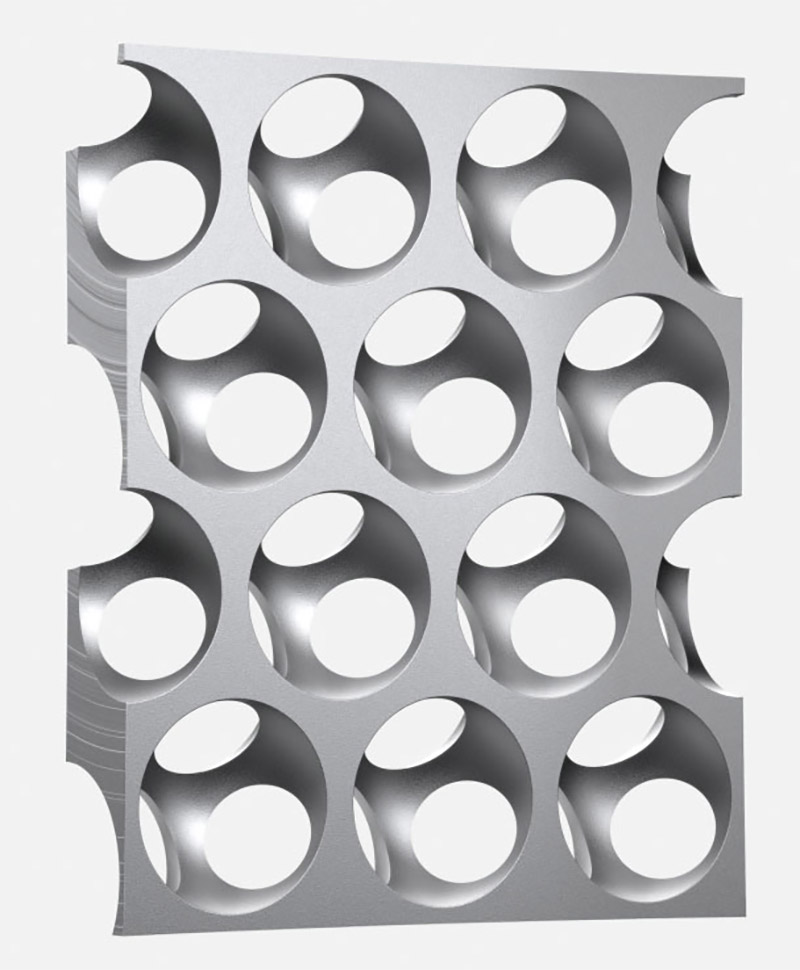
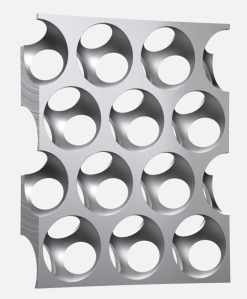
 The small details haven’t been fully revealed, so we probably won’t know everything about these new Mac Pros until September (the rumored release). Apple once again adopted a signature case design, which like the earlier tower case has been dubbed a “cheese grater.” Unlike the previous model, where the holes were simply holes for ventilation, the updated model (or would that be the retro model?) uses a lattice system in the case to direct the airflow. The 2019 is about the same size as its “cheese grater” predecessor, but 20 pounds lighter.
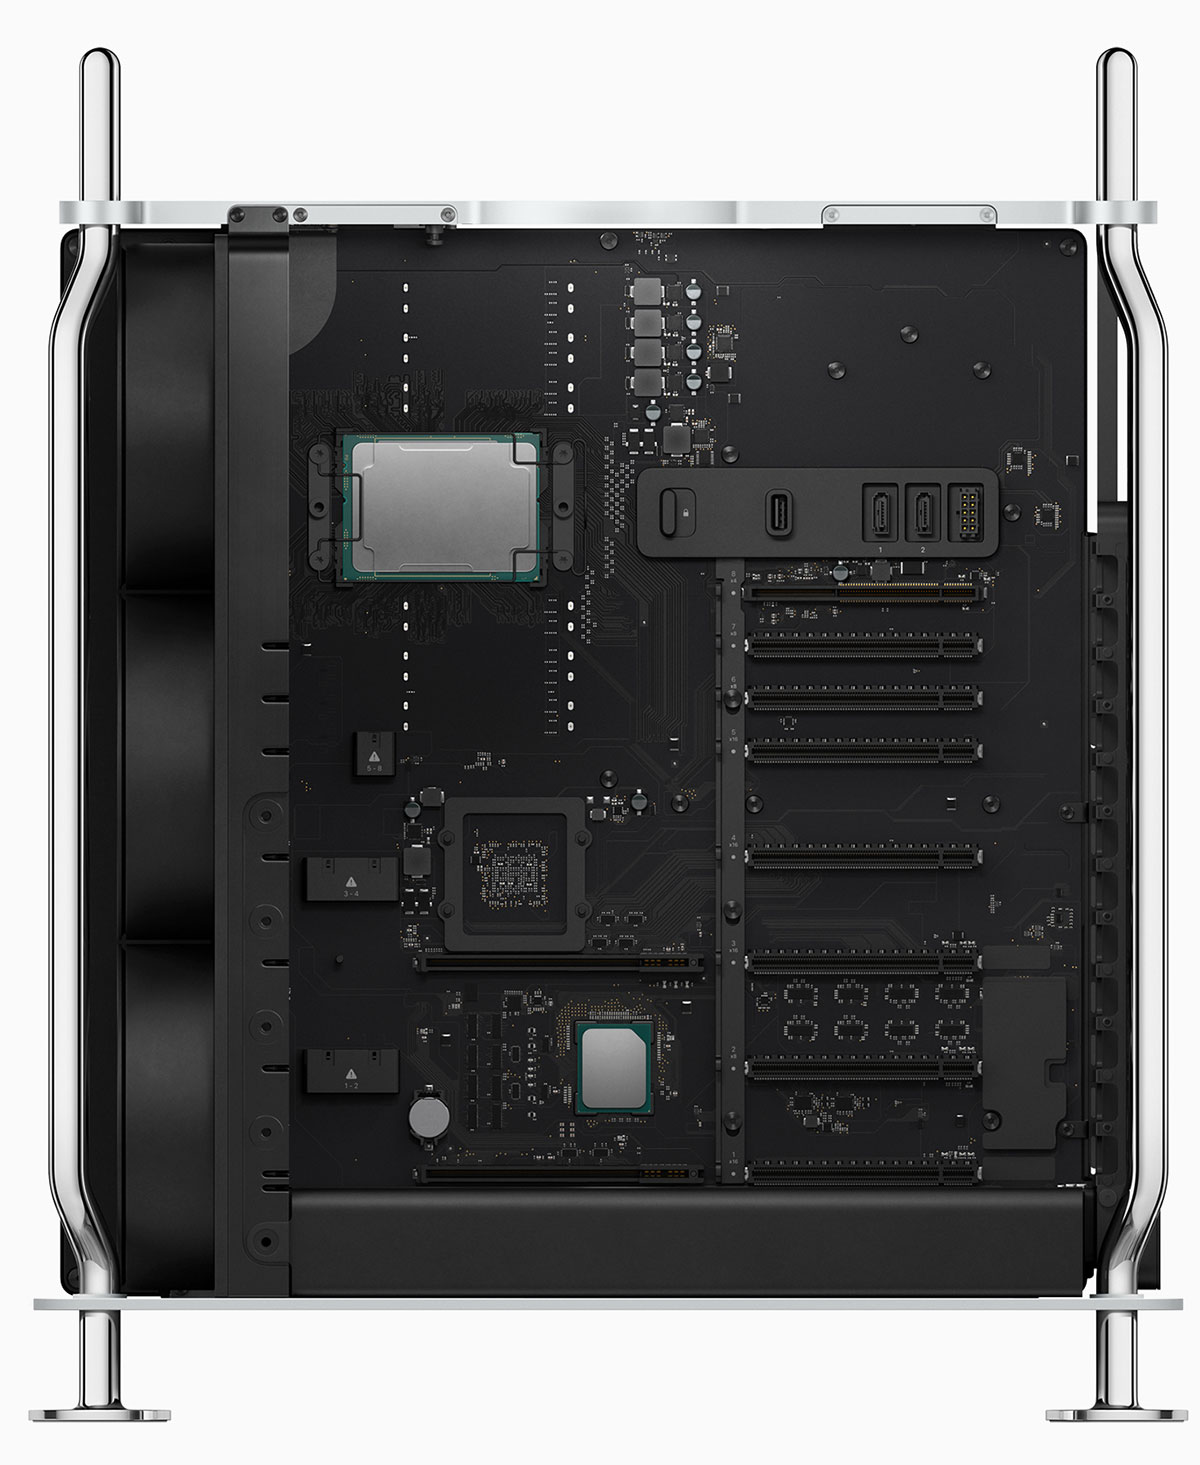
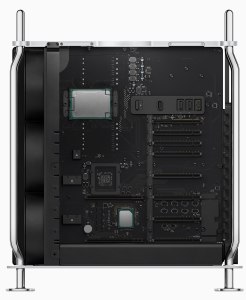
There is very little rocket science in how you build a workstation, so items like Xeon CPUs, GPU cards, RAM, and SSD system drives are well understood and relatively standard for a modern PC system.
The short hardware overview consists of:
8, 12, 16, 24, and 28-core Xeon CPU options
Memory from 32GB to 1.5TB of DDR4 ECC RAM
Up to four AMD GPU cards
1.4 kW power supply
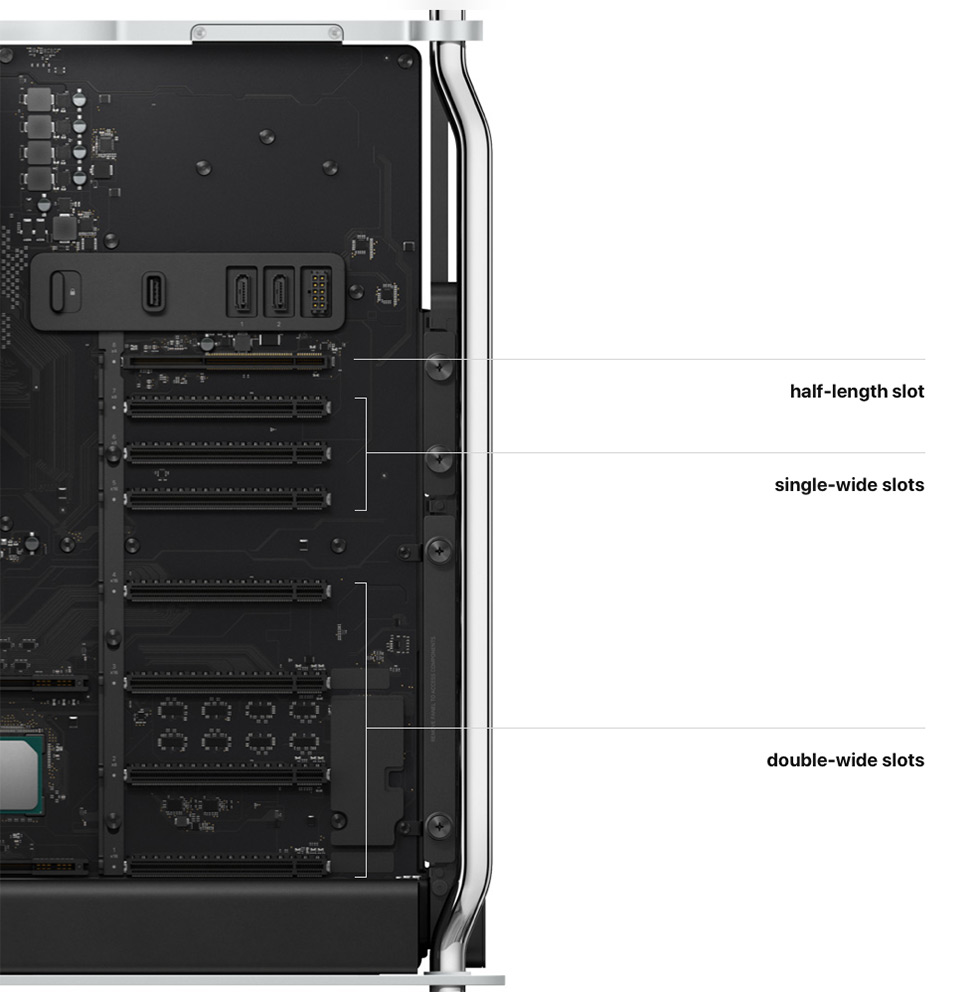
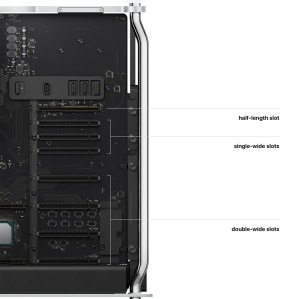
Eight PCIe expansion slots (one used for Apple i/o card)
System storage options from 256GB to 4TB
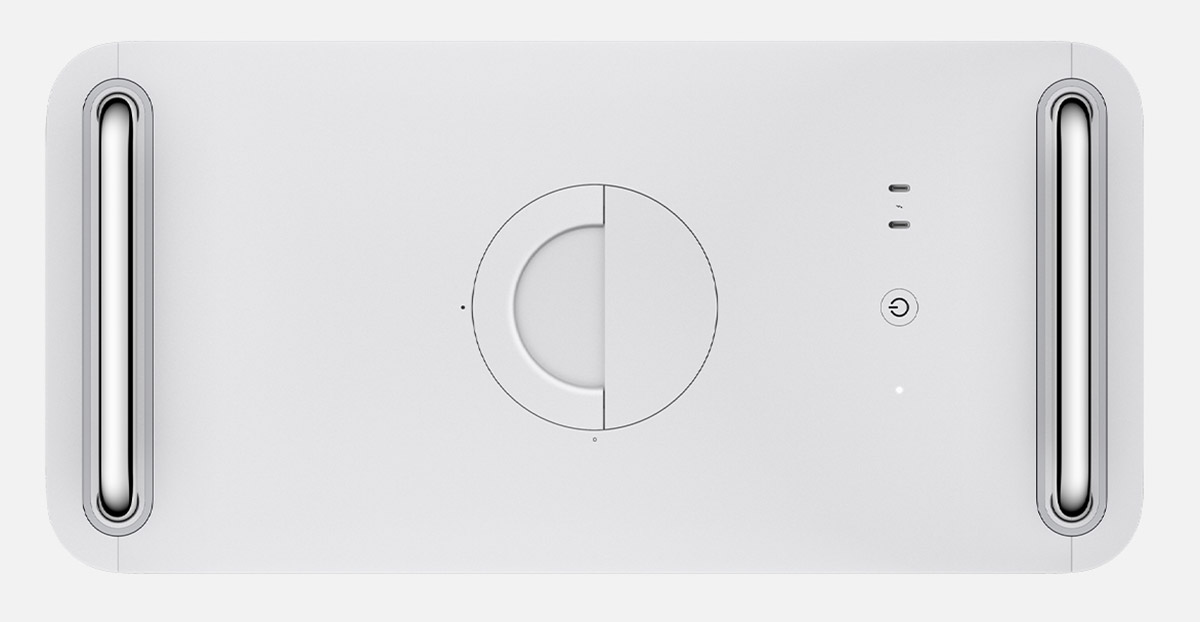
Four Thunderbolt 3 ports (2 top and 2 back) plus two USB 3 ports (back)
(Note – more ports available with the upgraded GPU options)
Two 10Gb Ethernet ports
WiFi, Bluetooth, built-in speakers, headphone jack
 So far, so good. Any modern workstation would have similar choices. There are several key unknowns and that’s where the questions come in. First, the GPU cards appear to be custom-designed AMD cards installed into a new MPX (Mac Pro expansion) module. This is a mounting/connecting cage to install and connect the hardware. However, if you wanted to add your own GPU card, would it fit into such a module? Would you have to buy a blank module from Apple for your card? Would your card simply fit into the PCIe slot and screw in like on any other tower? The last question does appear to be possible, but will there be proper Nvidia support?
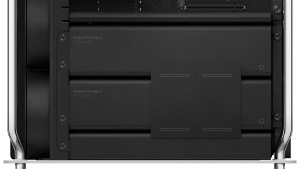
The second big question relates to internal storage. The old “cheese grater” had sleds to install four internal drives. Up to six could be installed if you used the optical drive bays. The 2019 Mac Pro appears to allow up to four drives within an MPX chassis. Promise has already announced two products specifically for the Mac Pro. One would include four RAIDed 8TB drives for a 32TB capacity. 14TB HDDs are already available, so presumably this internal capacity will go up.
The unknown is whether or not you can add drives without purchasing an MPX module. The maximum internal GPU option seems to be four cards, which are mounted inside two MPX modules. This is also the space required for internal drives. Therefore, if you have both MPX modules populated with GPU cards, then I would imagine you can’t add internal storage. But I may be wrong. As with most things tech, I predict that if blank MPX modules are required, a number of vendors will quickly offer cheaper aftermarket MPX modules for GPUs, storage, etc.
One side issue that a few blogs have commented on is the power draw. Because of the size of the power supply, the general feeling is that the Mac Pro should be plugged into a standard electrical circuit by itself, plus maybe a monitor. In other words, not a circuit with a bunch of other electrical devices, otherwise you might start blowing breakers.
Afterburner
A new hardware item from Apple is the optional Afterburner ProRes and ProRes RAW accelerator card. This uses an FGPA (field programmable gate array), which is a chip that can be programmed for various specific functions. It can potentially be updated in the future. Anyone who has worked with the RED Rocket or RED Rocket-X card in the past will be quite familiar with what the Afterburner is.
The Afterburner will decode ProRes and ProRes RAW codecs on-the-fly when this media is played in Final Cut Pro X, QuickTime Player X, and any other application re-coded to support the card. This would be especially beneficial with camera raw codecs, because it debayers the raw sensor data via hardware acceleration at full resolution, instead of using the CPU. Other camera RAW manufacturers, like RED, ARRI, Canon, and Blackmagic Design, might add support for this card to accelerate their codecs, as well. What is not known is whether the Afterburner card can also be used to offload true background functions like background exports and transcoding within Final Cut Pro X.
An FPGA card offers the promise of being future-proofed, because you can always update its function later. However, in actual practice, the hardware capabilities of any card become outstripped as the technology changes. This happened with the RED Rocket card and others. We’ll see if Apple has any better luck over time.
Performance
 Having lots of cores is great, but with most media and entertainment software the GPU can be key. Apple has been at a significant disadvantage with many applications, like After Effects, because of their stance with Nvidia and CUDA acceleration. Apple prefers that a manufacturer support Metal, which is their way of leveraging the combined power of all CPUs and GPUs in the system. This all sounds great, but the reality is that it’s one proprietary technology versus another. In the benchmark tests I ran with the Puget PC workstation, the CUDA performance in After Effects easily trounced any Mac that I scored it against.
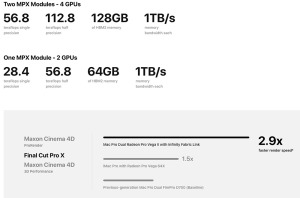
Look at Apple’s website for a chart representing the relative GPU performance of a 2013 Mac Pro, an iMac Pro, and the new 2019 Mac Pro. Each was tested with their respective top-of-the-line GPU option. The iMac Pro is 1.5x faster than the 2013 Mac Pro. The 2019 Mac Pro is twice as fast as the iMac Pro and 3x faster than the 2013 Mac Pro. While that certainly looks impressive, that 2x improvement over the iMac Pro comes thanks to two upgraded GPU cards instead of one. Well, duh! Of course, at this time we have no idea what these cards and MPX units will cost. (Note – I am not totally sure as to whether this testing used two GPUs in one MPX module or a total of four GPUs in two modules.)
We won’t know how well these really perform until the first units get out into the wild. Especially how they compare against comparable PCs with high-powered Nvidia cards. I may be going out on a limb, but I would be willing to bet that many people who buy the base configuration for $6K – thinking that they will get a huge boost in performance – are going to be very disappointed. I don’t mean to trash the entry-level machine. It’s got solid specs, but in that configuration, isn’t the best performer. At $6K, you are buying a machine that will have longevity and which can be upgraded in the future. In short, the system can grow with you over time as the workload demands increase. That’s something which has not be available to Mac owners since the end of 2012.
Software
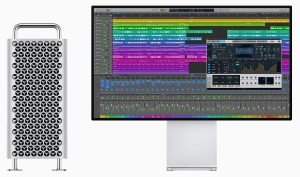 To take the most advantage of the capabilities of this new machine, software developers (both applications and plug-ins) will have to update their code. All of the major brands like Adobe, Avid, Blackmagic Design, and others seem to be on board with this. Obviously, so are the in-house developers at Apple who create the Pro Applications. Final Cut Pro X and Logic Pro X are obvious examples. Logic is increasing the track count and number of software instruments you can run. Updates have already been released.
Final Cut Pro X has a number of things that appear in need of change. Up until now, in spite of being based around Metal, Final Cut has not taken advantage of multiple GPUs when present. If you add an eGPU to a Mac today, you must toggle a preference setting to use one GPU or the other as the primary GPU (Mojave). Judging by the activity monitor, it appears to be an either-or thing, which means the other GPU is loafing. Clearly when you have four GPUs present, you will want to tap into the combined power of all four.
With the addition of the Afterburner option, FCPX (or any other NLE) has to know that the card is present and how to offload media to the card during playback (and render?). Finally, the color pipeline in Final Cut Pro X is being updated to work in 16-bit float math, as well as optimized for fast 8K workflows.
 All of this requires new code and development work. With the industry now talking about 16K video, is 8K enough? Today, 4K delivery is still years away for many editors, so 8K is yet that much further. I suspect that if and when 16K gets serious traction, Apple will be ready with appropriate hardware and software technology. In the case of the new Mac Pro, this could simply mean a new Afterburner card instead of an entirely new computer.
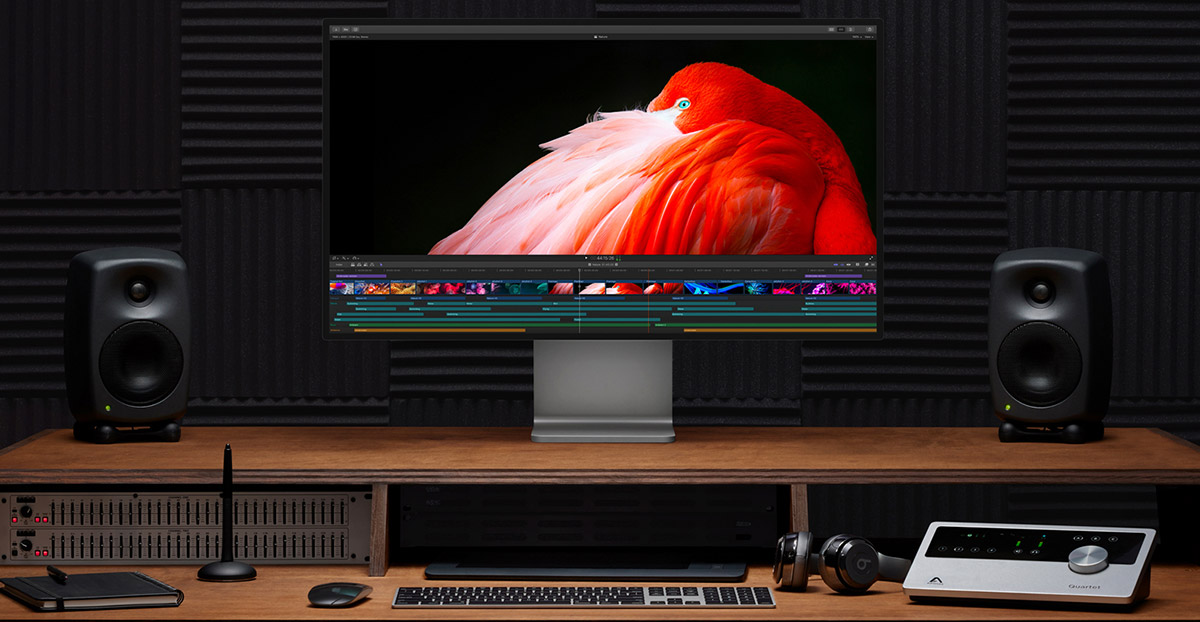
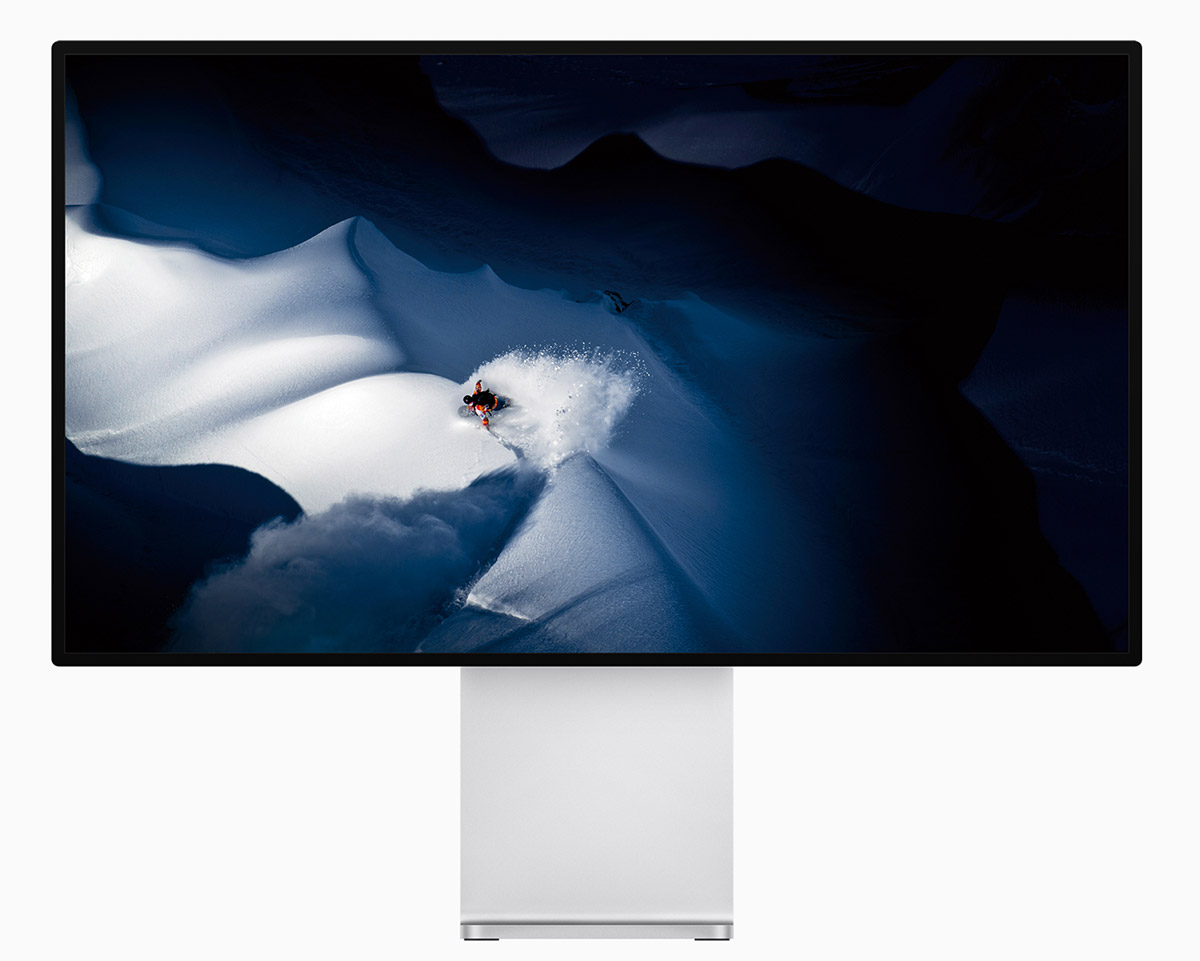
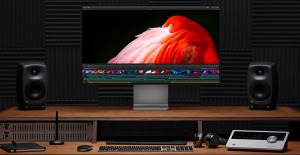
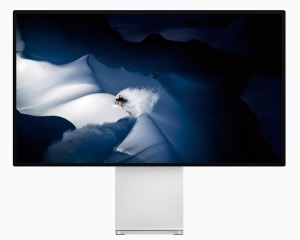
The Apple Pro Display XDR
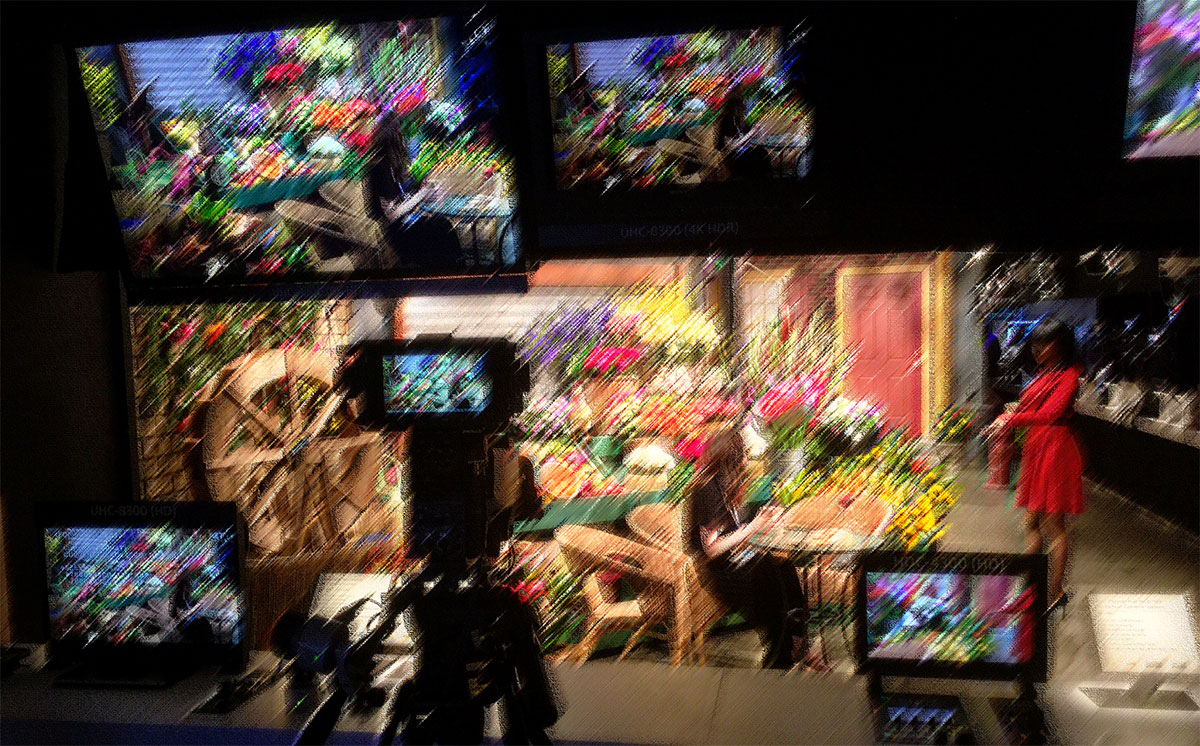
In tandem with the 2019 Mac Pro, Apple has also revealed the new Pro Display XDR – a 6K 32″ Retina display. It uses a similar design aesthetic to the Mac Pro, complete with a matching ventilation lattice. This display comes calibrated and is designed for HDR with 1,000 nits fullscreen, sustained brightness, and a 1,600 nit maximum. It will be interesting to see how this actually looks. Recent Final Cut Pro X updates have added HDR capabilities, but you can never get an accurate view of it on a UI display. Furthermore, the 500 nit, P3 displays used in the iMac Pros are some of the least color-accurate UI displays of any Mac that I work with. I really hope Apple gets this one right.
 To sell the industry on this display, Apple is making the cost and feature comparison between this new display and actual HDR color reference displays costing in the $30K-40K range. Think Flanders Scientific or Sony. The dirty little HDR secret is that when you display an image at the maximum nit level across the entire screen, the display will dim in order to prevent damage. Only the most expensive displays are more tolerant of this. I would presume that the Pro Display XDR will also dim when presented with a fullscreen image of 1,600 nits, which is why their spec lists 1,000 nits fullscreen. That level is the minimum HDR spec. Of course, if you are grading real world images properly, then in my opinion, you rarely should have important picture elements at such high levels. Most of the image should be in a very similar range to SDR, with the extended range used to preserve highlight information, like a bright sky.
Some colorists are challenging the physics behind some of Apple’s claims. The concern is whether or not the display will result in bloomed highlights. Apple’s own marketing video points out that the design reduces blooming, but it doesn’t say that it completely eliminates it. We’ll see. I don’t quite see how this display fits as a reference display. It only has Thunderbolt connections – no SDI or HDMI – so it won’t connect in most standard color correction facilities without additional hardware. If, like all computer displays, the user can adjust the brightness, then that goes against the concept of an HDR reference display. At 32″, it’s much too small to be used as a client display to stick on the wall.
Why did Apple make the choice to introduce this as a user interface display? If they wanted to make a great HDR reference display, then that makes some sense. Even as a great specialty display, like you often find in photography or fine print work. I understand that it will likely display accurate, fullscreen video directly from Final Cut Pro X or maybe even Premiere Pro without the need and added cost of an AJA or BMD i/o device or card. But as a general purpose computer display? That feels like it simply misses the mark, no matter how good it is. Not to mention, at a brightness level of 1,000 to 1,600 nits, that’s way too bright for most edit suites. I even find that to be the case with the iMac Pro’s 500 nit displays, when you crank them up.
This display is listed as $5K without a stand. Add another $1k if you want a matte finish. Oh, and if you want the stand, add another $1K! I don’t care how seductively Jony Ive pronounces “all-u-minium,” that’s taxing the good will of your customer. Heck, make it $5,500 and toss in the stand at cost. Remember, the stand has an articulating arm, which will probably lose its tension in a few years. I hope that a number of companies will make high-quality knock-offs for a couple of hundred bucks.
If you compare the Apple Pro Display XDR to another UI display with a similar mission, then it’s worth comparing it to the HP Dreamcolor Z31x Studio Display. This is a 32″ 4K, calibrated display with an MSRP of right at $3,200. But it doesn’t offer HDR specs, Retina density, or 6K resolution. Factor in those features and Apple’s brand premium and then the entry price isn’t that far out of line – except for that stand.
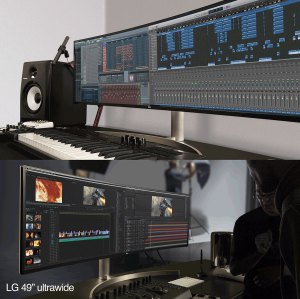
I imagine that Apple’s thought process is that if you don’t want to buy this display, then there are plenty of cheaper choices, like an LG, HP, Asus, or Dell. And speaking of LG, where’s Apple’s innovative spirit to try something different with a UI display? Maybe something like an ultra wide. LG now has a high-resolution 49″ display for about $1,400. This size enables one large canvas across the width; or two views, like having two displays side-by-side. However, maybe a high-density display (Retina) isn’t possible with such a design, which could be Apple’s hang-up.
Final thoughts
The new 2019 Mac Pro clearly demonstrates that Apple has not left the high-end user behind. I view relevant technology through the lens of my needs with video; however, this model will appeal to a wide range of design, scientific, and engineering users. It’s a big world out there. While it may not be the most cost-effective choice for the individual owner/editor, there are still plenty of editors, production companies, and facilities that will buy one.
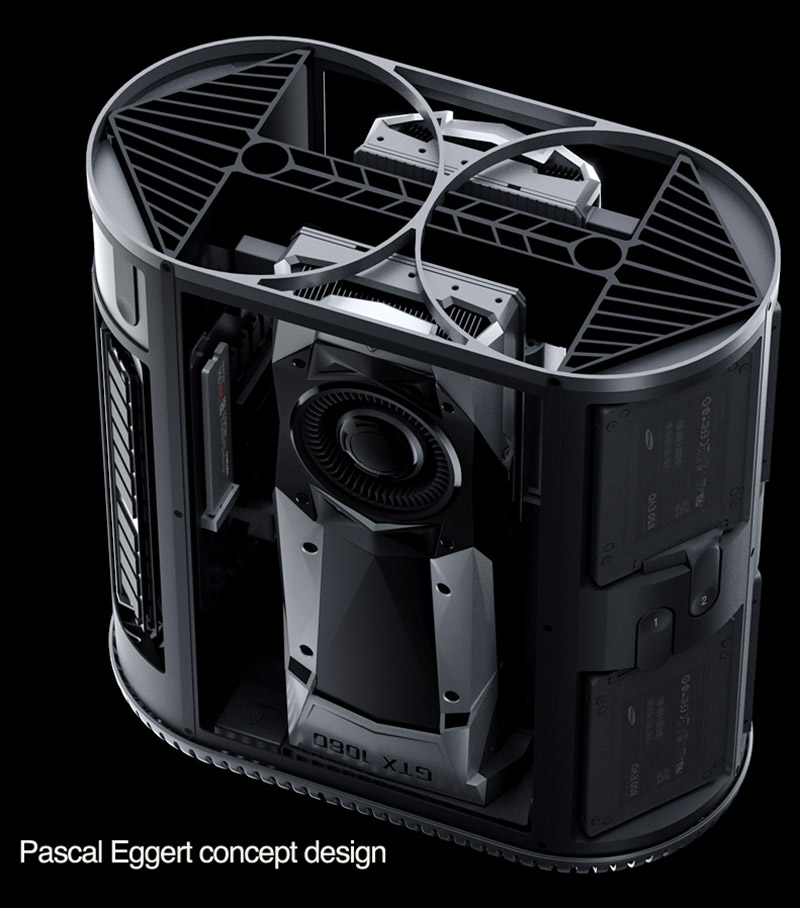
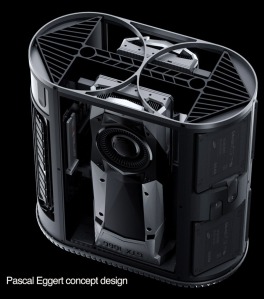 There is a large gap between the Mac mini and this new Mac Pro. I still believe there’s a market for a machine similar to some of those concept designs for a Mac Pro. Or maybe a smaller version of this machine that starts at $3,000. But there isn’t such a model from Apple. If you like the 2013 “trash can” Mac Pro, then you can still get it – at least until the 2019 model is officially released. Naturally, iMacs and iMac Pros have been a superb option for that in-between user and will continue to be so.
If you are in the market for the 2019 Mac Pro, then don’t cut yourself short. Think of it as an investment for at least 10 years. Unless you are tight and can only afford the base model, then I would recommend budgeting in the $10K range. I don’t have an exact configuration in mind, but that will likely be a sweet spot for demanding work. Once I get a chance to properly review the 2019 Mac Pro, I’ll be more than happy come back with a real evaluation.
©2019 Oliver Peters

 Audio plug-ins typically come in one of four formats: AU (Mac only), VST (Mac or Windows), VST3 (Mac or Windows), and AAX (for Avid Media Composer and Pro Tools). When you purchase audio filters, they don’t necessarily come in all flavors. Sometimes, plug-ins will be AU and VST/VST3, but leave out AAX. Or will only be for AAX. Or only AU. Accusonic plug-ins are installed as all four types on a Mac, which means that a single purchase covers most common DAWs and NLEs (check their site for supported hosts). For example, my Macs include Final Cut Pro X, Logic Pro X, Audition, Premiere Pro, and Media Composer. The ERA4 plug-ins work in all of these.
 The ERA4 Standard bundle includes six audio plug-ins: Noise, Reverb, and Plosive Removers, De-Esser, De-Clipper, and the Voice Leveler. The Pro bundle adds two more: the more comprehensive De-Esser Pro and ERA-D, which is a combined noise and reverb filter for more advanced processing than the two individual filters. If you primarily work with well-recorded studio voice-overs or location dialogue, then most likely the Standard bundle will be all you need. However, the two extra filters in the Pro bundle come in handy with more problematic audio. Even productions with high values occasionally get stuck with recordings done in challenging environments and last-minute VOs done on iPhones. It’s certainly worth checking out the full package as a trial.
 Accusonus ERA4 filters are designed to be easy to use and work well in real-time. When all I need to do is improve audio that isn’t a basket case, then the ERA filters at their default settings do a wonderful job. For example, a VO recording might require a combination of Voice Leveler (smooth out dynamics), De-Esser (reduce sibilance), and Plosive Remover (clean up popping “p” sounds). Using the default control level (40%) or even backing off a little improved the sound.
 I started out talking about the Voice Leveler plug-in, because that’s an audio function I perform often, especially with voice-overs. It helps to make the VO stand out in the mix against music and sound effects. This is an intelligent compressor, which means it tries to bring up all audio and then compress peaks over a threshold. But learn the controls before diving in. For example, it includes a breath control. Engaging this will prevent the audio from pumping up in volume each time the announcer takes a breath. As with all of the ERA4 filters, there is a small, scrolling waveform in the plug-in’s control panel. Areas that were adjusted by the filter are highlighted, so you can see when it is active.
 Voice Leveler is a good VO tool, but that type is one of the more subjective audio filters. Some editors or audio engineers compress, some limit, and others prefer to adjust levels only manually. My all-time favorite is Wave’s Vocal Rider. Unlike a compressor, it dynamically raises and lowers audio levels between two target points. To my ears, this method yields a more open sound than heavy compression. But when its normal MSRP is pretty expensive. I also like the Logic Pro X Compressor, which is available in Final Cut Pro X. It mimics various vintage compressors, like Focusrite Red or the DBX 160X. I feel that it’s one of the nicest sounding compressors, but is only available in the Apple pro apps. Adobe users – you are out of luck on that one.